
Pecan puffs for Christmas
December 18, 2016 § Leave a comment

I first came across this recipe more than 20 years ago in Sophie Grigson’s recipe column for the Evening Standard. I was delighted to rediscover it recently when I was thumbing through an old copy of her book “Sophie’s Table”.
She recounts how an American friend would send the family a gift of these puffs for Christmas each year and how they would barely last beyond Christmas Eve. They are a crumbly and buttery mouthful, essentially a shortbread but with a delicious pecan and vanilla flavour.
They have a Christmassy feel with their snowball-like appearance and are quick and easy to make. The only slightly fiddly part of the recipe is the rolling in icing sugar and returning to the oven to set the sugar.
They’ll keep for a week or more and so would make a lovely last-minute edible gift.
As an alternative to icing sugar, I’ve recently discovered “snow sugar” on the Bakery Bits website. It’s powdered dextrose plus cornflour and doesn’t dissolve away so bakes retain that freshly dusted look for longer. Ordinary icing sugar is fine though.


Pecan puffs
Adapted from a recipe in Sophie Grigson’s book “Sophie’s Table”.
Makes about 35.
Ingredients
125g unsalted butter
3g salt
30g golden caster sugar
½ teaspoon vanilla extract
150g shelled pecan halves
150g plain flour
icing sugar or snow sugar for dusting
Freeze the pecans beforehand to prevent them turning oily too quickly when ground. Put them into a food processor with the golden caster sugar and grind to a coarse powder without overworking.
Cream the butter, beat in the vanilla extract and gradually work in the ground nut and sugar mix and the flour to make a paste.
Chill the mixture briefly in the fridge to allow it to firm up just a little.
Roll rounded teaspoons of the mixture into balls and set onto baking sheets lined with silicone paper. Space the balls well apart to allow them to bake evenly.
Bake at 150 degrees C fan for 30 minutes until golden.
Allow to cool very briefly then carefully roll each puff in icing sugar, place back on the baking sheet and return to the oven for a further 2 minutes to set the icing sugar.
Cool on cake racks and store in an airtight tin, dusting each layer with icing sugar and separating with sheets of baking paper.
Bat cakes for a Night at the Opera
September 1, 2013 § Leave a comment
The opera in question was Die Fledermaus (The Bat), Clonter Opera Cheshire’s summer production. We’ve been going to Clonter for a number of years now and theming the dessert course of our opera picnic seems to have become my speciality.
Die Fledermaus is a light-hearted operetta composed by Johann Strauss the younger in 1874. It’s location is Vienna and the plot revolves around a ball set-piece scene, lots of disguises (including the bat costume) and all the silliness ends happily with forgiveness and reconciliation.
The combination of the bat image combined with the Viennese setting led me to the idea of a chocolate-bat decorated individual Sachertorte, Vienna’s iconic cake, as the centrepiece of my dessert. The Hotel Sacher has updated its chocolate cake offering by selling indvidual ganache-enrobed cubes of chocolate cake each topped with a chocolate seal. I loved the idea of these and thought they would look great topped with a discreet dark chocolate bat rather than the corporate Sacher logo.
Where on earth would I find bat-shaped confectionery in summer? There were various Halloween-themed bits and pieces available online but nothing the right size. Then I thought of Slattery’s, North Manchester’s own chocolatier. A quick phone call to John Slattery himself and two dozen bats were lined up ready for collection in two days’ time. I was even offered a choice of sizes. What service!
A single piece of chocolate cake was not going to be a show-stopper on its own so I decided that the Sachertorte would be one component within a dessert Bento-style box.
Our local cake shop supplied me (for a price!) with 12 cupcake boxes, one per guest, in a clean white card and cellophane window design that were perfect for my requirements. Sturdy enough for stacking and transport and flat-pack disposable for an easy clean-up at the end of the evening.
Now with box dimensions to work with I could visualise more easily what else I needed to complete the box. Vienna is famous for its cakes, in particular luscious layered tortes. After researching classic Viennese cakes I chose to construct a miniaturised version of the Esterházy Torte, a multilayered construction sandwiching nut sponge layers with a vanilla and nut flavoured cream, topped with a traditional feather-iced pattern.
That was two corners of the box taken care of. Now for the other two. I needed something to offset the sweet and dense cakes. A simple fruit compôte would be perfect and I chose apricot as both the Sacher and Esterházy Tortes use lots of sieved apricot jam in their construction so the flavours should be harmonious. Also, the best reason of all, apricots were in season and in peak condition.
Next I needed cream to set off both the tortes and the compôte. Sachertorte is traditionally served with a cloud of whipped cream but I like to combine Greek yoghurt and softly whipped cream 50:50, flavour it with real vanilla extract and lightly sweeten with icing sugar for a lighter, fresher result.
The apricot compôte and whipped cream could be served in transparent deli-style sealed cartons stacked one on top of each other. That left the final corner of the box to fill. What could I do here? I thought of chocolate-dipped Viennese fingers or sandwiched Viennese whirls, but these seemed to owe more to Mr Kipling than any true Viennese heritage. I then frantically thought of mini Kugelhopfs, perhaps marbled chocolate and vanilla, then had a memory flash back to my childhood when elaborate pink decorated tins of Viennese coffee flavoured with dried fig seasoning (can that really taste good?) used to be on sale. Maybe I could come up with a mini coffee meringue topped with fresh figs?
Finally I told myself to STOP and follow my own mantra of Less is More. I need not rush round the kitchen becoming frazzled before an evening at the opera. I filled the last corner of the box with a napkin, some disposable wooden cutlery (so much nicer than plastic) and the most elegant disposable plastic wine glass I could find. I then packed some half bottles of Hungary’s famous dessert wine Tokaji to serve alongside. Perfect.
Here’s the end result first with the box open:

and then closed ready for packing and transport to Clonter:

OK so that’s the overview, now for detail on the construction of the individual elements.
The Hotel Sacher recipe for Sachertorte is a closely guarded secret but fortunately it’s Mary Berry to the rescue. I used her Great British Bake Off recipe featured on the BBC Food website as the base for my Sachertorte cubes. Interestingly this is similar but not identical to the Sachertorte recipe featured in her Baking Bible. I doubled the recipe quantity given below and baked it in two 23cm (9 inch) square tins.
I then sandwiched the cakes together a generous quantity with sieved apricot jam flavoured with a little Amaretto liqueur (perfect as it is itself made from the bitter almond flavoured apricot kernels) and sharpened up with a spritz of lemon juice.
I trimmed the cakes, cut them neatly into 16 cubes and brushed each cube generously with more of that sieved apricot jam.
It was shaping up to be a warm, humid day so rather than a classic cream and chocolate ganache icing I chose to make the chocolate and butter ganache I’ve used before on the Ottolenghi golden clementine cake. You can find the recipe here. This worked a treat setting to a glossy sheen thanks to the honey and butter in the recipe. I needed to make a double quantity of the icing to coat all of the cubes but could probably have got away with 1 and a half times the recipe.
Finally, each individual cube was topped with one of those chocolate bats carefully transported home from Slattery’s and they were left in the cool cellar until being packed up in double white fluted cake cases later in the afternoon.


Moving on the Esterházy Torte. A classic version of this cake comprises a majestic 5 layers of nut flavoured cake sandwiched with nut and vanilla flavoured cream. The nuts might be toasted almonds or hazelnuts depending on your preferred version of the cake. There seem to be countless subtly different versions of this recipe out there so I combined features of several recipes and scaled the quantities down in order to come up with the recipe I give below for mini Esterházy tortes comprising just 2 cake layers sandwiching a layer of vanilla nut cream.
These were straightforward enough to make being similar to a macaroon batter but much easier to handle thanks to the differing proportions of egg whites, nuts and sugar.
For the filling, I reached for my failsafe Lenôtre vanilla buttercream recipe which I learned when making macarons a couple of years ago. To complete the vanilla cream I folded in some more of the toasted ground hazelnuts.
The next step before assembling the tortes was to ice the tops with the distinctive feathered icing which is an essential feature of the Esterházy torte. Despite my many years of baking this was to be a first for me and the result was going to be on show to 12 opera guests so no pressure… I decided to ice a few extra tops to make sure that at least 12 of the lids would make the grade. This proved to be a wise decision as there are plenty of pitfalls for the unwary…
The cake tops were first brushed with sieved apricot jam to create a barrier preventing the icing from being absorbed into the cake surface. I’d made my water icing using a newly available product on my local supermarket shelves, fondant icing sugar. I’d hoped this would give me the smooth glossy effect of true fondant icing but this stuff is a bit of a cheat as it’s merely regular icing sugar with a little added powdered glucose. This does give a nice sheen to the finished product but produces a slow-setting permanently soft icing which frankly is a pain to work with. Next time I will use ordinary icing sugar.
The contrasting colour in the feathered icing comes from melted dark chocolate. The addition of a little vegetable oil to the chocolate produces a softer slower-setting result giving you time to work the feathered pattern. I forgot the oil which made life difficult as by the time I had piped lines of dark chocolate onto a row of lids, the chocolate had set rock-solid before I had chance to try out my feathering skills.
I changed tack and piped a single lid with 3 neat parallel lines of chocolate and immediately ran the wooden skewer through in a perpendicular direction. This worked fine except that I set the lids down to dry at a slight angle and 5 minutes later the slow-setting fondant icing (see my comments above) had slid off onto the kitchen work surface. Very frustrating.
I managed to turn out 12 acceptable lids and left the rejects for home consumption later. Once the icing had dried for a couple of hours, it was time for final assembly. I chose to transport the Esterházy tortes in clear plastic clamshells designed for cupcakes and these proved to be perfect for protecting the delicate tortes. I place a torte base in the bottom of the clamshell, piped a disc of buttercream on top and gently placed the iced top-layer in position, applying just a little pressure to hold everything together.


On to the apricot compôte. This was relatively straightforward to make after the two complex mini-cakes, but with its sharp refreshing sweetness a very welcome element in the dessert box. I didn’t want a babyfood-smooth purée, nor did I want something resembling a can of apricot halves in syrup. What was required was something nice and thick but with a bit of chunky texture. I thought I could achieve the texture I wanted by gently poaching the peeled apricot slices in vanilla-scented sugar syrup, carefully draining the fruit then puréeing half of it before combining it with the remainder of the fruit cut into pieces. This worked a treat. The compôte was thoroughly chilled in the fridge before spooning neatly into small clear plastic deli-style containers.
The final step was to pipe my Greek yoghurt and vanilla cream into similar deli-style pots in a relaxed swirl – more elegant than just dolloping it in to the pots.


After 2 days’ work I was finally all done and packed up. The boxes and their contents travelled brilliantly and, sigh, were consumed in the interval in a matter of minutes.
Recipe for Sachertorte
Adapted from a Mary Berry Great British Bake Off recipe on bbc.co.uk/food. This quantity of cake batter makes a single layer cake. A double quantity is required to make 16 cake cubes.
Ingredients
140g plain chocolate broken into small pieces (or use professional baking drops or buttons)
140g unsalted butter, softened
115g golden caster sugar
½ teaspoon vanilla extract
5 eggs, separated
85g ground almonds
55g sifted plain flour
1. Preheat the oven to 170 degrees C (fan). Grease and line with silicone paper your chosen cake tin. This quantity of cake batter will make a slim single layer cake if baked in a 23cm round tin, or a chunky layer for a two layer cake if baked in a 23cm square tin.
2. Melt the chocolate over a pan of simmering water. Remove and cool slightly.
3. Cream the butter and sugar together very well until really light. There is no raising agent in this cake so the only lift comes from air incorporated at this stage and when the beaten egg whites are incorporated.
4. Add the cooled melted chocolate and vanilla extract and beat again. Beat in the egg yolks one at a time then fold in the ground almonds and sifted flour.
5. In a separate bowl, whisk the egg whites until they are stiff but not dry. Add about one third of the whisked egg whites to the chocolate mixture and stir will to mix in. This will lighten the mixture and make it easier to incorporate the remaining whisked egg white without beating all the air out.
6. Gently fold in the remaining egg whites.
7. Pour the mixture into the prepared tin and level the surface with a palette knife.
8. Bake for 40-50 minutes until well risen and the top springs back when gently pressed with your forefinger. The shallower 23cm square cake will cook more quickly whereas the deeper 23cm round cake will need a little longer in the oven.
9. Leave the cake to cool in the tin for 15-20 minutes then turn out onto a wire rack to complete cooling.
10. Glaze, ice, fill and decorate according to your chosen recipe and desired finish. A sieved apricot jam glaze topped with chocolate ganache icing is traditional.
Recipe for mini Esterházy Tortes
Makes 16-18 sandwich cakes (32-36 individual cake discs).
Ingredients
For the cake layers
210g egg white (whites of approx. 6 eggs)
250g golden caster sugar
125g ground hazelnuts, lightly toasted
2 and a half tablespoons flour
To complete
1 quantity vanilla buttercream
85g ground hazelnuts, lightly toasted
Sieved apricot jam
1 quantity thick water icing made with 200g icing sugar, a squeeze of lemon juice, a tablespoon of schnapps and water to mix
50g dark chocolate melted with a teaspoon of flavourless oil
Begin by making the mini cake layers. Preheat the oven to 150 degrees C (fan). Whisk the egg whites until foamy then add the sugar a couple of tablespoons at a time whisking after each addition. Continue whisking until the meringue mixture is stiff. Fold in the flour and toasted ground hazelnuts. Transfer the mixture to a piping bag fitted with a 1cm nozzle and pipe small discs 4-5cm in diameter onto baking sheets lined with silicone paper or a non-stick liner. Leave about 2cm space between each disc to allow air to circulate to achieve an even bake. They don’t spread as they bake. Bake for about 15 minutes until the discs are a light golden colour. Allow to cool on the baking sheets for 5 minutes or so before carefully transferring to a rack with a palette knife to complete cooling.
Prepare the vanilla buttercream using the recipe given in the link above. Stir in the ground almonds. Set aside.
Divide the cake discs into two halves, one group will be the tops and the other the bottoms. Brush the smooth side of the tops with sieved apricot jam and leave to set for a few minutes. Feather-ice the tops by piping 3 parallel evenly spaced lines of dark chocolate across the freshly applied thick water icing layer and immediately drawing a wooden skewer through the chocolate lines at right angles. The chocolate is easily piped from a small piping bag made from a folded triangle of greaseproof paper with a tiny hole snipped off at the pointed end. Each draw of the skewer should be evenly spaced and parallel to form the feathered pattern. Three or four draws of the skewer should be about right for these small cakes. The feathering technique is more easily explained with diagrams and pictures so I’d suggest looking first at a detailed cake decorating book or at some of the videos available online (search terms marbled or feathered icing) if you’re trying this for the first time.
Leave the iced tops to set for a couple of hours before final assembly.
Assemble the cakes by piping a disc of buttercream onto the cake base. Use a disposable piping bag fitted with a 1cm nozzle. Set the iced layer on top and press gently to adhere.
Recipe for stone fruit compôte
Ingredients
800g-1kg ripe but not overripe stone fruit (eg apricots, peaches, nectarines or plums) peeled, stones removed and sliced
750 ml water
375g golden granulated or caster sugar
1 vanilla pod, split in half
2-3 strips lemon peel
juice of a lemon
Make a syrup by bringing to the boil the sugar and water. Add the vanilla pod, lemon peel strips and lemon juice.
Poach the prepared fruit for 5-10 minutes until tender but not too pulpy. You may need to do this in batches.
Remove the poached fruit from the syrup with a slotted spoon. Purée about half of the poached fruit in a food processor or liquidiser. Cut the remaining poached fruit into bite sized chunks. Combine the fruit purée and chunks adding a little more poaching syrup if needed.
Chill until ready to serve. Don’t throw the deliciously scented poaching syrup away – keep it in the fridge and use as the base for a soft drink or cocktail.
The perfect melting middle chocolate pudding
November 15, 2012 § Leave a comment
The melting middle chocolate pudding or moelleux au chocolat as it’s known in France is one of those dishes that pops up all over the place, from Masterchef to TV cookery programmes to the Marks and Spencer chilled section.
It’s now a recipe in my newly expanded repertoire of chocolate desserts following a trip earlier in the year to the Lenôtre Cooking School, the best place in Paris to learn about making fine pâtisserie at home. I’ve written before about attending classes at Lenôtre -see my post Le Vrai Macaron Parisien. For anyone interested in baking it has to be the place to come and learn tricks of the trade (though all the teaching is conducted in French so at least schoolgirl French is a must). Our group comprised 3 chic Parisiennes, a jolly baker from Lille up for the weekend to hone his skills, and of course me. We were instructed by the charming and surprisingly thin Gilles Maisonneuve:

Gilles is a hands-on kind of instructor, particularly if you are young and glamorous. Here he is instructing one of my fellow students.

Unlike baking at home that has to be done in a kitchen where family meals are cooked, homework done, laundry dried or whatever, the Lenôtre kitchen is gleamingly clean and empty and set up for baking action.
I love the way the finest ingredients are used here in industrial quantities – neatly labelled bins of best quality couverture chocolate, Madagascan vanilla powder, paste and whole pods in similar neat hoppers, different kinds of sugars, nuts, fruits, spices, flours. Then there’s the equipment – rack upon rack of prepared uniform size baking trays, tartlet tins, piping nozzles of all kinds. It just makes you want to get started on an ambitious baking project, and there’s even your own personal kitchen porter to whisk away your dirty pots. What bliss!
The name of this half day course was “Desserts Tout Chocolat” and we made chocolate tartlets, chocolate sorbet and the universally loved chocolate brownie (pronounced “Brooney” or “Bruni” in French – depending on whether your reference points are Manchester United players or politicians’ wives) as well as the moelleux au chocolat, but it is this last dessert that I’ll be concentrating on today.
I am so thrilled with this recipe – it works perfectly every time and is very straightforward – even my 14 year old son can knock out a batch of perfect puddings. It sits in the fridge quite happily for a few days ready to be baked and served withing 9 minutes – perfect for dinner parties. The puddings freeze well too though I think it’s worth defrosting them for, say, 2 hours at room temperature rather than baking straight from frozen. The recipe, though simple, does call for precision (and I mean to the nearest gram) in the weighing of ingredients, the portioning out of the mixture between the moulds and cooking temperature and time.
I’ve cooked these numerous times at home now and have tried rival recipes, specifically those in TV chef Rachel Khoo and Lorraine Pascale’s books. Sorry ladies, your versions just don’t cut it – too big, too sweet, wrong texture.
At Lenôtre we cooked our moelleux in individual disposal foil pudding basins which we buttered and floured then scattered a few flaked almonds into the base:

This is what the end result looked like:

Not bad huh? That said I’m not sure the flaked almonds add a great deal. The disposable foil basins are dead handy and you can pick them up in Lakeland and no doubt other places as well. Better still than the disposable foil basins are these perfectly sized non-stick metal dariole moulds, also available from Lakeland:

No need to grease and flour, the puddings turn out like a dream straight from the oven:

This brings me to the other piece of kit that you’ll need to make this recipe with ease, a disposable piping bag. You can buy these cheaply and easily in bulk from Amazon. They look like a roll of tear-off plastic bags which is exactly what they are but are triangular in shape to create a piping bag. I’ve found the best way to fill them cleanly is to stand them into a tall cylindrical container which supports the weight of the mixture as you spoon it in:

The most important ingredient in the recipe is of course the chocolate. We used dark couverture chocolate drops at Lenôtre. I think they favour the Barry Caillebaut brand and the recipe specifies a 70% cocoa content chocolate. The word “couverture” means a specialised chocolate with a high cocoa butter content for ease of melting. I’ve had unsatisfactory cooking results with some dark chocolates whic simply list a high cocoa solid count on their labels. My suspicion is that they’re stuffed full of cocoa powder rather than the more expensive cocoa butter which makes the chocolate dry and powdery.
I’ve used Valrhona chocolate drops in my recipe, purchased in industrial quantities from the excellent Chocolate Trading Company (see contact details below). I see from their website that they’re based nearby in Macclesfield of all places so I can even comfort myself with the thought that I’m buying local when I take my latest delivery!

Recipe for melting middle chocolate pudding
Once you have the right kit and ingredients assembled it’s a straightforward task to melt the chocolate (over simmering water please), combine it with the softened butter (you need a bit of patience here to let it soften then mash it with a wooden spoon), lightly beaten eggs, sugar, flour and baking powder.

Once baked, all you need to do is serve with a little thick cream (or raspberry coulis if you prefer) and sit back and enjoy the compliments!
Recipe for melting middle chocolate pudding
Translated and adapted from the Lenôtre pâtisserie school recipe though I have not dared tinker with the ingredients, quantities or method!
Serves 8
Ingredients
170g dark couverture chocolate drops (I use Valrhona Manjari, a 64% cocoa content couverture chocolate)
130g unsalted softened butter
95g golden caster sugar
130g whole egg – shelled weight (approximately 2 large eggs)
100g plain flour
4g baking powder
Melt the chocolate using your preferred method (Lenôtre recommend a bain-marie). Add the softened butter and mix well. Add the sugar and lightly beaten egg (whisk by hand with a fork or small whisk until there is a little froth on the surface of the egg) and mix to incorporate.
Combine the flour and baking powder in a bowl and stir well to combine. Gradually add the flour and baking powder to the chocolate mixture. Mix to combine but do not overwork the mixture.
Put the mixture into a disposable piping bag and use this to fill 8 small dariole moulds. Use scales to weigh each mould to ensure you fill them evenly. You should find that if you use a rubber spatula to empty the bowls thoroughly that you can fill the moulds with at least 72g of mixture, maybe even 75g of mixture if you’re careful.
Chill the moulds in the refrigerator for at least 30 minutes.
Bake at 200 degrees C fan for 9 minutes.
Contact details
Pâtisserie courses
Containers and moulds
Fine couverture chocolate
My top 5 Parisian pâtisserie trends
May 6, 2012 § Leave a comment
During April’s trip to Paris to brush up my pâtisserie skills at Lenôtre’s École des Amateurs, I took the opportunity to wander the streets, gaze into the shop windows, read the magazines and do a little tasting. I’ve distilled this into my take on the latest pâtisserie trends.
Trend 1: Choux puffs
Move over macarons, choux puffs are set to be the latest small cake trend, or so young entrepreneur Lauren Koumetz hopes. She set up her boutique bakery named Popelini in the Marais district last year. Cannily, the tiny patisserie selling just choux puffs is just across the road from world-famous bakery Poilâne’s newest outlet in the rue Debelleyme (see my previous post). Eagle-eyed viewers will have seen Rachel Khoo popping into the shop in Episode 2 of her recent BBC 2 series “Little Paris Kitchen”.

The concept is simple – take a choux pastry puff, fill it with flavoured crème pâtissière and top it with a disc of prettily coloured fondant icing. The appearance of these choux puffs and their flavour combinations clearly owes a lot to the macaron trend, and indeed the pastry chef at Popelini, Alice Barday, is ex- Ladurée.
There are 9 classic flavours in the current range – these include dark chocolate, lemon, salted caramel, pistachio/griottine (more on this one later) – plus an ever changing ‘flavour of the day’.

Trend 2: Pistachios
The love affair with the pistachio nut goes on and on. It must have something to do with their intriguing green colour as well as their delicate flavour. In the on-trend pâtisseries, every classic tart or entremet traditionally prepared with ground almonds has been reinvented with pistachios. The pairing of griottine cherries (morello cherries preserved in kirsch) with pistachios, whether in the filling for a choux puff (see above) or in a frangipane tart is increasingly popular.
There’s even a shop, La Pistacherie, which opened in mid 2011, devoted to the pistachio nut in all its forms on the Rue Rambuteau just around the corner from Beaubourg, the Pompidou Centre:

Trend 3: citrus
Forget familiar lemon and orange, now it’s got to be mandarin, grapefruit (ideally delicate pink grapefruit), or more exotically still bergamot or the Japanese favourite yuzu. The Japanese are avid buyers of French pâtisserie – just look at the big names that have opened up branches in Tokyo – and are in turn bringing their influence to bear – the green tea powder matcha is found flavouring all sorts of cakes and biscuits now. The tart, aromatic yuzu described in flavour terms as being similar to the grapefruit and mandarin is very popular in Japan but sadly well nigh impossible to get hold of in the UK. I have seen prepacked juice available for sale in specialist Japanese stores so maybe the fresh fruit is on its way.
Not strictly citrus, but the herb lemon-thyme is popping up all over the place whether perking up emigré pâtissier Eric Lanlard’s lemon cake or adorning a Pain de Sucre (see below) fig tart.
Trend 4: all things American
Parisians have fallen in love with brownies (charmingly pronounced as ‘brew-neez’), luscious cheesecake and simple-to-make pound cakes and muffins and have made them their own. You’ll find them everywhere now – peeking out of chi-chi pâtisserie windows and on sale to grab and go as you pass through the Gare du Nord or wherever. On-trend boulangerie-pâtisserie Huré on the rue Rambuteau has an enticing display of American-inpsired loaf cakes in the window with flavours such as white chocolate and cranberry and pecan to the fore.

Trend 5: Classics reinvented
A step further down the rue Rambuteau and you’ll find Pain de Sucre (‘sugarloaf’), one of Paris’ hottest establishments, regularly featuring on top 10 lists of Paris’ best pâtisseries. Renowned for its flavoured breads, oversized jars of pastel-coloured marshmallows, reinvented classics abound here. Its rum baba, renamed ‘Le Baobab’ is sold complete with miniature pharmacist’s dropper of rum to allow for dosing of alcohol just the way you want it.
It’s not just in Pain de Sucre that you’ll find classics reinvented. The space age showroom featured in several episodes of the BBC 2 programme “Little Paris Kitchen” is Philippe Conticini’s “Pâtisserie des Rêves” (Pâtisserie of Dreams). Rachel Khoo, the chef within the Little Paris Kitchen is shown admiring a reinvented chocolate éclair, a sculpted beauty almost unrecognisable as an éclair displayed like an artwork beneath its own glass dome. You can find pictures of it plus detailed tasting notes here.
Places like this lead the way, but everywhere you’ll find classic large cakes like the gâteaux Opéra or St Honoré reinvented either as small individual with sophisticated pared-down decoration. The mini Opéras will sport a lacquered chocolate glaze, as dark and shiny as a Steinway grand piano, ornamented only by a shred of pure gold leaf. Alternatively, classic cakes can be miniaturised and given a new flavour twist like Ladurée’s billowy pink raspberry and rose miniature St Honoré. You can see this here. My last two links are to US citizen Adam’s beautifully obsessive blog http://www.parispatisseries.com/ dedicated, as the name suggests to all things sweet in Paris – you couldn’t find a better starting point if you were planning a food-based trip to the French capital.
As the French are voting for a new president today, I’m going to sign off with a French joke. I suspect it may be the last we hear of Sarko for some time:
Q: What is Nicolas Sarkozy’s favourite cake?
A: Brownie (pronounced like ‘Bruni’ in French!)
Contact details
Popelini
http://www.popelini.com/
29, rue Debelleyme
Paris 75003
Tel +33 (0)1 44 61 31 44
Opening hours – check website but currently Tuesday to Saturday 11.00 to 19.30; Sunday 10.00 to 15.00
La Pistacherie (website still under construction at time of writing)
67, rue Rambuteau
Paris 75004
Tel +33 (0)1 42 78 84 55
Opening hours “every day of the week”
Huré
18, rue Rambuteau
Paris 75003
Tel +33 (0)1 42 72 32 18
Pain de Sucre
http://www.patisseriepaindesucre.com/
Rue Rambuteau
Paris 75003
Tel +33 (0)1 45 74 68 92
Opening hours: 10.00 – 20.00 closed Tuesday and Wednesday
La Pâtisserie des Rêves
http://www.lapatisseriedesreves.com/
93 rue du Bac
Paris 75007
Tel +33 (0)1 42 84 00 82
Opening hours: Tuesday to Saturday 9.00 – 20.00; Sunday 9.00 – 16.00
111 rue de Longchamp
Paris 750016
Tel +33 (0)1 47 04 00 24
Opening hours: Tuesday to Friday 10.00 – 20.00; Saturday and Sunday 9.00 – 20.00
Parisian dark (chocolate) secrets
May 22, 2011 § 1 Comment
Daybreak in Paris last Sunday. The public shame. The disgrace. The furtive attempts to conceal the evidence. The seedy story of Dominique Strauss-Kahn’s New York exploits hits the newsstands perhaps?
No, this was me, rising at dawn to try and dispose of 1kg best quality Tanzanian 75% cocoa solids chocolate, a further kg of unsalted alpine butter, lashings of organic double cream and a generous slug of cognac, the whole lot coalesced into a greasy solidified mass of split ganache which should have graced a celebratory chocolate cake, the centrepiece of my cousin Pierre’s birthday party the night before. I finally found an empty public bin by a bus stop, deposited my sorry double-bagged chocolate mess and jogged away, lightened in load and spirit.
So what was the occasion?
A Saturday Night Fever birthday party to celebrate a Significant Birthday. The cake to match was a scaled down (2 layers rather than 3) version of spectacular chocolate-raspberry wedding cake selected from my new favourite baking book “Sky High: Irresistible Triple Layer Cakes” by Alisa Huntsman and Peter Wynne.

The book is American through and through and completely over the top in terms of the sheer number of generously proportioned and imaginatively filled and frosted celebratory cakes it describes. Other bloggers have raved about it so I just had to get hold of a copy. Apart from the Bittersweet Brandied Ganache débacle, it hasn’t disappointed.

The book’s strengths are the seductiveness of its drop-dead gorgeous full page glossy colour photos, its generosity of spirit and the imagination of its flavour combinations. Where it falls short is perhaps in a lack of precision – for that you have to go to Rose Levy Beranbaum’s Cake Bible, another American classic on my bookshelf.
It all started so well. The choice of a classic American chocolate cake, seemed perfect for a party for a chocoholic into American disco nostalgia. The edible elements needed for the cake were 6 layers of Chocolate Butter Cake, generous quantities of seedless raspberry jam to sandwich the layers together, an unspeakably large quantity of Bittersweet Brandied Ganache to frost and a punnet of ripe raspberries scattered over the top to finish.
I have neither the time nor the space to give the complete recipe here – you’ll have to buy the book for that – the instructions for the full 3 tier wedding cake go on for 6 pages. However I do give the recipe for the Lenôtre chocolate ganache which eventually saved the day I’ve tried it 3 times now (albeit using European ingredients) and it’s been spot-on every time. A ganache to lean on, so to speak.
Here is the end result, finished just minutes before the first guests arrived at 7.30 pm. Not bad given the stresses of the afternoon of which more later…

The baking of the cake itself was fine. I followed the recipe to the letter, eschewing my favourite Green & Black’s cocoa powder in favour of Hershey’s obtained here in the UK via Amazon Marketplace.

This wasn’t just for reasons of American authenticity. The recipe specifies a non-Dutch Process cocoa powder in order to ensure the right chemical reaction with the recipe’s raising agent, bicarbonate of soda, to make the cake rise properly. Reading the Green & Black’s small print, you’ll see that this cocoa powder has been through the so-called Dutch process whereby the beans are treated with an alkaline agent to produce a milder flavour and, counter-intuitively, a darker colour. The Hershey’s stuff is paler but in theory contains more “roasty, caramel-like molecules…and…astringent, bitter, phenolics” (quoting from Harold McGee’s indispensable kitchen reference work On Food and Cooking).

The recipe is not a chocolate sponge made by the familiar creaming method but requires softened butter and buttermilk to be beaten into the sifted dry ingredients before the eggs and more liquid in the form of strong coffee are incorporated into the mixture. I would not attempt this recipe without the help of a Kenwood or Kitchenaid-type mixer as it requires a lot of heavy-duty beating.
After the addition of butter and buttermilk the mixture looks like a moist and friable garden loam:

Once the eggs and coffee were incorporated, it became soft, thick and lusciously silky, like a chocolate version of mayonnaise:

Baked, the cake rose well but not too aggressively. Don’t worry, the dome that forms in the oven settles down once the cake is cooled leaving a firm, glossy and flat cake which holds its shape well, eminently well-suited to the architectural task ahead.

The finished cake was firm, rich, dense and crumbly. It had an intense chocolate flavour pointed up by the addition of cinnamon and coffee in the recipe though neither flavour is perceptible. This is a cake designed for filling and frosting as eaten on its own it would be a tad dry.
The cakes were mixed and baked first thing Friday morning. Once cooled and carefully wrapped and packed, the cake’s 6 layers travelled as hand luggage, sitting obediently beside me on the short Flybe flight to Paris. Cake assembly began in situ at the party venue at about 2.00pm on Saturday afternoon. First the layers were spread with seedless raspberry jam (Tiptree brand), then sandwiched together with each triple layer cake having a slim silver cardboard base:

If I were to make this cake again, I would be more generous with the raspberry jam and I would leave the cake to mature overnight as the recipe instructs. The quantity of jam shown in the picture may look generous but is far less than the recipe suggests and when the cake was cut into later that evening, it had practically disappeared. More jam would have made for a moister cake I think as, being self-critical, it was just a little on the dry side (easily remedied on the night by serving it with extra fresh raspberries and a dollop of crème fraîche).
The next potentially tricky step was the positioning of the 4 transparent plastic dowels which supported the top layer. I measured, cut to size and positioned the dowels. This bit of the assembly worked like a dream – a relief as I’d never worked with dowels before. I know you shouldn’t experiment when baking for a special occasion, especially someone else’s special occasion, but I just couldn’t help myself:

Now for the ganache. How hard could it be to whip up a batch of ganache and slather it on all over the cake? I’d preweighed all the ingredients so it was quick work to set the vast quantities of best quality dark chocolate and unsalted butter (a kilogramme of each no less) to melt over a pan of barely simmering water.
I was patient and careful, never letting the mixture become too warm, not letting a drop of water near it lest it seize up and going easy on the stirring. On the home strait now. All I had to do was whisk in the warmed cream, then the brandy, just like the recipe said and I was home and dry. Blithely, I tipped them in and whisked away. That’s when disaster struck as the previously smooth glossy mix began to separate out into particulates and oil before my very eyes. 30 minutes and frantic whisking and cooling later, I pronounced the mixture officially beyond redemption, tipped it into a big plastic box for subsequent disposal and confessed my error to my slightly alarmed host and his family. The public shame and humiliation!
Having checked Harold McGee subsequently, I think that where I went wrong was in using chocolate with too high a cocoa content – 75% in my case. When liquid is added, the cocoa solids absorb the water releasing the fats out of emulsion and hey presto the mixture splits. His advice is to follow a recipe which sets out precisely the fat contents of the various ingredients and to follow it to the letter. The Sky High recipe was a bit on the sketchy side – ie just bittersweet chocolate, heavy cream and American ingredients are not quite the same as those we can buy in Europe which can make for misunderstandings.
Back to the party. Remembering Corporal Jones’ advice from Dad’s Army (Don’t Panic), using my host’s computer, I quickly retrieved the tried, tested and reassuringly precise ganache recipe I’d learned at the Lenôtre cookery school in Paris over Easter. Next, an emergency dash to the local supermarket for yet more cream and chocolate (just 600g of chocolate this time as 1kg was way too much, even for the most enthusiastic chocoholic) and I was back in business:

I followed the Lenôtre recipe as accurately as I could, though without scales or thermometer to hand I had rely on educated guesswork and prayer. To my immense relief, the ganache behaved itself perfectly and after 20 minutes’ or so cooling, it had reached the perfect consistency for spreading. The first house guests were just arriving at this point so I smiled and pretended to be part of the evening’s entertainment, a sort of cake artist installation.
The final step was piping a bold decorative border of what I can best describe as chocolate blobs to hide the joins between cake and board. Very effective though I say so myself. By the time the cake was served, the blobs had firmed up to become in effect mini chocolate truffles which could be detached and discreetly popped into the mouth while the cake was being sliced and served. Cook’s prerogative!

Cake complete, it was time to enjoy the party with the host rather than the cake the centre of attention – just as it should be. Great party Peter!

Recipe for foolproof chocolate ganache
With thanks to Philippe from the Lenôtre cookery school in Paris. I scaled this up by a factor of three to use to coat the birthday cake which comprised a 7 inch square stacked onto a 9 inch square.
Ingredients
200g cream 32% fat (equates to UK whipping cream – this is liquid cream not thick crème fraîche)
250g dark chocolate 50% cocoa solids (buttons are ideal for quick melting but bar broken into square is OK too)
50g unsalted butter
Heat the cream to 85 degrees C. Break up the chocolate and place into a large heatproof bowl. Pour over the hot cream and leave to stand for 10 minutes. Once the chocolate has melted, stir with a rubber spatula to incorporate the cream into the chocolate. Keep a ball of molten chocolate in the centre whilst incorporating the cream at the edges of the chocolate. Reduce the temperature to 30 degrees C then beat in the butter previously softened and tempered at 22 degrees C.
Cover with cling film and reduce the temperature to 17 degrees C when it will be the right consistency to use.
In search of the real Pithiviers
April 29, 2011 § 2 Comments
You have to wonder what the point is of the tourist office in Pithiviers. After 10 minutes’ browsing the leaflets for various châteaux, parks and gardens I was none the wiser about the two things for which Pithiviers is most famous. The first is its eponymous cake, an indulgent confection of buttery puff pastry with an almond filling, and the second is its notorious second world war transit camp where French Jews were rounded up and detained before being sent on to Auschwitz.

We were spending the easter holidays in France based in and around Paris and Fontainebleau. On a sunny Monday morning we decided over breakfast to head off to Pithiviers, a typical French market town some 50 miles South of Paris.
Q: Why?
A: a rather frivolous excursion to try and track down a genuine Pithiviers pastry.
The less frivolous outcome was that we learned a little about an unedifying episode in French history, one that the tourist office was keen to airbrush away. I’d read about the French internment camps before, specifically Drancy on the outskirts of Paris. This was not in a history book but in Sebastian Faulks’ moving wartime novel “Charlotte Gray”.
It was another novelist, Irène Némirovsky, the author of the sensational “Suite Française” who’s partly responsible for putting Pithiviers on the map, for all the wrong reasons. Némirovsky was interned here before being sent to Auschwitz where she died in 1942 leaving her epic novel unfinished, its manuscript undiscovered until some 60 years later.
Back to the original purpose of our visit. The Pithiviers has a special place in our family history as I ate a stunning chocolate Pithiviers at London’s Bibendum restaurant the night before our eldest son George was born. It features in chef proprietor Simon Hopkinson’s book “Roast Chicken and Other Stories” if you fancy making one at home.
Finding a Pithiviers proved surprisingly easy. Having found a parking space in a sunny square (the Mail Ouest) in the centre, we found ourselves just across the road from an inviting-looking pâtisserie, “À la Renommée” (the Renowned).
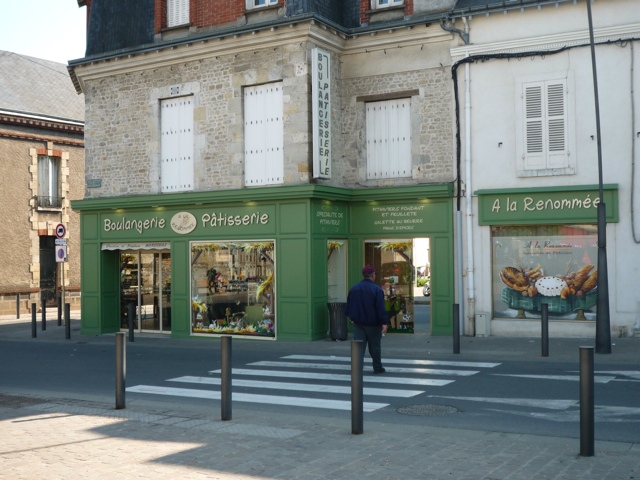
Heading to the window, we realised we’d struck lucky with a picture perfect example of a Pithiviers feuilleté (puff pastry) with its distinctive scalloped border and sculpted lid not just once:

but twice, with its more gaudy iced cousin, the Pithiviers fondant:

Of course, we had to buy both, the fondant version to enjoy there and then with a cup of coffee and the feuilleté version later after our evening meal.
The fondant Pithiviers, with its virginal white icing and old school glacé cherry and crystallised angelica decoration, bore more than a passing resemblance to a Mr Kipling Cherry Bakewell, but without the pastry case. Beneath the icing was a dense and crumbly almond sponge, satisfying in its simplicity. Apparently this is the original version of the cake, an ancient Gaulish speciality, its origins lost in the mists of time. Maybe Asterix ate one of these…
The origins of puff pastry in France are generally dated back to the 17th century so the more familiar Pithiviers feuilleté is a relatively recent upstart. We followed the bakery instructions to warm it through gently for 15-20 minutes before serving. It needs no accompaniment (other than a strong cup of coffee). The puff pastry layers were featherlight, belying the huge quantities of butter that went into its manufacture, and the almond cream filling rich and sweet. It reminded me just a little of its more rustic cousin the English Bakewell pudding – the real dense almondy version you find in the Peak District town rather than the more usual tart I mentioned earlier. Maybe Pithiviers and Bakewell should be twinned?
You’ll find recipes for the regular puff pastry Pithiviers in any fat cook book with a pâtisserie chapter. Recipes for the fondant version are harder to come by so here’s one I hunted down:
Recipe for Pithiviers fondant – iced almond cake from Pithiviers
From the recipe section of the website http://www.loiret.logishotels.com with quantities halved to make a more manageable sized cake.
Ingredients
250g blanched almonds, very finely chopped
250g caster sugar
250g butter
1.5 cl rum
6 or 7 eggs (depending on size) beaten
White fondant icing
Halved glacé cherries and angelica to decorate
Mix the sugar with the finely chopped almonds and beat in the softened butter. Incorporate the eggs gradually and the rum. Spoon into a greased and floured Pain de Gênes mould (a deep fluted flan tin – use an ordinary round cale tin not a shallow flan tin as a substitute) and baked in a moderate oven (180 degrees C fan) for 30 to 35 minutes. When cool, ice with white fondant icing and decorate with glacé cherries and Angelica.
Artisan baking part 2 rye sourdough
November 23, 2010 § 2 Comments

This post is the second of series describing the inspiring 4 day bread baking course I attended in last month at the School of Artisan Food in Nottinghamshire. I’ve decided to forget about describing the course contents in logical chronological order but instead to write about what inspires me at the moment. This week, that just happens to be rye bread, specifically rye sourdough.
Before the course, the inner workings of rye bread were a mystery to me: it remained an occasional eccentric supermarket purchase – cellophane-wrapped packets of pumpernickel containing dark brown strips of cardboard textured slices which seemingly last for ever had a certain masochistic expeditionary appeal.
I hadn’t appreciated that organic stone-ground rye flour was widely available and as a result I’d never have dreamed of trying to bake it myself at home. Since the course, all that has changed.
Our teacher, bread guru Emmanuel Hadjiandreou was brilliant and packed in so much information over the 4 days that it’s taken a while to sift through my photos and video clips. I’ve taken a crash course in basic video handling and editing in my latest One to One session at the Apple Store in Manchester and my very first little movie, imaginatively titled “Rye Sourdough” can be viewed by clicking on the following link.
http://www.youtube.com/watch?v=6qUNKKO1ULU
Now you can see yourself Emmanuel’s deft handiwork, the exact consistency of starter and finished dough and even hear the sound of a perfectly baked loaf.
Let’s start with Emmanuel’s recipe. The ingredients and quantities are exactly as on his beautifully typed-out recipe sheets handed out on the course but I have on occasion put his methods into my own words.
Recipe for dark rye sourdough bread
Ingredients
For the ferment
150g dark rye flour
100g rye sourdough
200g water
For the bread
1 quantity ferment (see above)
200g dark rye flour
6g salt
150g very hot water
Optional flavourings
For apple rye – add 200g chopped dried apple
For apricot rye – add 200g chopped dried apricots
For sultana rye – add 200g sultanas
For prune and pepper rye – add 200g prunes and 10g pink peppercorns
For onion rye – add 200g chopped onion, lightly fried
Begin the day before you want the bread by mixing together the ferment ingredients in a large mixing bowl. Cover with a smaller mixing bowl and leave to ferment overnight at room temperature. In another bowl, weigh out the remaining flour and salt and mix thoroughly. Set aside.
The following morning, when you’re ready to make the bread pour the flour and salt mix over the ferment in the first mixing bowl. Then pour over the measured quantity of very hot water (from a just boiled kettle). The layer of flour will protect the hot water from scalding and killing the yeast within the ferment. Mix thoroughly and add any optional flavourings at this stage. Shape into a greased tin.
Allow to rise/prove for about 2 hours. Preheat the oven to 250 degrees C. Place the proved loaf into the oven at this high temperature; add a cup of water on a hot tray in the base of the oven to form steam then lower the oven temperature to 220 degrees C.
Bake for about 30 minutes. Turn out and cool on a wire rack.
And now for the raw materials.

What we have here is a bowl of ferment (noun) – a wet dough mixture made the night before and left to ferment (verb) to activate the wild yeasts and develop the characteristic background sour flavour of good rye bread. Next to it is the weighed-out rye flour and salt. And that’s it. The rye flour had a silky texture and the prettiest more-than-pastel grey-green colour which when baked is transformed into a dark chocolate-brown loaf.
Here’s fellow student Jethro inspecting the small bubbles which have formed overnight in his ferment. Being able to see what’s going on in your dough from all sides was a bonus of using the semi-translucent plastic bowls we were provided with on the course. These lightweight bowls can be upturned and used as protective covers over fermenting doughs, another useful home-baking tip potentially saving metres of clingfilm and faffing with damp teatowels.

You can also see fellow student Diana carefully weighing out dry ingredients on the “My Weigh” (geddit?) scales we were provided with on the course. These were brilliant and so quick and easy to use and of course accurate to within a gram too – essential especially for getting the right quantity of salt in a recipe. We weighed everything on the scales, the water too, as of course 1ml of water weighs 1g and it’s much more accurate not to say speedy to weigh the water rather than use a measuring jug. Since coming home I’ve bought a set of these scales (Amazon marketplace) and consigned my retro scales with their dinky brass weights to the cellar.
Here is my brandy new all-singing, all dancing set of My Weigh scales on the kitchen table at home:

It seems very odd adding near-boiling water to a bread recipe. Rye bread is unique in requiring this step and Emmanuel talked about this causing a process within the flour called gelatinisation – the dough takes on a porridge like consistency. He showed us how to protect the ferment containing the essential wild yeasts from the hot water by using the flour as an insulating blanket with the hot water being poured over the top.
The rye dough doesn’t look very inspiring when first mixed – more like a building material. I quipped to Ben, a young chef from South Africa who was sharing my workbench that the dough reminded me of childhood holidays on the beach in Wales. He looked puzzled – it seems that beaches in South Africa are of the pure white sand variety rather than the grit, shingle and mud we’re used to over here!

The wet dough mixture is shaped by being tipped into the oiled tin and patted and smeared using a dampened plastic scraper into a mounded loaf shape. Emmanuel advised being careful not to let water from the scraper run down the sides of the tin as this will cause the loaf to stick.

After two hours or so, the rye loaves had increased in size dramatically. We were given the option of sprinkling the top with rye flour and you can see the effect this produces in the loaf on the left in the picture below:

I’ve not stopped making this recipe since returning home after the course. I’ve been using Bacheldre organic stoneground rye flour which gives really good results (sorry Jethro but Ocado don’t stock your stuff). It’s become a bit of a weekend routine to resuscitate the rye starter on a Thursday night ready for a Friday night ferment (sounds more exciting than it really is!) and a Saturday baking session. Here’s a pic of a couple of loaves I baked at the weekend. The resulting bread is moist, flavoursome and delicious, makes fantastic sandwiches and toast and is nothing like those cardboard pumpernickel slices….

