
Lime tea and madeleines
July 5, 2011 § Leave a comment
The air outside is still fragrant with the scent of the blossom of the stately lime trees which line our pleasant suburban street. This is the year that I have finally harvested and dried some of these blossoms. They make the most delicately flavoured of tisanes to serve alongside a plateful of madeleines to recreate that oft-referenced literary reminiscence in Marcel Proust’s “Du Côté de Chez Swann”, the first instalment of the mighty novel cycle “À la Recherche du Temps Perdu”.

Towards the beginning of the novel, the narrator’s mother sends out for a small cake to serve with tea “un de ces gâteaux courts et dodus appelés Petites Madeleines qui semblaent avoir été moulés dans la valve rainurée d’une coquille de Saint-Jacques”.
Tasting the morsel of cake dipped in hot tea triggers in the narrator a childhood memory of eating madeleines dipped in his Aunt Léonie’s lime tea. The narrator is fascinated by the shape of the madeleine “the form, too of the little shell made of cake, so fatly sensual within its severe and pious pleating”.
The shape of the madeleine is undoubtedly part of its appeal. Its dainty size and unadorned simplicity make it the antithesis of an oversized, overfrosted, overdecorated cupcake.

The good news is that madeleines are very simple to make. The recipe I use comes from Frances Bissell’s book “Entertaining”. The key step before you start is getting hold of the essential madeleine moulds. Be sure to invest in at least two trays as it’s very frustrating being able to bake just 9 madeleines at a time. I picked up my pair of silicone moulds in a kitchen shop in France but there’s no need to travel – there’s a huge selection of similar moulds available on Amazon.
Some cooks insist that only metal moulds give good results but I’ve had excellent results with my silicone moulds which I grease lightly before use. I sit them on a baking tray to make the job of putting them in and taking them out of the oven risk-free.

I give the full madeleine recipe below, together with a slightly more complex recipe featured recently on BBC Radio 4’s “Woman’s Hour” which I haven’t tried out yet. Why bother when the basic recipe works so well?
You can ring the changes a little by flavouring the madeleines classically with a little orange zest and a teaspoon of orange flower water, or a little lemon peel. In the last batch I made, I finally found the opportunity to use my latest food purchase – a precious little tin of must-have Tonka beans – and grated just a little into the batter to impart a subtle spicy richness.
Another trick to add depth of flavour to your madeleines is to take your melted butter to the beurre noisette stage before stirring it into the mix – this is something I learned to do from Rose Levy Beranbaum’s Génoise Classique recipe from her aptly named “Cake Bible”. It’s also something that the second more complex madeleine recipe suggests.
Mixing the batter is very straightforward – no tricky creaming as the butter is melted and is incorporated very easily. It takes only a tablespoon of batter to fill each mould and the mixture really is quite runny – don’t be alarmed, this is how it should be.

OK, so that’s the madeleines taken care of. Now for the tea to dip them in.
The lime trees outside my front door may smell divine but are too close to the road to contemplate gathering the flowers to make a tisane. Lime trees are in flower for a very short time – just a week or so – so when a warm dry day arrives to gather the blossoms, you have to drop everything and seize the moment.
When the right day arrived, I headed off to nearby Dunham Park where lime trees grow in a perfect rolling parkland setting well away from roads:

I spread out the blossoms I’d collected on a wicker tray to dry gently in the dining room out of direct sunlight:

And a week later, I was ready to prepare my tisane and enjoy my Proustian moment.

So much more refined than dunking a jaffa cake into a mug of PG tips. Come to think of it, there’s a great literary pastiche to be written here…
Recipe for madeleines (1)
From Frances Bissell’s “Entertaining”
Makes 24
Ingredients
100g (4 oz) caster sugar
100g (4 oz) self raising flour
pinch of salt
2 eggs, lightly beaten
130g (5 oz) unsalted butter, melted
Butter and flour madeleine moulds. Sift together the sugar, flour and salt. Beat in the eggs, and then mix in the melted butter. Pour the batter (which is quite liquid) into the prepared moulds, and bake in the top half of a preheated oven at 220 degrees C/450 degrees F/gas mark 8 for 5-7 minutes. Remove from the oven once the madeleines are golden, well risen and have the characteristic “bump” in the middle.
Recipe for madeleines (2)
Michael Vanheste of Betty’s cookery school’s recipe as featured on BBC Radio 4 Woman’s Hour earlier this year.
Ingredients
60g (2 oz) lightly salted butter
1 medium egg
50 g (1.5 oz) caster sugar
30g (1 oz) plain flour
20g (1/2 oz) ground almonds
1 lemon, zested
1. Preheat the oven to 190 degrees (fan assisted). Gas mark 5.
2. Warm a heavy-based pan over a moderate heat and add the butter. Cook the butter slowly until it has melted, turned a golden colour and gives off a nutty scent, hence the name “beurre noisette”. Remove from the heat and allow to cool slightly.
3. In a metal bowl, whisk the egg with the caster sugar until the mixture has become light and airy. You should be able to briefly leave a figure of eight with the balloon whisk on the surface of the mixture.
4. Sift the flour and ground almonds into the bowl and gently fold into the egg mixture together with the lemon zest. Finally, gently stir the beurre noisette through the mixture. Leave to rest for about an hour if you have the time, this will allow the gluten in the flour to relax, ensuring the cakes are light.
5. Spoon the batter into the madeleine moulds filling them 3/4 full. Bake in the preheated oven for 8-10 minutes or until golden brown and springy to the touch.
6. Leave to cool in the mould for a while until cool enough to handle and then turn out onto a wire rack.
7. Once cooled, store in an airtight container.
Instructions for preparing lime or linden tea
Choose a warm sunny day to gather lime blossoms. Pick your trees carefully, away from roadside dirt and pollution. Using a pair of scissors, snip off the blossoms including the leaflike bracts. Transport the blossoms home carefully ideally in a wicker basket. Lay them out to dry on trays and leave in a warm dry place out of direct sunlight for about a week. Store in an airtight container.
When ready to brew, place 2 tablespoons blossoms (7g) in a teapot, pour on boiling water (I used 835 ml) and leave to infuse for at least 5 minutes. Strain into your favourite china cup, and if liked, sweeten with a little runny honey – choose one which is light and floral in character to complement rather than overpower the flavour of the tisane.
Belarusian breakfast
June 28, 2011 § 2 Comments
The latest in the series making up our Breakfasts of the World project.
What an anonymous and grim-sounding place Belarus is. It’s a landlocked country nestling between Poland and Russia which declared independence from the former Soviet Union in 1991. The landscape is largely flat, marshy and forested and thanks to this and the Soviet legacy its economy is dominated by agriculture and manufacturing.
Whilst researching Belarus and its food I was amused to come across Alby’s travel blog documenting the all-action Italian’s trip there in 2005:
“It’s difficult to give impressions about Belarus. From a certain point of view travelling here it’s nice: no hassle with the policemen and it’s quite safe, but on the opposite the landscape is monotonous and there’re not highlights enough to justify the trip. In addition the food doesn’t help, since it really sucks, but what can push you there is the possibility of a off-of-the-beaten-track travel in a country almost under a dictator that today turns out the most isolated in Europe.”
The dictator he refers to is Alexander Lukashenko who has held the presidency since 1994. Although not at the forefront of news stories, various European countries have imposed economic sanctions as a response to Mr Lukashenko’s authoritarian rule. Things may be changing – there are very recent BBC news reports of protestors defying the ban on public demonstrations in Minsk and making silent, peaceful protests. Something to watch as well as the higher news profile Arab Spring/Summer stories.
Perhaps understandably given travel blogger Alby’s view of the food he ate on his trip, descriptions of Belarusian food are few and far between on the web or from other sources. I did come across this little snippet from an unknown author on http://www.mapsofworld.com/belarus/society-and-culture/
“Belarusian cuisine mostly comprises of meats, vegetables and breads. The staple food of Belarus includes pork, potatoes, cabbages and bread. The diet of a typical Belarusian includes a very light breakfast with two heavy meals and the dinner becomes the largest meal of the day. Both wheat and rye breads are consumed in Belarus society and culture. Drinks are also a very popular part of the culture and society of Belarus.”
So, not much to go on. I decided a light breakfast might mean a cup of tea and a piece of rye bread. So far so good as, thanks to last year’s baking course at Welbeck, homemade 100% rye sourdough is now a regular feature of the breakfast table. It doesn’t appeal to everyone but I enjoy its dense, dark sourness. Rye bread takes well to the addition of fruit and,on a whim, I threw a handful of dried apricots into this particular loaf:

Surely that can’t be it though? I had another hunt around for Belarusian recipes and came up with Draniki, a fried potato pancake which is the de facto national dish of Belarus. I don’t know if draniki are eaten for breakfast in Belarus but that’s how we chose to eat them, with the addition of sour cream and smoked salmon as an atypical decadent touch:

The Draniki turned out pretty well and reminded me of Jewish latkes:

In fact, looking through a few recipes for latkes now, I see that the list of ingredients and the method are practically identical. In common with many simple, traditional recipes, it seems that each person has there own way of making draniki. Some say no flour, some say a little; some grate the potato very finely almost to a purée, some have more distinct potato pieces. The draniki recipe I give below is the one that I used having looked at a number of different Belarusian recipes. What’s important is to get the grated potato as dry as you can by draining off the excess water.
If emerging Belarusian tennis star Victoria Azarenka breakfasts like this today she’ll certainly power through her match to make it the Wimbledon semi finals – I’ll be watching later…
Recipe for draniki
Makes 8-10 individual pancakes serving 4 people in a modest way
Ingredients
6 medium potatoes
1 onion
1 egg, beaten
2 tablespoons flour
flavourless vegetable oil for frying
Grate the potatoes finely into a bowl. Drain off excess water, pressing with kitchen roll to absorb more liquid if necessary. Finely chop the onion and add to the bowl. Add the beaten egg, flour and seasoning to the bowl and stir together vigorously with a wooden spoon to make a thick batter.
Heat 2 tablespoons vegetable oil in a non-stick frying pan until hot but not smoking. Drop in spoonfuls of batter which will form thick round pancakes. Fry until golden brown then flip over and fry on the other side. Drain on kitchen paper to absorb excess oil and serve.
Recipe for rye bread
You can find this in a previous post here
Bajan breakfast
June 15, 2011 § 3 Comments
Bajan being the correct adjective to describe something from Barbados, this was the latest in our series of breakfasts of the world.
At 431 square kilometres, Barbados is a tiny country, approximately one third of the size of my own UK county, Greater Manchester which clocks in at 1,276 square kilometres. It was one of the earliest British colonies with settlers arriving in 1627. The British heritage is evident in the island’s organisation and placenames – it’s divided into parishes each named after a saint. The capital and main city, the very British sounding Bridgetown is in the parish of St Michaels.
Barbados may be a small country but it’s a familiar one. That Desmond Dekker song, sugar, rum, cricket and of course the larger-than-life Rihanna all come immediately to mind. That’s not all that’s larger than life as Barbados can put on a big breakfast. The Bajan breakfast option priced at $22 on the menu from Simply Gigi’s, a hotel restaurant which looks out over Barbados’ Dover Beach reads “Flying Fish, Bakes, Eggs, Onions, Peppers, Plantain”. Much more adventurous sounding than the Full English or bog-standard American options. After a little research and judicious cheating, this is the colourful plate of food I came up with:

First find your flying fish, the favourite fish and symbol of Barbados. This is not as easy as it sounds. I did track down a UK wholesale supplier of frozen flying fish fillets but couldn’t face ordering the industrial-sized minimum order quantity.
Next step was a trip to the cornucopic fish stall on Manchester’s Arndale Market which goes by the very mundane name of “Direct Fisheries”. They had all sorts of exotic species on offer as you can see:

but sadly, flying fish wasn’t one of them – it’s occasionally requested, said the fishmonger, but a bit pricey for most people so they’ve stopped selling it. I opted for a couple of seabass instead. No idea whether it’s like flying fish but it’s a very adaptable fish which works with all sorts of flavours.
The recipe involves a brief period in which the fish fillets are first marinaded/infused with aromatic flavourings (herbs, green pepper and lime juice), then, top side only, lightly coated in egg and breadcrumbs and quickly shallow fried.

Far from being just a regional curiosity, this is a handy little recipe which I’ll definitely be trying again. The marinading period gives the fish zingy flavours and the crispy golden crust gives a bit of fast food type appeal.
Next step was to find out what Bakes were. This is by no means a selection of bread rolls on the side but a little doughy Bajan treat which paradoxically is shallow-fried rather than baked. Bajan chef John Hazzard’s (pronounced Has-Ard rather than as in traffic obstruction, moral or Dukes of) little videoclip on was helpful in showing exactly how to whip up a batch of bakes.
I had planned to put in here the link to John’s handy little video which I found on a site called theholidaychannel.net but sadly the site appears to have been suspended. You’ll just have to take my word for it that he had a great relaxed manner and his lilting accent was rather lovely to listen to as well.
I followed Chef Hazzard’s instructions to the letter and he end result was rather good – a cross between a Scotch pancake and a doughnut. The brown sugar and spices provide flavour and the cornmeal a pleasing chewy crunch. I can see why the islanders get so passionate about bakes.

Sugar has been the mainstay of the Barbadian (or should that be Bajan?) economy for centuries so it seemed fitting to round off breakfast with something sweet. My choice was Bajan sweet bread, not a true bread but a coconut cake baked in a loaf tin. This beauty is made with refined sugar rather than what we know now as Barbados or Muscovado sugar, it’s studded with garish glacé cherries and raisins and has extra sugar and coconut strip concealed within the cake like so:

With all that refined sugar, coconut and artificially coloured dried fruit it could almost be a Scottish delicacy couldn’t it?

The end result looked impressive in a bulky golden brown homespun kind of way but sadly it was a bit disappointing. It was a bit dry and oversweet, it crumbled rather than slicing neatly, the coconut stuffing fell out rather than maintaining structural integrity and it went stale within 24 hours. For that reason I’m not going to painstakingly copy out the recipe here. If you’re interested, here’s where I found my recipe, a Paul Hollywood (not so) special – he’s the sleek silver haired judge on last year’s BBC programme “Great British Bake Off” you may recall.
http://uktv.co.uk/food/recipe/aid/515131
Recipe for fried flying fish fillets
I found this recipe in a Barbados travel blog http://barbadostravel.squarespace.com so thank you to blog author Linda Thompkins.
Works well for other medium to large fillets of firm white fish such as seabass.
Serves 4 (generous portions)
Ingredients
8 flying fish fillets
1 small onion
1 small green pepper, chopped
1 teaspoon chopped thyme leaves
t tablespoon chopped parsley
salt and pepper
juice of a lime
1 egg, beaten
dry natural breadcrumbs
oil for frying
to serve, lime wedges
Mix the seasoning ingredients together and spread over the meaty side of the fish. Leave for about 1 hour. Remove the fish from the seasoning mix, pat it dry it on kitchen paper. Dip the meaty side of the fish fish into the beaten egg and then into the breadcrumbs. Fry gently in a little oil for 3-4 minutes on each side until cooked through and crumbed surface is crisp and golden. Serve with lime wedges.
Recipe for Bajan bakes
Bajan chef John Hazzard’s recipe. John has twice been awarded the title “Caribbean Chef of the Year” so he should know what he’s talking about.
Ingredients
1 cup of plain flour
4 oz cornmeal (polenta)
3 oz brown sugar (I used demerara)
1/2 teaspoon salt
1/2 teaspoon baking powder
pinch allspice
pinch freshly grated nutmeg
6 oz water
to fry, 2 tablespoons flavourless vegetable oil
Combine the first 7 ingredients in a mixing bowl. Add most but not all of the water and mix well with a spoon to form a batter with a stiff dropping consistency. Add the reserved water if required to achieve the right consistency.
Heat the oil in a frying plan until it reaches 300 degrees Fahrenheit (what I would call a medium heat)
Drop generous spoonfuls of the mixture into the frying pan and cook for a few minutes on each side until golden brown.
Drain on kitchen paper and serve.
Weird fish
June 11, 2011 § Leave a comment

The weird fish in question is a ling, a member of the cod family. Rick Stein writes about ling in his “Taste of the Sea” like this:
“Ling is one of those underrated fish which, in addition to being reasonably flavoured, is also firm in texture – a cheap version of monkfish, if you like. It is an extraordinary looking fish which could easily be mistaken for an eel, so long and sinuous is its appearance.”
He’s certainly right about how it looks as the picture above, snapped at Samantha K’s fish shack on the harbour at Southwold, shows.
Over the years we’ve gently fallen in to the routine established by my husband’s family of joining a large family party at Southwold on the Suffolk coast. We eat out some of the time but for the most part take turns to cook an evening meal served on the big kitchen table.
Last Thursday, it was my turn to cook so, being by the seaside, I decided to cook fish. One of the pleasures of a holiday in Southwold is wandering along the Blackshore Harbour waterfront to buy the freshest possible fish without guilt – it’s caught sustainably on lines by small day boats which supply the harbourside shacks in the most direct way possible.
You have a choice of 3 fish shacks to buy from. My favourite is the smallest and simplest of the lot, Samantha K’s:

The Sole Bay Fish Company, a pebble’s throw away is good too and clearly has a superior PR machine. Blimey, you can even find Jasper Conran extolling its virtues in a Guardian Online article…

Having looked at what was on offer, I couldn’t resist choosing the impressive and rather scary whole ling. All mine for £24. The fish guy kindly filleted the monster for me while Tim and I slipped off to the Harbour Tearooms for an early morning coffee and toasted teacake.
I chose a simple Indian-inspired recipe to show off the fish at its best – the fish fillets are briefly marinaded in lemon juice plus added aromatics, then coated in lots of chopped fresh herbs before being baked for 20 minutes in a hot oven.

I included wild fennel which I found growing wild on the beach in my fresh herb mix for a truly local flavour:

It’s a very adaptable recipe which would work well with all sorts of white fish and the half hour marinading period gives the cook a perfect excuse to slip off to the local pub for a sundowner.
Cooking with fish this fresh was a real revelation. The raw fillets on the board didn’t smell fishy at all, there was just the faintest seaweedy smell of the sea. The cooked fish flaked easily, was an amazing pearly white and the taste was clean, fresh and very summery. So yes, Rick, I agree with you about the fish being underrated and reasonably flavoured but beg to differ on its texture being similar to monkfish – it’s much closer to the flaky texture of cod. A cheaper version of monkfish really would have been too good to be true.
I served the fish with spiced basmati rice, an Indian style grated carrot salad, cucumber raita and some simply steamed greens. A shameless attempt to persuade some of the curry fans in our family to give fresh fish a try – it seems to have worked:

Recipe for fish baked with herbs
I’ve adapted this recipe from one given in Thane Prince’s “Summer Cook”, a slim paperback volume perfect for slipping into your bag if you’re heading off on a self-catering holiday. Her recipe is called Pudina Macchi and she attributes it to Indian chef Satish Arora. Pudina is the Hindi word for mint, a key ingredient in this summery, fresh tasting and straightforward dish.
Serves 4
Ingredients
4 square chunky pieces of white fish fillet, one per person, each weighing about 6 oz so approx one and a half pounds in total. I left the skin on to help the fish keep its shape. I used ling but cod, haddock or any similar variety would work fine in this adaptable recipe
2 cloves garlic, peeled and roughly chopped
1 teaspoon ground coriander
1 fresh red medium hot chilli deseeded and roughly chopped (adjust quantity of chilli to suit your group’s capacity for heat)
juice of 1 lemon
small bunch each of mint, coriander and an aniseedy herb such as fennel or dill
2 tablespoons light olive oil
In a shallow glazed ceramic dish which which will hold the fish fillets snugly without overlapping to much mix together the garlic, coriander, chilli and lemon juice to form a marinade. Place the fish in the marinade flesh side down, skin side up, cover with cling film, refrigerate and leave in the marinade for betweeh 30 minutes and 1 hour. Don’t leave it longer than this as the lemon juice “cooks” the fish and you’ll end up with a ceviche on your hands rather than fish ready for cooking.
Meanwhile, prepare the herbs. Remove the leaves from the mint stalks and chop roughly. The coriander and fennel/dill can be chopped just as they are as their stems are tender. Mix together the chopped herbs.
Once the marinading period is over, remove the fish from the marinade and discard the liquid. Press the flesh side of the fish into the herb mixture aiming for a really thick generous herb coating. Place the fish skin side down, herb side up in a shallow baking dish.
Drizzle the light olive oil over the fish and bake in a preheated oven at 200 degrees C for approximately 20 minutes. Test the fish for doneness as it approaches the end of its cooking time by pressing with the point of sharp knife feeling for the difference in resistance between just cooked and slightly underdone fish.
Bangladeshi breakfast
May 27, 2011 § 1 Comment
The latest in our series breakfasts of the world (https://rhubarbfool.co.uk/breakfasts-of-the-world-project/) took us to the Indian subcontinent, specifically to Bangladesh. The country is a strange mix of the familiar and the exotic. Most of the UK’s so-called Indian restaurants are in fact Bangladeshi and there is a substantial Bangladeshi immigrant community in the UK centred around London’s Brick Lane (hence the title of Monica Ali’s novel).
Looking at a map of Bangladesh, the place names are redolent of the history of British colonialism: Dacca/Dhaka, Chittagong and Cox’s Bazar. It is claimed that the beach at Cox’s Bazar, 125km of natural sand, is the longest in the world.
Thinking about Bangladesh, what immediately springs to mind are floods. Looking at satellite images of the country, Bangladesh’s predicament becomes painfully obvious – the country sits astride an enormous river delta at the confluence of the Ganges, Brahmaputra and Meghna rivers. The plus side is that the country benefits from incredibly fertile alluvial soils. All sorts of grains and vegetables can be grown here and small-scale agriculture occupies the majority of the population. This is reflected in the country’s staple cuisine – simple vegetarian meals capable of being cooked over a single gas flame or open fire.

“A typical Bangladeshi breakfast consists of Roti (flat bread), Paratha (kind of thick pancake) with Sabji (mix of overcooked vegetables that is often cold) and Dahl (lentil sauce that also is often cold). A breakfast for two persons sets you back around 30 eurocents.”
So wrote Dutch couple Ivonne and Edwin on their trip to Bangladesh’s capital city, Dhaka, in 2008. You can read the full unvarnished account of their trip to Bangladesh, and their other foreign travels here:
http://www.babakoto.eu/Articles/Bangladesh/Table-manners/Table-manners-English.htm
(Thanks Ivonne & Edwin for this – and for helpfully writing in English as well as your native Dutch)
So that made the breakfast menu for recreation at home very simple. My modification was to cook a single type of bread rather than both the Roti and Parathas (aka chapatis). Oh, and I added a little yoghurt to the breakfast table, along with fresh mangoes and the raw palm sugar eaten in the Indian subcontinent known as jaggery. The national fruit of Bangladesh is the jackfruit: I scoured the shops of Manchester’s “curry mile” to find one but in vain – maybe it’s out of season or maybe they’re not favoured by the curry mile community which is predominantly Pakistani and North Indian rather than Bangladeshi. Fortunately, finding chana dal and chapati flour was straighforward enough and added a touch of authenticity to breakfast. These products and more can be found at WH Lung oriental supermarket on Upper Brook Street, Manchester (see contact details below). There’s easy parking a real treasure trove of exotic ingredients from all over Asia, not just China. I used to work round the corner from here and when dealing with a knotty problem would wander the aisles in here to try and solve it.
I already had recipes for chapatis and dal, so it was a simple matter of typing “vegetable sabji recipe” into my search engine to come up with this recipe:
http://www.ifood.tv/recipe/vegetable_sabzi_for_roti
This sabzi recipe (the spellings sabji/sabzi transliterated from the Bengali language seem to be interchangeable) is essentially, a selection of diced vegetables (potato, cabbage, aubergine, peas, beans and so on) boiled in water and milk, flavoured with strong spices like chilli, cumin and aniseed. I’m not going to write out the recipe in full as, in all honesty, I won’t be making it again. It tasted rather less than the sum of its parts and the vegetables were soggy to boot. Ivonne and Edwin were right about this, but at least my sabji had the virtue of being piping hot.

In contrast the dal and chapatis were delicious – I’d happily eat this as a regular breakfast – much tastier and more nutritious than the ubiquitous bowl of industrial refined salty cereal with milk so often found in the West.
My dal and chapati recipes both come from a well thumbed copy of Madhur Jaffrey’s BBC book “Indian Cookery”. I love dal and always order it in Indian restaurants to add a little lubrication to my curry and rice. It’s simplicity itself to make and the addition to the dal at the end of its cooking time of garlic, cumin and cayenne sizzled hot oil really lifts the flavour.

The chapatis are made from just flour and water, but by dint of a little kitchen alchemy, become delicious toasty flatbreads for perfect for scooping up the vegetables and dal. The dough is first formed into balls:

The balls are then rolled into flatbreads and cooked in a hot dry frying pan before being puffed up and ever so slightly charred over a naked gas flame. A little drama over the breakfast table. The photo shows husband Tim’s flambé skills:

Recipe for chapatis
From Madhur Jaffrey’s BBC book “Indian Cookery”. Makes about 15.
Ingredients
9oz (250g) sieved wheatmeal flour (chapati flour) plus extra for dusting
6 fl oz (175ml) water (exact quantity will vary according to your flour and local atmospheric conditions)

Put the flour in a bowl. Slowly add the water, gathering the flour as you do so, to form a soft dough. Knead the dough for 6-8 minutes or until it is smooth. Put the dough in a bowl. Cover with a damp cloth and leave for half an hour.
Set a cast iron frying pan to heat over a medium-low flame for 10 minutes. When it is very hot, turn the heat to low.
Knead the dough again and divide it roughly into 15 parts. It will be fairly sticky so rub your hands with a little flour when handling it.
Take one part of the dough and form it into a ball. Flour your work surface generously and roll the ball in it. Press down on the ball to make a patty. Now roll this patty out, dusting it very frequently with flour, until it is about 14cm in diameter. Pick up this chapati and pat it between your hands to shake off extra flour and then slap it onto the hot frying pan. Let it cook on low heat for about a minute. Its underside should develop white spots. Turn the chapati over using either your fingers or a pair of tongs and cook for about half a minute on the second side. Take the pan off the stove and put the chapati directly on top of the low flame. It should (no, will, ed) puff up in seconds.
Turn the chapati over and let the second side sit on the flame for a few seconds.
Ms Jaffrey suggests piling the cooked chapatis into a napkin lined bowl – I’m afraid we scoffed them as soon as they were cooked.
Recipe for Chana dal – yellow split peas
Another recipe from Madhur Jaffrey’s BBC book “Indian Cookery”. Serves 4-6
Ingredients
8 oz (225g) chana dal – yellow split peas/lentils obtainable from Indian grocers
2 pints (1.15 litres) water
1/2 teaspoon ground turmeric
2 thin slices unpeeled ginger root
3/4- 1tsp salt
1/4 tsp garam masala
3 tbsp ghee or vegetable oil
1/2 tsp whole cumin seeds
1-2 cloves garlic, peeled and chopped
1/4-1/2 tsp red chilli powder

Put the dal into a heavy pot along with the water. Bring to a boil and remove any surface scum. Add the turmeric and ginger. Cover, leaving the lid just very slightly ajar, turn the heat to low and simmer gently for 1 and 1/2 hours or until the dal is tender. Stir every 5 minutes or so during the last half hour of cooking to prevent sticking. Add the salt and garam masala to the dal. Stir to mix.
Heat the ghee or oil in a small frying pan over a medium flame. When hot, put in the cumin seeds. A couple of seconds later, put in the garlic. Stir and fry until the garlic pieces are lightly browned. Put the chilli powder into the pan. Immediately, lift the pan off the heat and pour its entire contents, ghee/oil and spices into the pot with the dal. Stir to mix.
Contact details
WH Lung
81-97 Upper Brook Street
Manchester M13 9TX
0161 274 3177
Parisian dark (chocolate) secrets
May 22, 2011 § 1 Comment
Daybreak in Paris last Sunday. The public shame. The disgrace. The furtive attempts to conceal the evidence. The seedy story of Dominique Strauss-Kahn’s New York exploits hits the newsstands perhaps?
No, this was me, rising at dawn to try and dispose of 1kg best quality Tanzanian 75% cocoa solids chocolate, a further kg of unsalted alpine butter, lashings of organic double cream and a generous slug of cognac, the whole lot coalesced into a greasy solidified mass of split ganache which should have graced a celebratory chocolate cake, the centrepiece of my cousin Pierre’s birthday party the night before. I finally found an empty public bin by a bus stop, deposited my sorry double-bagged chocolate mess and jogged away, lightened in load and spirit.
So what was the occasion?
A Saturday Night Fever birthday party to celebrate a Significant Birthday. The cake to match was a scaled down (2 layers rather than 3) version of spectacular chocolate-raspberry wedding cake selected from my new favourite baking book “Sky High: Irresistible Triple Layer Cakes” by Alisa Huntsman and Peter Wynne.

The book is American through and through and completely over the top in terms of the sheer number of generously proportioned and imaginatively filled and frosted celebratory cakes it describes. Other bloggers have raved about it so I just had to get hold of a copy. Apart from the Bittersweet Brandied Ganache débacle, it hasn’t disappointed.

The book’s strengths are the seductiveness of its drop-dead gorgeous full page glossy colour photos, its generosity of spirit and the imagination of its flavour combinations. Where it falls short is perhaps in a lack of precision – for that you have to go to Rose Levy Beranbaum’s Cake Bible, another American classic on my bookshelf.
It all started so well. The choice of a classic American chocolate cake, seemed perfect for a party for a chocoholic into American disco nostalgia. The edible elements needed for the cake were 6 layers of Chocolate Butter Cake, generous quantities of seedless raspberry jam to sandwich the layers together, an unspeakably large quantity of Bittersweet Brandied Ganache to frost and a punnet of ripe raspberries scattered over the top to finish.
I have neither the time nor the space to give the complete recipe here – you’ll have to buy the book for that – the instructions for the full 3 tier wedding cake go on for 6 pages. However I do give the recipe for the Lenôtre chocolate ganache which eventually saved the day I’ve tried it 3 times now (albeit using European ingredients) and it’s been spot-on every time. A ganache to lean on, so to speak.
Here is the end result, finished just minutes before the first guests arrived at 7.30 pm. Not bad given the stresses of the afternoon of which more later…

The baking of the cake itself was fine. I followed the recipe to the letter, eschewing my favourite Green & Black’s cocoa powder in favour of Hershey’s obtained here in the UK via Amazon Marketplace.

This wasn’t just for reasons of American authenticity. The recipe specifies a non-Dutch Process cocoa powder in order to ensure the right chemical reaction with the recipe’s raising agent, bicarbonate of soda, to make the cake rise properly. Reading the Green & Black’s small print, you’ll see that this cocoa powder has been through the so-called Dutch process whereby the beans are treated with an alkaline agent to produce a milder flavour and, counter-intuitively, a darker colour. The Hershey’s stuff is paler but in theory contains more “roasty, caramel-like molecules…and…astringent, bitter, phenolics” (quoting from Harold McGee’s indispensable kitchen reference work On Food and Cooking).

The recipe is not a chocolate sponge made by the familiar creaming method but requires softened butter and buttermilk to be beaten into the sifted dry ingredients before the eggs and more liquid in the form of strong coffee are incorporated into the mixture. I would not attempt this recipe without the help of a Kenwood or Kitchenaid-type mixer as it requires a lot of heavy-duty beating.
After the addition of butter and buttermilk the mixture looks like a moist and friable garden loam:

Once the eggs and coffee were incorporated, it became soft, thick and lusciously silky, like a chocolate version of mayonnaise:

Baked, the cake rose well but not too aggressively. Don’t worry, the dome that forms in the oven settles down once the cake is cooled leaving a firm, glossy and flat cake which holds its shape well, eminently well-suited to the architectural task ahead.

The finished cake was firm, rich, dense and crumbly. It had an intense chocolate flavour pointed up by the addition of cinnamon and coffee in the recipe though neither flavour is perceptible. This is a cake designed for filling and frosting as eaten on its own it would be a tad dry.
The cakes were mixed and baked first thing Friday morning. Once cooled and carefully wrapped and packed, the cake’s 6 layers travelled as hand luggage, sitting obediently beside me on the short Flybe flight to Paris. Cake assembly began in situ at the party venue at about 2.00pm on Saturday afternoon. First the layers were spread with seedless raspberry jam (Tiptree brand), then sandwiched together with each triple layer cake having a slim silver cardboard base:

If I were to make this cake again, I would be more generous with the raspberry jam and I would leave the cake to mature overnight as the recipe instructs. The quantity of jam shown in the picture may look generous but is far less than the recipe suggests and when the cake was cut into later that evening, it had practically disappeared. More jam would have made for a moister cake I think as, being self-critical, it was just a little on the dry side (easily remedied on the night by serving it with extra fresh raspberries and a dollop of crème fraîche).
The next potentially tricky step was the positioning of the 4 transparent plastic dowels which supported the top layer. I measured, cut to size and positioned the dowels. This bit of the assembly worked like a dream – a relief as I’d never worked with dowels before. I know you shouldn’t experiment when baking for a special occasion, especially someone else’s special occasion, but I just couldn’t help myself:

Now for the ganache. How hard could it be to whip up a batch of ganache and slather it on all over the cake? I’d preweighed all the ingredients so it was quick work to set the vast quantities of best quality dark chocolate and unsalted butter (a kilogramme of each no less) to melt over a pan of barely simmering water.
I was patient and careful, never letting the mixture become too warm, not letting a drop of water near it lest it seize up and going easy on the stirring. On the home strait now. All I had to do was whisk in the warmed cream, then the brandy, just like the recipe said and I was home and dry. Blithely, I tipped them in and whisked away. That’s when disaster struck as the previously smooth glossy mix began to separate out into particulates and oil before my very eyes. 30 minutes and frantic whisking and cooling later, I pronounced the mixture officially beyond redemption, tipped it into a big plastic box for subsequent disposal and confessed my error to my slightly alarmed host and his family. The public shame and humiliation!
Having checked Harold McGee subsequently, I think that where I went wrong was in using chocolate with too high a cocoa content – 75% in my case. When liquid is added, the cocoa solids absorb the water releasing the fats out of emulsion and hey presto the mixture splits. His advice is to follow a recipe which sets out precisely the fat contents of the various ingredients and to follow it to the letter. The Sky High recipe was a bit on the sketchy side – ie just bittersweet chocolate, heavy cream and American ingredients are not quite the same as those we can buy in Europe which can make for misunderstandings.
Back to the party. Remembering Corporal Jones’ advice from Dad’s Army (Don’t Panic), using my host’s computer, I quickly retrieved the tried, tested and reassuringly precise ganache recipe I’d learned at the Lenôtre cookery school in Paris over Easter. Next, an emergency dash to the local supermarket for yet more cream and chocolate (just 600g of chocolate this time as 1kg was way too much, even for the most enthusiastic chocoholic) and I was back in business:

I followed the Lenôtre recipe as accurately as I could, though without scales or thermometer to hand I had rely on educated guesswork and prayer. To my immense relief, the ganache behaved itself perfectly and after 20 minutes’ or so cooling, it had reached the perfect consistency for spreading. The first house guests were just arriving at this point so I smiled and pretended to be part of the evening’s entertainment, a sort of cake artist installation.
The final step was piping a bold decorative border of what I can best describe as chocolate blobs to hide the joins between cake and board. Very effective though I say so myself. By the time the cake was served, the blobs had firmed up to become in effect mini chocolate truffles which could be detached and discreetly popped into the mouth while the cake was being sliced and served. Cook’s prerogative!

Cake complete, it was time to enjoy the party with the host rather than the cake the centre of attention – just as it should be. Great party Peter!

Recipe for foolproof chocolate ganache
With thanks to Philippe from the Lenôtre cookery school in Paris. I scaled this up by a factor of three to use to coat the birthday cake which comprised a 7 inch square stacked onto a 9 inch square.
Ingredients
200g cream 32% fat (equates to UK whipping cream – this is liquid cream not thick crème fraîche)
250g dark chocolate 50% cocoa solids (buttons are ideal for quick melting but bar broken into square is OK too)
50g unsalted butter
Heat the cream to 85 degrees C. Break up the chocolate and place into a large heatproof bowl. Pour over the hot cream and leave to stand for 10 minutes. Once the chocolate has melted, stir with a rubber spatula to incorporate the cream into the chocolate. Keep a ball of molten chocolate in the centre whilst incorporating the cream at the edges of the chocolate. Reduce the temperature to 30 degrees C then beat in the butter previously softened and tempered at 22 degrees C.
Cover with cling film and reduce the temperature to 17 degrees C when it will be the right consistency to use.
The green asparagus and the white
May 9, 2011 § Leave a comment
Yes, you guessed it – curiosity piqued by the current BBC adaption of “The Crimson Petal and the White” I’ve finally got round to reading Michel Faber’s racy historical novel . It made a perfect holiday read over Easter in France, punctuating the main activities of exploring the Forêt de Fontainebleau and thinking about the next meal.
I was reminded of the febrile atmosphere of the novel whilst strolling past a curiously mounded asparagus bed on the outskirts of the village where we were staying:

The French prefer their asparagus white with the tips displaying just a tinge of purple. This is achieved by banking the soil up around each asparagus crown to blanch the growing shoots. Pausing beside the weird dusty anthills concealing the exclusively male crowns beneath, you can practically hear the shoots growing as they thrust upwards towards the source of warmth and light. I felt positively faint after a few minutes gazing at these shoots in the lazy afternoon sunshine.

The Germans too prefer the thicky juicy spears of white asparagus (Spargel in German). Despite their buttoned-up reputation, they go a little bit crazy during asparagus season (“Spargelzeit”) when asparagus festivals and special restaurant menus abound. The thick juicy white spears are simply served either on their own or with boiled potatoes and ham and always with generous pools of yellow buttery hollandaise sauce.
Whilst in Dusseldorf during Spargelzeit I was intrigued to find an asparagus ice cream sundae on the menu. This turned out to be a spectacular trompe l’oeil affair of piped vanilla and palest pistachio ice cream (to imitate the spears) topped with chilled vanilla sauce to mimic the hollandaise. Only in Germany…
We Brits prefer the arguably better flavoured and certainly more decorous green asparagus. No stonking purple-tipped white shoots the width of a baby’s arm here thank you! There is the added plus point for the lazy cook that tender shoots of green asparagus don’t require peeling unlike their continental cousins.
So what does a field of English green asparagus look like? I’d fondly imagined rows upon rows of waving green fronds but in fact the banked-up rows of dry soil I spotted in Suffolk don’t look radically different from their French counterparts:

I took this photo in the sandy fields near the coast around Wrentham. These spears were destined for the packing sheds of Sea Breeze Asparagus http://www.seabreezeasparagus.co.uk/ who supply by mail order all over the country and have come up with the delightful idea of sending an edible bouquet of perfect top grade asparagus spears to your loved one. It’s got to be better than a tired bunch of petrol station flowers hasn’t it?
So, what to do if you find yourself with a bunch of either the green asparagus or the white and feel inclined to do a little more with it than the usual steaming and serving with melted butter?
Having trawled through my collection of recipe books and notes, here are a couple of recipes that appeal to me, the first suitable for green asparagus and the second for white.
Recipe for grilled asparagus with blood oranges and tapenade toast
Serves 4
From Alice Waters’ inspirational and beautifully illustrated book “Chez Panisse Vegetables”. This is her typically relaxed Californian take on a classic combination of asparagus and oranges. Classical French cuisine does this by primly serving steamed asparagus presented in white napkin with the orange flavoured hollandaise known as Sauce Maltaise. All very well but a tad formal. In contrast, just reading Alice Waters’ recipe transports you to Californian wine country and the perfect al fresco supper…
Ingredients
For the tapenade
2 cups niçoise (black) olives, pitted
4 salt-packed anchovy fillets
1 clove garlic
salt
2 tablespoons capers
2 teaspoons lemon juice
1/3 cup extra-virgin olive oil
For the rest of the dish
1 shallot
3 blood oranges
1 and 1/2 teaspoons balsamic vinegar
1/2 teaspoon red wine vinegar
extra-virgin olive oil
salt and pepper
1 and 1/2 pounds fat (green) asparagus – 25 to 30 spears
4 slices country-style bread
First make the tapenade. Peel and smash the garlic with a pinch of salt. Using a food processor, pulse together the olive. anchovies, garlic and capers to make a coarse paste. Add the lemon juice and then gradually the olive oil, pulsing until completely incorporated. Put into a small bowl and set aside.
Peel and chop the shallot finely and macerate for 30 minutes in the juice of half an orange and the balsamic and red wine vinegars. Whisk in the olive oil to make a vinaigrette, and season with salt and pepper.
Peel just the zest from one of the oranges, chop it very fine and add to the vinaigrette. Cut away all the rind and pith from 2 and a half oranges (one half was used earlier for juicing) and slice them crosswise thinly into rounds.
Parboil and drain the asparagus. Brush lightly with olive oil, salt lightly and grill the asparagus ideally over charcoal or a wood fire for about 6 minutes over medium heat, turning often. At the same time, grill the bread.
When the bread is toasted, cut the slices into thirds and spread with tapenade. Arrange the asparagus on a platter with the orange slices on top. Drizzle the vinaigrette over and garnish with the tapenade toast.
Recipe for white asparagus and new potato salad with mustard and walnut vinaigrette
Serves 8 as a side dish
An idea I came up with whilst in France this easter. A good way of stretching a single bunch of asparagus into a dish to feed more than one or two people. The combination of white on white looks good, the chives add both colour and delicate onion flavour. The walnut oil imparts a delicious flavour to the salad without overpowering either the asparagus or the new potatoes. Reading the list of ingredients, I’m transported away from my computer screen in grey and cloudy Manchester to a sunny lunch table in France once more.
Ingredients
1 bunch white asparagus (500g)
650g small new potatoes
small bunch chives
For the dressing
3 tablespoons light olive oil
3 tablespoons walnut or hazelnut oil
1 tablespoon white balsamic vinegar or white wine vinegar plus a teaspoon of sugar
1 tablespoon Dijon mustard
squeeze of lemon juice to taste
salt and freshly ground black pepper.
Wash, peel and trim the white asparagus. Steam for 10-15 minutes until soft but not mushy. Leave to cool, then slice each spear on the bias into 3 or 4 pieces. Set aside.
Prepare the dressing by whisking together all the ingredients. Taste and check for flavour and seasoning.
Scrub the new potatoes (no need to peel) and steam for 10 minutes or until cooked through (test with the point of a knife).
As soon as the potatoes are cool enough to handle, slice into chunks and tip into a bowl. Pour three quarters of the dressing over and stir. Leave for 5-10 minutes to allow the warm potatoes to absorb the dressing.
Add the reserved pieces of asparagus, the remaining dressing and a generous quantity of snipped chives to the bowl and stir carefully to distribute.
Transfer to a serving dish lined with little gem or baby cos lettuce leaves.
Contact details for Seabreeze Asparagus
Alison Cooper
Priory Road Site
Priory Road
Wrentham Beccles
NR34 7LR
Phone number 01502675330
E-mail address alison@wveg.co.uk
http://www.seabreezeasparagus.co.uk
Two pretty lazy tarts…
May 1, 2011 § Leave a comment
No, not a reference to Princesses Beatrice and Eugenie amongst the guests at That Wedding, but a pair of recipes to make the most of newly arrived asparagus. Both have the advantage that you can feed some 6 people with a single prized bunch.

Both recipes are dead simple as you start with bought puff pastry. Now that the all-butter stuff is readily available, there’s really no good reason to make your own, unless of course it’s your idea of fun.
The first recipe, pairing the asparagus with slow cooked sweet shallots, unctuous melted taleggio cheese and serrano ham, comes from an old issue of House and Garden magazine circa spring 2005 I think. I carefully clipped the recipe out a few years ago after first making this tart. I then lost the cutting and was never able to remember the ingredients so I was thrilled that it turned up again when I cleared out some old boxes of papers the other week.

The second tart came from an article by Lucas Hollweg in the Times Online May 2008. I came across it when searching for my first recipe, lost then but now found. It’s different but equally good, combining asparagus with garlic, cream and goats’ cheese, the flavours pointed up with a little mint and lemon zest.

The only potential technical pitfall with either recipe is avoiding the dreaded soggy bottom (Princesses, take note…). Making sure your oven is good and hot, and using shallow metal baking sheets should help avoid this problem.
Either tart would make a lovely light spring lunch served with a green salad. And either would be perfect for the group occasion when you need to bring along a dish for a buffet supper or posh picnic – a bit festive, can be made in advance, good warm or cold, tastes fantastic, easy to cut into portions and serve – what more can you ask?
Recipe for asparagus, basil, serrano ham and taleggio tart
With thanks to House and Garden magazine.
You can use either green or white asparagus but be sure to peel white asparagus first – this isn’t necessary with the green stuff. You can substitute other oozy soft-rinded cheeses if you can’t get hold of Taleggio. I’ve made this recipe successfully with slices of Reblochon and Tomme de Brébis previously as that was I had to hand in the fridge. Slices of a well flavoured Brie or Camembert would probably be good too. You can also substitute other cured hams for the serrano, or even leave the ham out if you’re cooking for a gathering including vegetarians.
Ingredients
450g puff pastry
4 tablespoons olive oil
250g shallots or mild onions, sliced
1 tablespoon finely sliced basil leaves
salt and freshly ground black pepper
500g fresh asparagus
85g finely sliced serrano ham
225g Taleggio cheese
Basil leaves to garnish
Heat the oven to 220 degrees C, gas mark 7. Roll out the pastry into a thin rectangle 35cm by 25cm and slip onto a baking sheet. Take a sharp knife and lightly score the pastry about 2cm inside the pastry edge, so that create a rim for the tart. Prick the internal rectangle of the pastry with a fork and chill for 30 minutes.

Heat the oil in a large frying pan and gently sauté the shallots until they are meltingly soft. Mix in the basil, season to taste and set aside. Meanwhile, trim the asparagus removing the tough ends of the stalks (peel if using white asparagus), then drop into a pan of boiling salted water; cook for about 5 minutes, or until al dente. Drain and spread out on kitchen paper to cool.
Spread the shallots over the pastry within the rim. Arrange the asparagus on top, then tear the ham into strips and scatter over the asparagus mixture. Cut the cheese into fine slices (the original recipe suggests cutting off the rind but I think this is unnecessary and wasteful). Dot over the filling.

Immediately place in the centre of the oven and bake for about 10 minutes, then reduce the temperature to 200 degrees C, gas mark 6 and cook for a further 10 minutes, or until the pastry is crisp and the cheese bubbling. Serve garnished with a few basil leaves.
Recipe for asparagus, lemon and goat’s cheese tart
With thanks to Lucas Hollweg for this recipe which appeared in The Times Online in May 2008.
Again, you can use either green or white asparagus but be sure to peel the white stuff first as otherwise it will be inedibly woody.
Ingredients
500g asparagus
250g puff pastry
2 cloves garlic
100ml double cream
zest of 1 lemon
150g soft white goat’s cheese
salt and pepper
1 egg
small handful mint leaves
olive oil
Throw the asparagus into a pan of boiling water. Reduce to a simmer and cook for 4-7 minutes until just soft. Tip into a colander and refresh under the cold tap.

Preheat the oven to 220 degrees C/425 F/gas mark 7. Roll the puff pastry into a rough circle about 28cm diameter. Put it onto a large baking sheet, then use the tip of a knife to score a line all the way around, about 1cm from the edge. Don’t cut all the way through; it’s just to form a rim for the tart. Prick the centre with a fork. Cook in the oven for 5 minutes until it starts to rise and brown.
Meanwhile, mix together the garlic, cream, lemon zest and half the cheese. Season, then beat in the egg. Remove the pastry from the oven and flatten the centre inside the border to make a well. Pour in the cream mixture, being careful that it doesn’t spill over the edge. Arrange the asparagus randomly over the top and scatter with the remaining goat’s cheese and the mint leaves. Add a drizzle of olive oil and some salt and pepper.
Turn the oven down to 200 degrees C/400 degrees F/gas mark 6 and bake for 20-25 minutes more until the pastry is crisp. Drizzle over a little more oil and leave for 20 minutes to cool.
A dish fit for princess…?
STOP PRESS – Pleased to see that an asparagus and watercress tart featured on the menu at That Wedding Reception
In search of the real Pithiviers
April 29, 2011 § 2 Comments
You have to wonder what the point is of the tourist office in Pithiviers. After 10 minutes’ browsing the leaflets for various châteaux, parks and gardens I was none the wiser about the two things for which Pithiviers is most famous. The first is its eponymous cake, an indulgent confection of buttery puff pastry with an almond filling, and the second is its notorious second world war transit camp where French Jews were rounded up and detained before being sent on to Auschwitz.

We were spending the easter holidays in France based in and around Paris and Fontainebleau. On a sunny Monday morning we decided over breakfast to head off to Pithiviers, a typical French market town some 50 miles South of Paris.
Q: Why?
A: a rather frivolous excursion to try and track down a genuine Pithiviers pastry.
The less frivolous outcome was that we learned a little about an unedifying episode in French history, one that the tourist office was keen to airbrush away. I’d read about the French internment camps before, specifically Drancy on the outskirts of Paris. This was not in a history book but in Sebastian Faulks’ moving wartime novel “Charlotte Gray”.
It was another novelist, Irène Némirovsky, the author of the sensational “Suite Française” who’s partly responsible for putting Pithiviers on the map, for all the wrong reasons. Némirovsky was interned here before being sent to Auschwitz where she died in 1942 leaving her epic novel unfinished, its manuscript undiscovered until some 60 years later.
Back to the original purpose of our visit. The Pithiviers has a special place in our family history as I ate a stunning chocolate Pithiviers at London’s Bibendum restaurant the night before our eldest son George was born. It features in chef proprietor Simon Hopkinson’s book “Roast Chicken and Other Stories” if you fancy making one at home.
Finding a Pithiviers proved surprisingly easy. Having found a parking space in a sunny square (the Mail Ouest) in the centre, we found ourselves just across the road from an inviting-looking pâtisserie, “À la Renommée” (the Renowned).
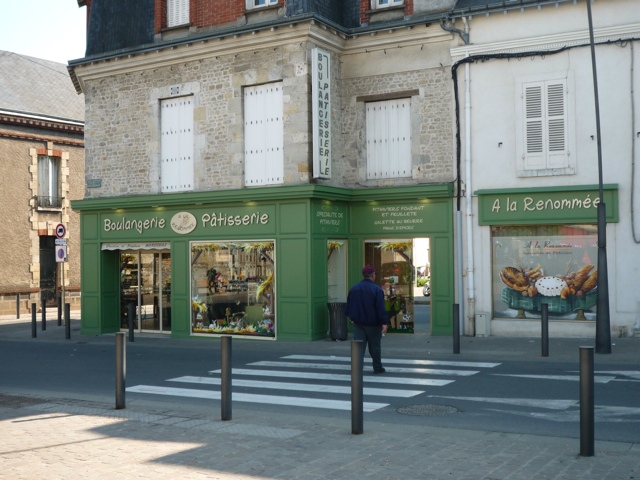
Heading to the window, we realised we’d struck lucky with a picture perfect example of a Pithiviers feuilleté (puff pastry) with its distinctive scalloped border and sculpted lid not just once:

but twice, with its more gaudy iced cousin, the Pithiviers fondant:

Of course, we had to buy both, the fondant version to enjoy there and then with a cup of coffee and the feuilleté version later after our evening meal.
The fondant Pithiviers, with its virginal white icing and old school glacé cherry and crystallised angelica decoration, bore more than a passing resemblance to a Mr Kipling Cherry Bakewell, but without the pastry case. Beneath the icing was a dense and crumbly almond sponge, satisfying in its simplicity. Apparently this is the original version of the cake, an ancient Gaulish speciality, its origins lost in the mists of time. Maybe Asterix ate one of these…
The origins of puff pastry in France are generally dated back to the 17th century so the more familiar Pithiviers feuilleté is a relatively recent upstart. We followed the bakery instructions to warm it through gently for 15-20 minutes before serving. It needs no accompaniment (other than a strong cup of coffee). The puff pastry layers were featherlight, belying the huge quantities of butter that went into its manufacture, and the almond cream filling rich and sweet. It reminded me just a little of its more rustic cousin the English Bakewell pudding – the real dense almondy version you find in the Peak District town rather than the more usual tart I mentioned earlier. Maybe Pithiviers and Bakewell should be twinned?
You’ll find recipes for the regular puff pastry Pithiviers in any fat cook book with a pâtisserie chapter. Recipes for the fondant version are harder to come by so here’s one I hunted down:
Recipe for Pithiviers fondant – iced almond cake from Pithiviers
From the recipe section of the website http://www.loiret.logishotels.com with quantities halved to make a more manageable sized cake.
Ingredients
250g blanched almonds, very finely chopped
250g caster sugar
250g butter
1.5 cl rum
6 or 7 eggs (depending on size) beaten
White fondant icing
Halved glacé cherries and angelica to decorate
Mix the sugar with the finely chopped almonds and beat in the softened butter. Incorporate the eggs gradually and the rum. Spoon into a greased and floured Pain de Gênes mould (a deep fluted flan tin – use an ordinary round cale tin not a shallow flan tin as a substitute) and baked in a moderate oven (180 degrees C fan) for 30 to 35 minutes. When cool, ice with white fondant icing and decorate with glacé cherries and Angelica.
Le vrai macaron Parisien
April 20, 2011 § Leave a comment

Actually this is not a macaron but vrai Parisien Philippe, expert instructor for the pâtisserie class I took last Saturday, entirely devoted to the making of the perfect macaroon.
The venue was the Lenôtre amateur cookery school in the grand looking Pavillon d’Elysée in the heart of Paris’ 8th arrondissement.

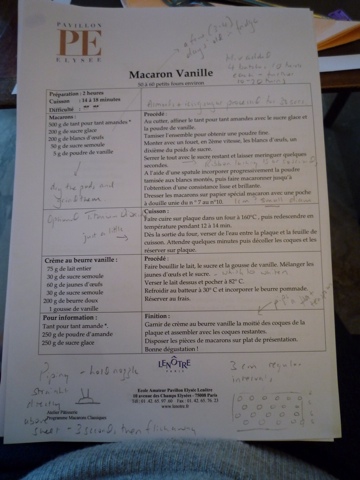
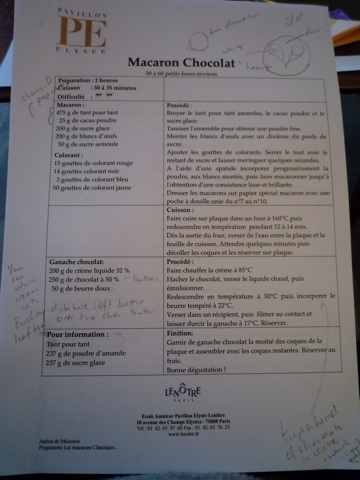
On the agenda were three classic macaroon recipes: vanilla, coffee and chocolate. I’m feeling too lazy to write up all 3 recipes in full, so here they are as photos. I’ve translated and annotated the base vanilla recipe below, but have taken the liberty of halving the quantities to make the numbers more manageable for the home baker.

My fellow course participants were 3 Parisian ladies and 1 man who turned out to be a professional pastry chef. I decided to share my workbench with him and pick up some extra tips. The 6 of us shared a spacious kitchen nattily decorated with orange walls, sleek white cabinets and lots of chrome and stainless steel.
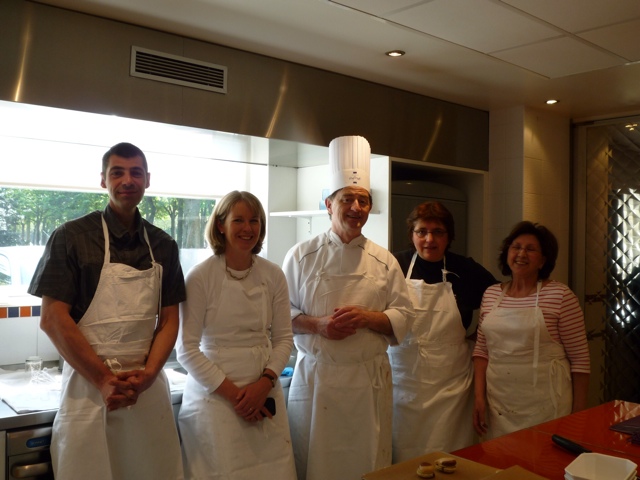
Chef Philippe was a little stern at first and asked for no photography. As the morning went on, he gradually warmed and melted and by the end of the session, the no photography rule was relaxed as you can see.
All was of course in rapid Parisian French. This was clearly going to be a workout for my schoolgirl French as well as honing my pâtisserie skills.
So, what did I learn?
Ingredients
1) All the recipes include a mystery ingredient “tant pour tant amandes” which is nothing more than a 50:50 mixture of ground almonds and icing sugar. This is a mix that the professional pastry kitchen already has on hand as it’s the starting point for a number of recipes. It’s not something that the domestic cook needs that often so I’ve restated the recipe in terms of the underlying quantities of ground almonds and icing sugar.
2) The base recipe specifies vanilla powder rather than the more usual extract or paste. Ever wondered what to do with old vanilla pods other than them into a jar of caster sugar? Once the old pods are thoroughly dry, you can crush them in a spice grinder/ mini food processor to make a fragrant powder perfect for use in baking. I haven’t tried this at home yet but will give it a go with my next batch of old pods.
3) The egg whites are weighed for an accurate result. A medium egg white weighs a little over 30g so you’ll need 3 eggs for the base recipe I give below.
4) I need to mention the nasty subject of additives. Although not listed amongst the ingredients, Chef Philippe casually added a couple of pinches of white food colouring to his macaroon mix. On closer inspection, this turned out to be E171 titanium dioxide. At best this seems entirely unnecessary – the finished macaroons were an attractive toasty gold colour – and at worst possibly dangerous.
Philippe also added yellow food colouring to his coffee macaroons, again not in the recipe, and again unnecessary as the coffee extract used to flavour the macaroons (make your own by dissolving instant coffee granules in a very little hot water or consider that old standby Camp Coffee Essence) will also lend them a little colour.
Finally, the chocolate macaroon recipe specifies a massive 82 combined drops of black, red, blue and yellow food colourings to turn the mix into the requisite rich dark brown. When I try these at home, I will make do with a more delicate brown colour provided by the cocoa powder alone.
Equipment
5) I learned to use a much smaller piping nozzle than the one I’d used previously. The recipe specifies nozzles in the range between nos. 7 to 10. I’d estimate that the one we used in the class was about 12mm in diameter.
6) We used very convenient big disposable clear plastic piping bags. I’ve stocked up on these to bring home with me.
7) We used a powerful professional food processor to pulse the ground almond and icing sugar mix. I’m not sure if a domestic processor works quite as well but I’ve had good results from my Kenwood liquidiser.
8) Talking of my Kenwood mixer, this was the machine of choice in the Lenôtre kitchen. Chef Philippe prefers it to the more modish Kitchenaid.
9) To bake the macaroons, we used doubled-up (one stacked on top of another) baking trays lined with unbleached non-stick baking paper, again just like the stuff I use at home. The double trays mean a more even heat distribution.
10) The most versatile kitchen tool we used was a little plastic scraper, the kind used for bread making. This was a fantastic stand-in for a spatula and dead handy for filling piping bags, emptying bowls, rubbing ground almonds through a sieve etc. I’ve brought one of these home with me too.
Techniques
11) The consistency of the macaroon mixture is key to the shape of the finished product. The ground almond and sugar mix was folded into the meringue mix using a spatula in three phases, with 10 turns of the bowl for each addition. Then comes the key final mixing with a spatula, a further turning and folding of the mixture until it becomes smooth and glossy, holding its shape but only just. There is a special word for this final mixing “macaronner”. If you don’t get it quite right, the mixture will be too stiff and the piped discs won’t flow to a nice flat circle and will have little tails instead of being smooth on top.
12) When piping the discs, hold the tip of the nozzle directly above (90 degrees) and very close to the baking tray. Squeeze using the palm of the right hand against the top of the piping bag for a count of 3, stop the pressure then execute a quick flick of the wrist as if writing a comma with a fountain pen to release the nozzle.
13) Pipe in neat rows and keep a good distance (3cm or more) between the discs in order to ensure a good airflow and even baking. We piped 28 discs on a tray, a row of 6 then a row of 5 in the gaps, another row of 6, another of 5 then a final row of 6.
14) To ensure that the cooked discs with their still soft centres peeled off the paper easily, we carefully poured cold water onto the hot baking tray as soon as it came out of the oven. To do this, you need to set the tray at a slight slant over the sink and carefully lift up the edge of the paper before pouring water beneath it from a small jug.
15) I’ve never paid special attention to filling macaroons previously. I’ve simply spread them with buttercream using a small crank-handled palette knife. I’ve now learned to make a silky-textured buttercream with a crème anglaise base which is piped onto a macaroon disc in a similar way to piping the disc itself. Sandwich with a second disc, press lightly and you have a level filled macaroon with a perfectly even line of filling around it’s circumference.
16) Finally, the completed filled macaroons should be left to mature overnight in the refrigerator before eating. As if!
Apparently they can be frozen successfully if you need to make a big batch for a wedding, party, family celebration or similar.
OK so that’s the rather lengthy preamble. Time for a couple of pictures of the finished product. First, our neat rows of filled vanilla macaroons:

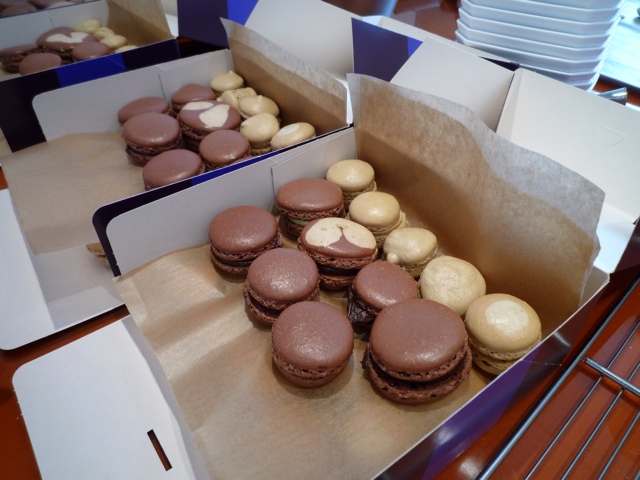
Next, the top layer of our very desirable Lenôtre cake boxes filled with the chocolate and coffee macaroons ready to take home:
Recipe for vanilla macaroons
Makes 25 to 30 filled macaroons
Ingredients
For the macaroon discs
125g ground almonds
225g icing sugar
100g egg whites
25g caster sugar
2 to 3g vanilla powder
For the vanilla buttercream
37g whole milk
15g caster sugar
1 vanilla pod
30g egg yolks
Further 15g caster sugar
100g softened unsalted butter
Method for the macaroon discs
Mix the ground almonds and icing sugar together. Liquidise or pulse in a food processor for 10 to seconds and push the resulting mixture through a sieve.
Put the egg whites into a mixing bowl with about one tenth of the caster sugar. Begin whisking at a medium speed (level 3 on a Kenwood electric mixer) until the mixture reaches the soft peak stage. Gradually whisk in the remaining caster sugar and whisk until the mixture becomes a smooth, glossy, stiff meringue.
Gradually fold in the sieved ground almond and icing sugar mix using a spatula. Do this in 3 or 4 batches. Continue to fold the mixture with the spatula until it becomes smooth and glossy and a little looser but not too runny for piping well.
Using a piping bag fitted with a nozzle in the range 7 to 10 (10 to 15 diameter) pipe individual macaroon discs 2cm in diameter onto a tray lined with silicone paper. Space them at least 3cm apart. Leave the macaroons to dry for 15 minutes or so before baking.
Place a second tray beneath the macaroons than place in an oven preheated to 160 degrees C. Turn the heat down to 140 degrees C and bake for anywhere between 12 to 18 minutes until the macaroons have puffed up a little and have coloured lightly. They should have cooked, crisp bases but still be soft in the centre. Start checking after 12 minutes.
Remove the cooked macaroons from the oven and immediately pour a little cold water onto the hot tray UNDER the baking paper to form steam and help release the macaroons from the paper. Allow to cool for 5 minutes or so then remove from the paper onto a cooling rack with help of a small crank handled palette knife. Leave to cool completely before sandwiching together with piped vanilla buttercream.
Method for vanilla buttercream
Heat together the milk, 15 g caster sugar and the vanilla pod. Bring to just below boiling point then remove from the heat, cover and allow to infuse for a few minutes.
In a large bowl, using a balloon whisk, whisk together the egg yolks and the other 15g sugar until the mixture lightens in coloured just a little. Remove the vanilla pod, scrape out the seeds and add to the mix. Pour the warm milk over the egg yolks and sugar and whisk together. Return the mix to the pan and, stirring the mixture with a spatula or wooden spoon, heat gently to 82 degrees C to make a custard/crème anglaise which has thickened just a little to the coating a spoon stage.
Pour the cooked custard into the bowl of a Kenwood mixer or equivalent and whisk at high speed until cool. The mixture should now be much thicker, pale in colour and softly creamy in texture.
Gradually incorporate the softened butter which you have previously creamed to ensure it’s the right texture for easy incorporation.
Keep cool if not using immediately and bring back to the right soft consistency for piping by gently warming OVER hot water.
That’s it – good luck with making these at home!
Contact details
École Amateur Pavillon Elysée Lenôtre
10 avenue des Champs Elysées
75008 Paris
Tel +33 (0)1 42 65 97 60
