
Ben Lawers Whisky Sour
September 14, 2023 § Leave a comment

My Ben Lawers re-invention of the classic whisky sour was inspired by a pre-dinner cocktail, the Porto Sour, sampled at the Grandtully Hotel on the banks of the River Tay in Perthshire on a recent family holiday.

The Porto Sour ingredients were listed on the cocktail menu as “Dewar’s Portuguese Smooth, blood orange, fennel, raspberry, lemon, pimento”. Grandtully is on the outskirts of the market town of Aberfeldy which in turn is spiritual home both to Aberfeldy single malt and also to Dewars, the first blended Scotch whisky. Dewars’ first female Master Blender is the redoubtable Stephanie Macleod and one of her innovations was to mature Dewars blended whisky in a port casks to produce the specific whisky called for in this cocktail.
The Aberfeldy distillery is both picturesque and visitor-friendly and, incidentally, they market their own range of innovative ready-to-drink cocktails but that’s another story…

The red fruit notes from the whisky made a great starting point for the Grandtully mixologist’s reinvention classic whisky sour. I could pick out the orange, lemon, raspberry and anise notes in the drink but to be honest, and perhaps fortunately, the pimento element completely passed me by.
It was a perfect summer evening cocktail and I decided I’d have a go at recreating something similar once I was back home. I’ve come up with something along the same lines built on Dewar’s Portuguese Smooth blended whisky but I’ve tweaked the ingredients and made the drink my own.
My first attempt used orange juice and a home-made fennel infused simple syrup. This was pleasant enough but the orange juice didn’t give the required sour hit and the mild fennel flavour of my home-made syrup was completely overpowered by the other ingredients.
I decided that the anise and raspberry elements of the drink were key so swapped out the fennel syrup in favour of a capful of Pernod and boosted the raspberry flavour by adding some unsweetened fresh raspberry purée. These ingredients are also appropriate to Perthshire. The connection between soft fruits and Perthshire is well known, whereas the reason for the inclusion of anise is perhaps less obvious. Aberfeldy is the closest town to the mighty Ben Lawers, the tenth highest mountain in Scotland and well-known for its fabulous mountain flowers. The hint of anise from the Pernod recalls the wild angelica that grows in profusion on the lower slopes of Ben Lawers. The borage flower garnish that I also added was inspired by the bright blue alpine gentian that grows near the summit of Ben Lawers.
We spent several days exploring the Ben Lawers massif and its botany so this drink is a reminder of some great days out.


The orange juice was ditched in favour of lemon juice so the orange flavour called for in the cocktail now comes from a bottle of orange bitters that I found in the back of my cocktail cupboard plus the orange oil from the twist of peel garnish.
I’m really pleased with the end result and you don ‘t need to know the back story to enjoy it.
Sláinte!

Ben Lawers whisky sour
Serves 1
Ingredients
2oz Dewar’s Portuguese Smooth (or any smooth blended whisky or alternatively a not too obtrusive single malt ideally with a port cask finish)
¾ oz lemon juice
¾ oz unsweetened raspberry puree
½ oz simple syrup
3 dashes orange bitters (Angostura brand)
3ml Pernod
Twist of orange peel and 3 frozen raspberries to garnish plus a couple of borage flowers if you can find them
Shake all the ingredients (except for the garnish) with ice. Strain into a small tumbler. Drop in 3 frozen raspberries and float a twist of orange peel on the surface making sure that the essential orange oil lands on the surface of the drink as you peel. Float the borage flowers carefully on the top of the drink.
A pudding for Queen Elizabeth
September 17, 2022 § 1 Comment
This week, I’ve been watching televised queues of people lining the streets of villages, towns and cities throughout Britain waiting to catch a glimpse of the late Queen’s coffin. This is not for me. Instead, I’ve been working up a recipe I started thinking about during the Platinum Jubilee celebrations earlier in the year.
Out of curiosity, I did make that competition-winning Platinum Jubilee pudding featuring in a BBC TV programme, a confection of canned mandarins, lemon jelly, amaretti biscuits and rather showy white chocolate bark shards. It was OK, but suffered from a serious lack of booze. Oh, and I’m sorry but jelly in a trifle is a definite no-no in our household.

I’ve gone down the more warm and comforting route for my pudding. It’s a white chocolate, whisky and marmalade bread and butter pudding with a distinctly Scottish flavour.
I came up with the idea of creating a pudding out of marmalade sandwiches after watching my favourite part of the Platinum Jubilee celebrations – the moment where the Queen entertained Paddington Bear at Buckingham Palace, sharing tea and marmalade sandwiches. Charming or sentimental? You decide but it’s surely preferable to being serenaded by Paul McCartney and Rod Stewart…
The next part of the pudding jigsaw puzzle was being tempted by a white chocolate, whisky and marmalade bread and butter pudding on the menu at The Ceilidh Place, a brilliant gastropub in Ullapool in far north of Scotland. Sadly, they’d sold out when I came to order it on a visit earlier this year so I had to store the idea away until I was able to make it myself.
The pudding idea finally came together when I found the right whisky to cut through the potentially cloying sweetness of white chocolate and marmalade. Adding whisky to food is a tricky business as there are so many wildly contrasting whisky styles from the heavily peated Islay single malts that knock your head off, to smooth Speyside spirits matured in sherry casks that come close to a fine Cognac.
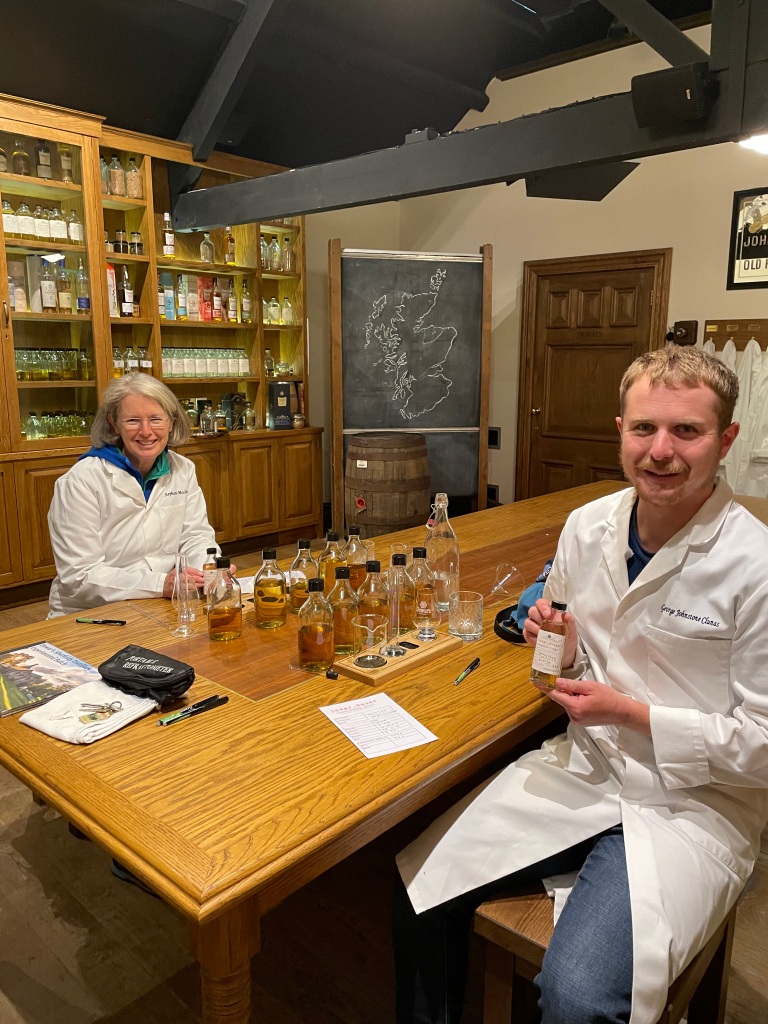
I chose Royal Lochnagar whisky for two reasons. Firstly, it is made in a charming small distillery at Crathie, bang next-door to the late Queen’s Balmoral Estate and has royal warrants dating back to Queen Victoria, Edward VII and George V. Second, it is the perfect complement for marmalade with its candied citrus peel, demerara sugar and spice flavour profile. I’ve been lucky enough to visit both the distillery and Balmoral Castle on separate visits to Royal Deeside. It’s a stunning part of the world and it’s no surprise that the queen chose to spend her final days there.


It took a couple of experiments to refine the recipe and make the flavours sing without any one element being too overpowering. This is my end result and it will be gracing my Sunday dinner table tomorrow as the nation prepares for Monday’s state funeral and we collectively have a quiet moment of self-reflection at the end of an era.
White chocolate, whisky and marmalade bread and butter pudding
Serves 6
Ingredients
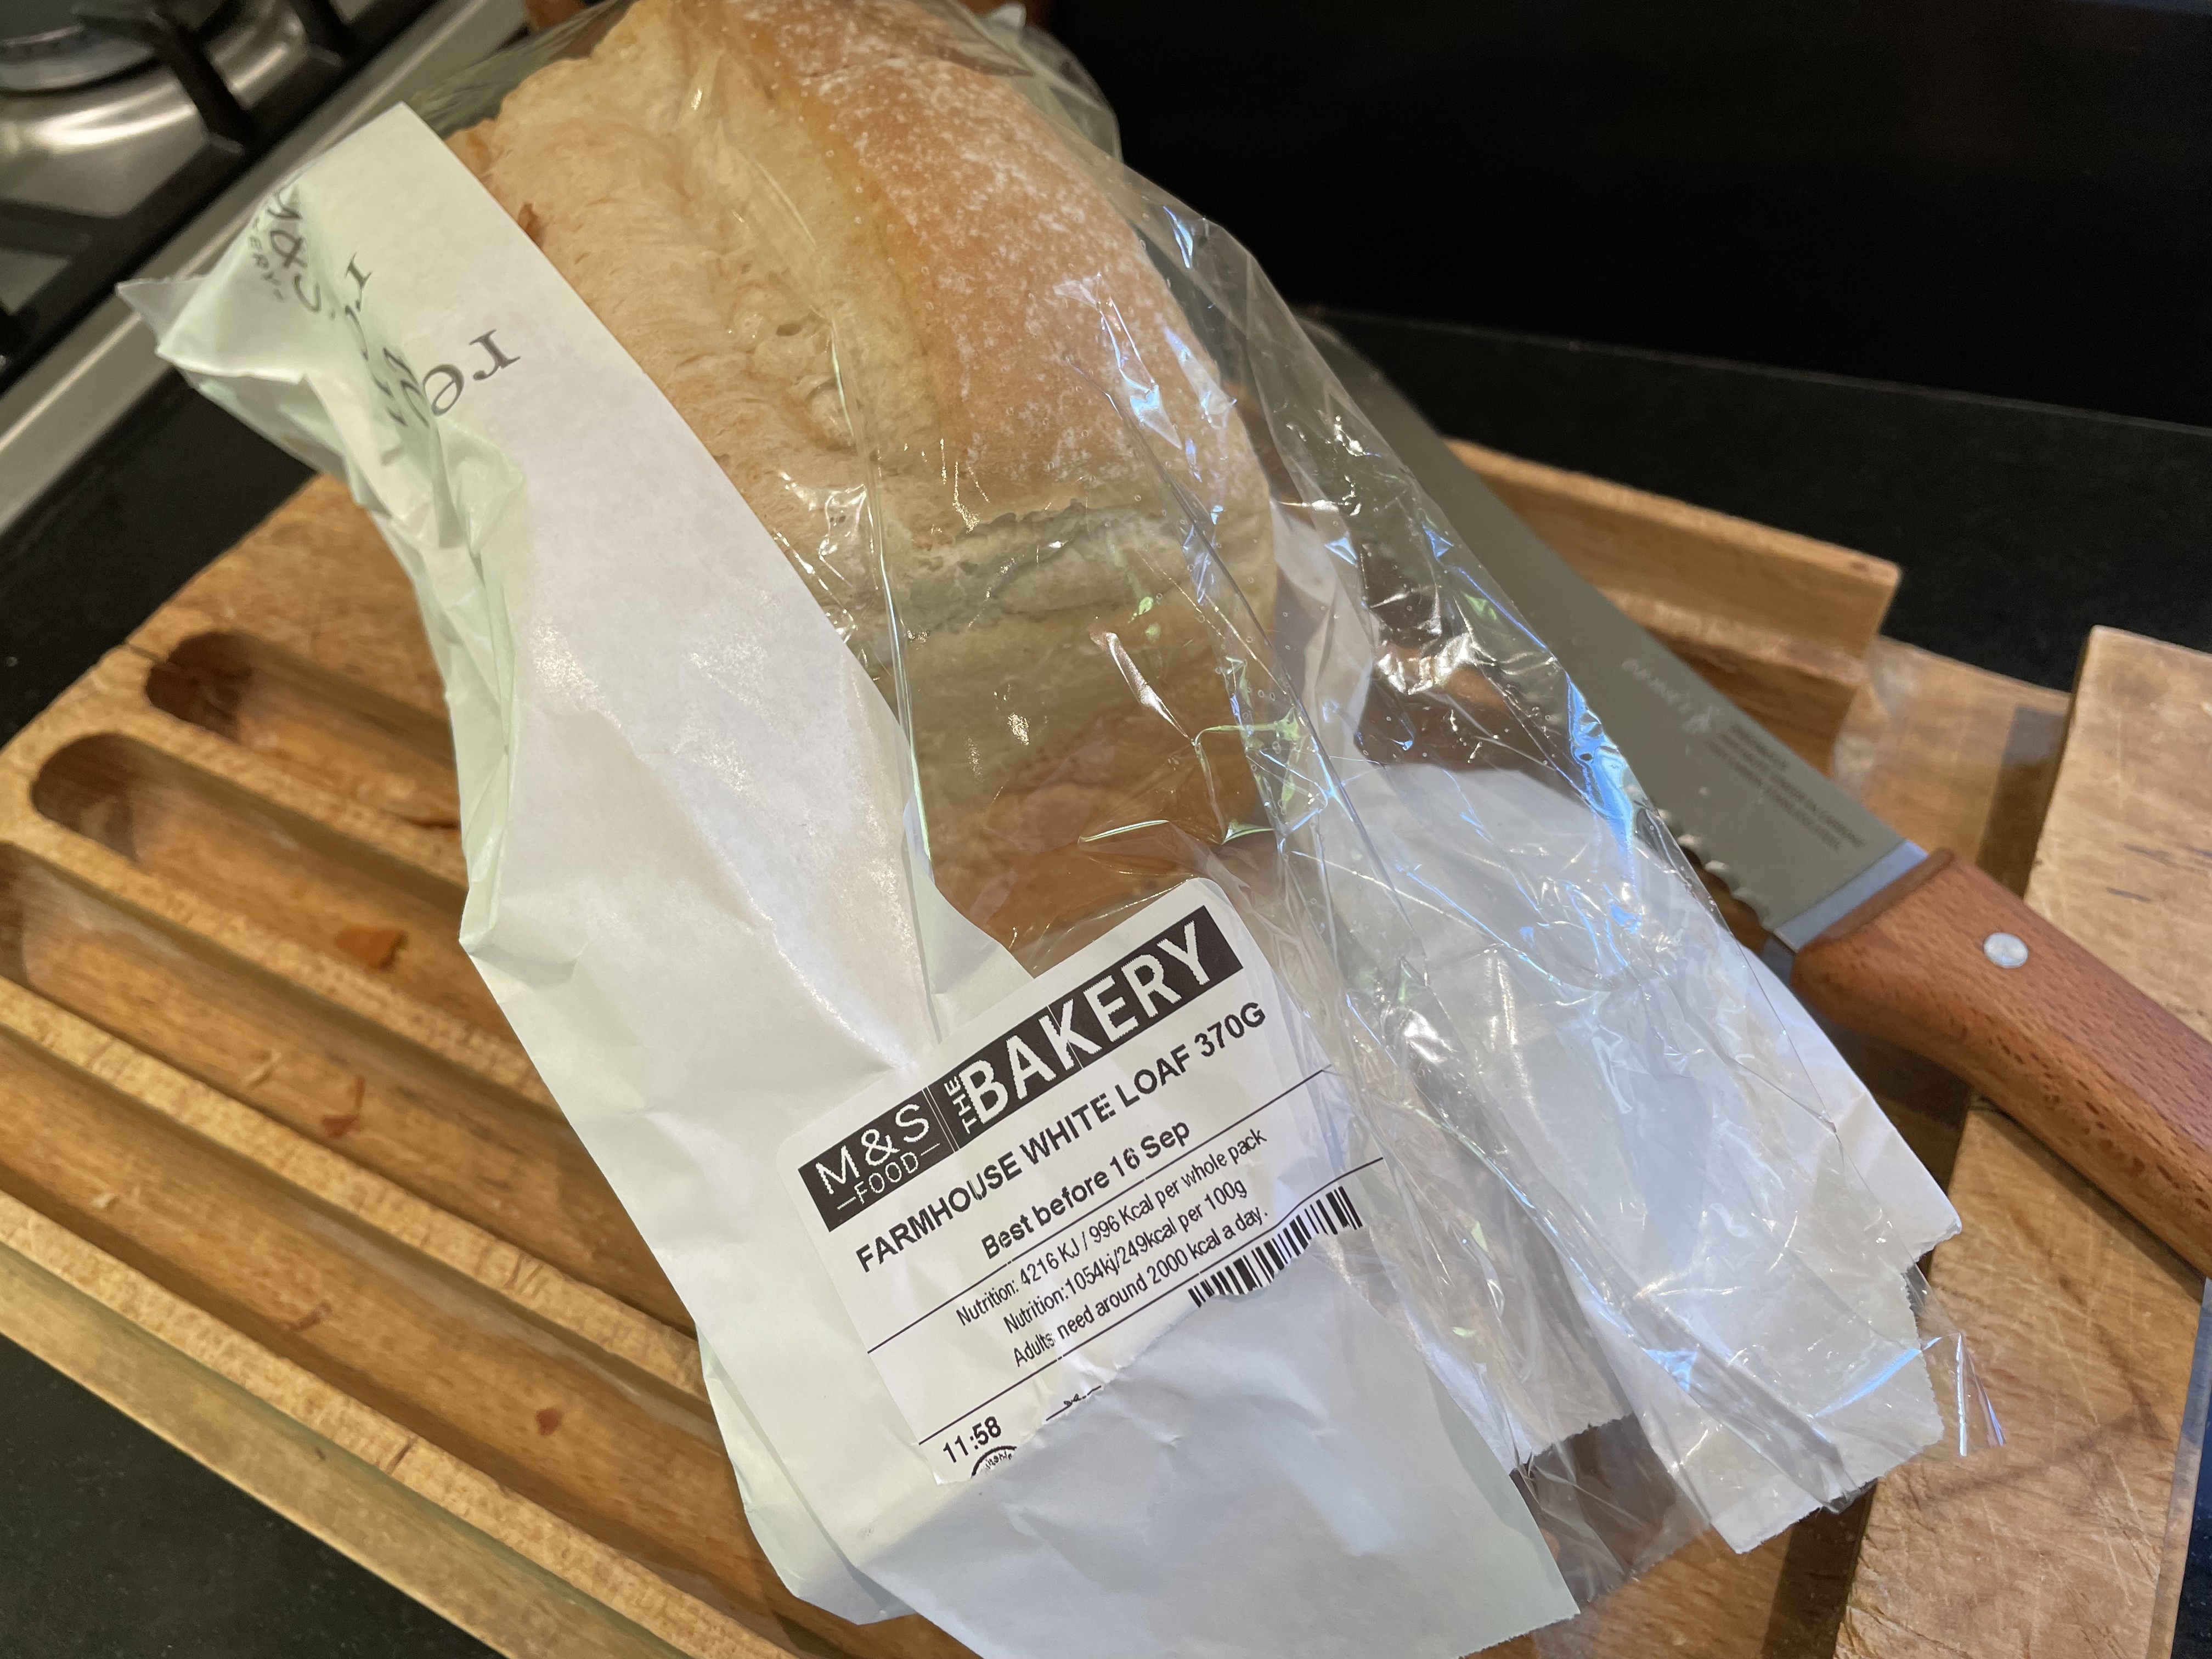
12 thin slices white bread
Softened butter for spreading on the bread and greasing the baking dish
6 generous tablespoons of your favourite marmalade
150g good quality white chocolate flavoured with vanilla, broken up into squares
425-450 ml whipping cream (or a 300ml pot single cream plus a 150ml pot double cream)
1 teaspoon vanilla extract
1 teaspoon grated orange zest
3 large eggs
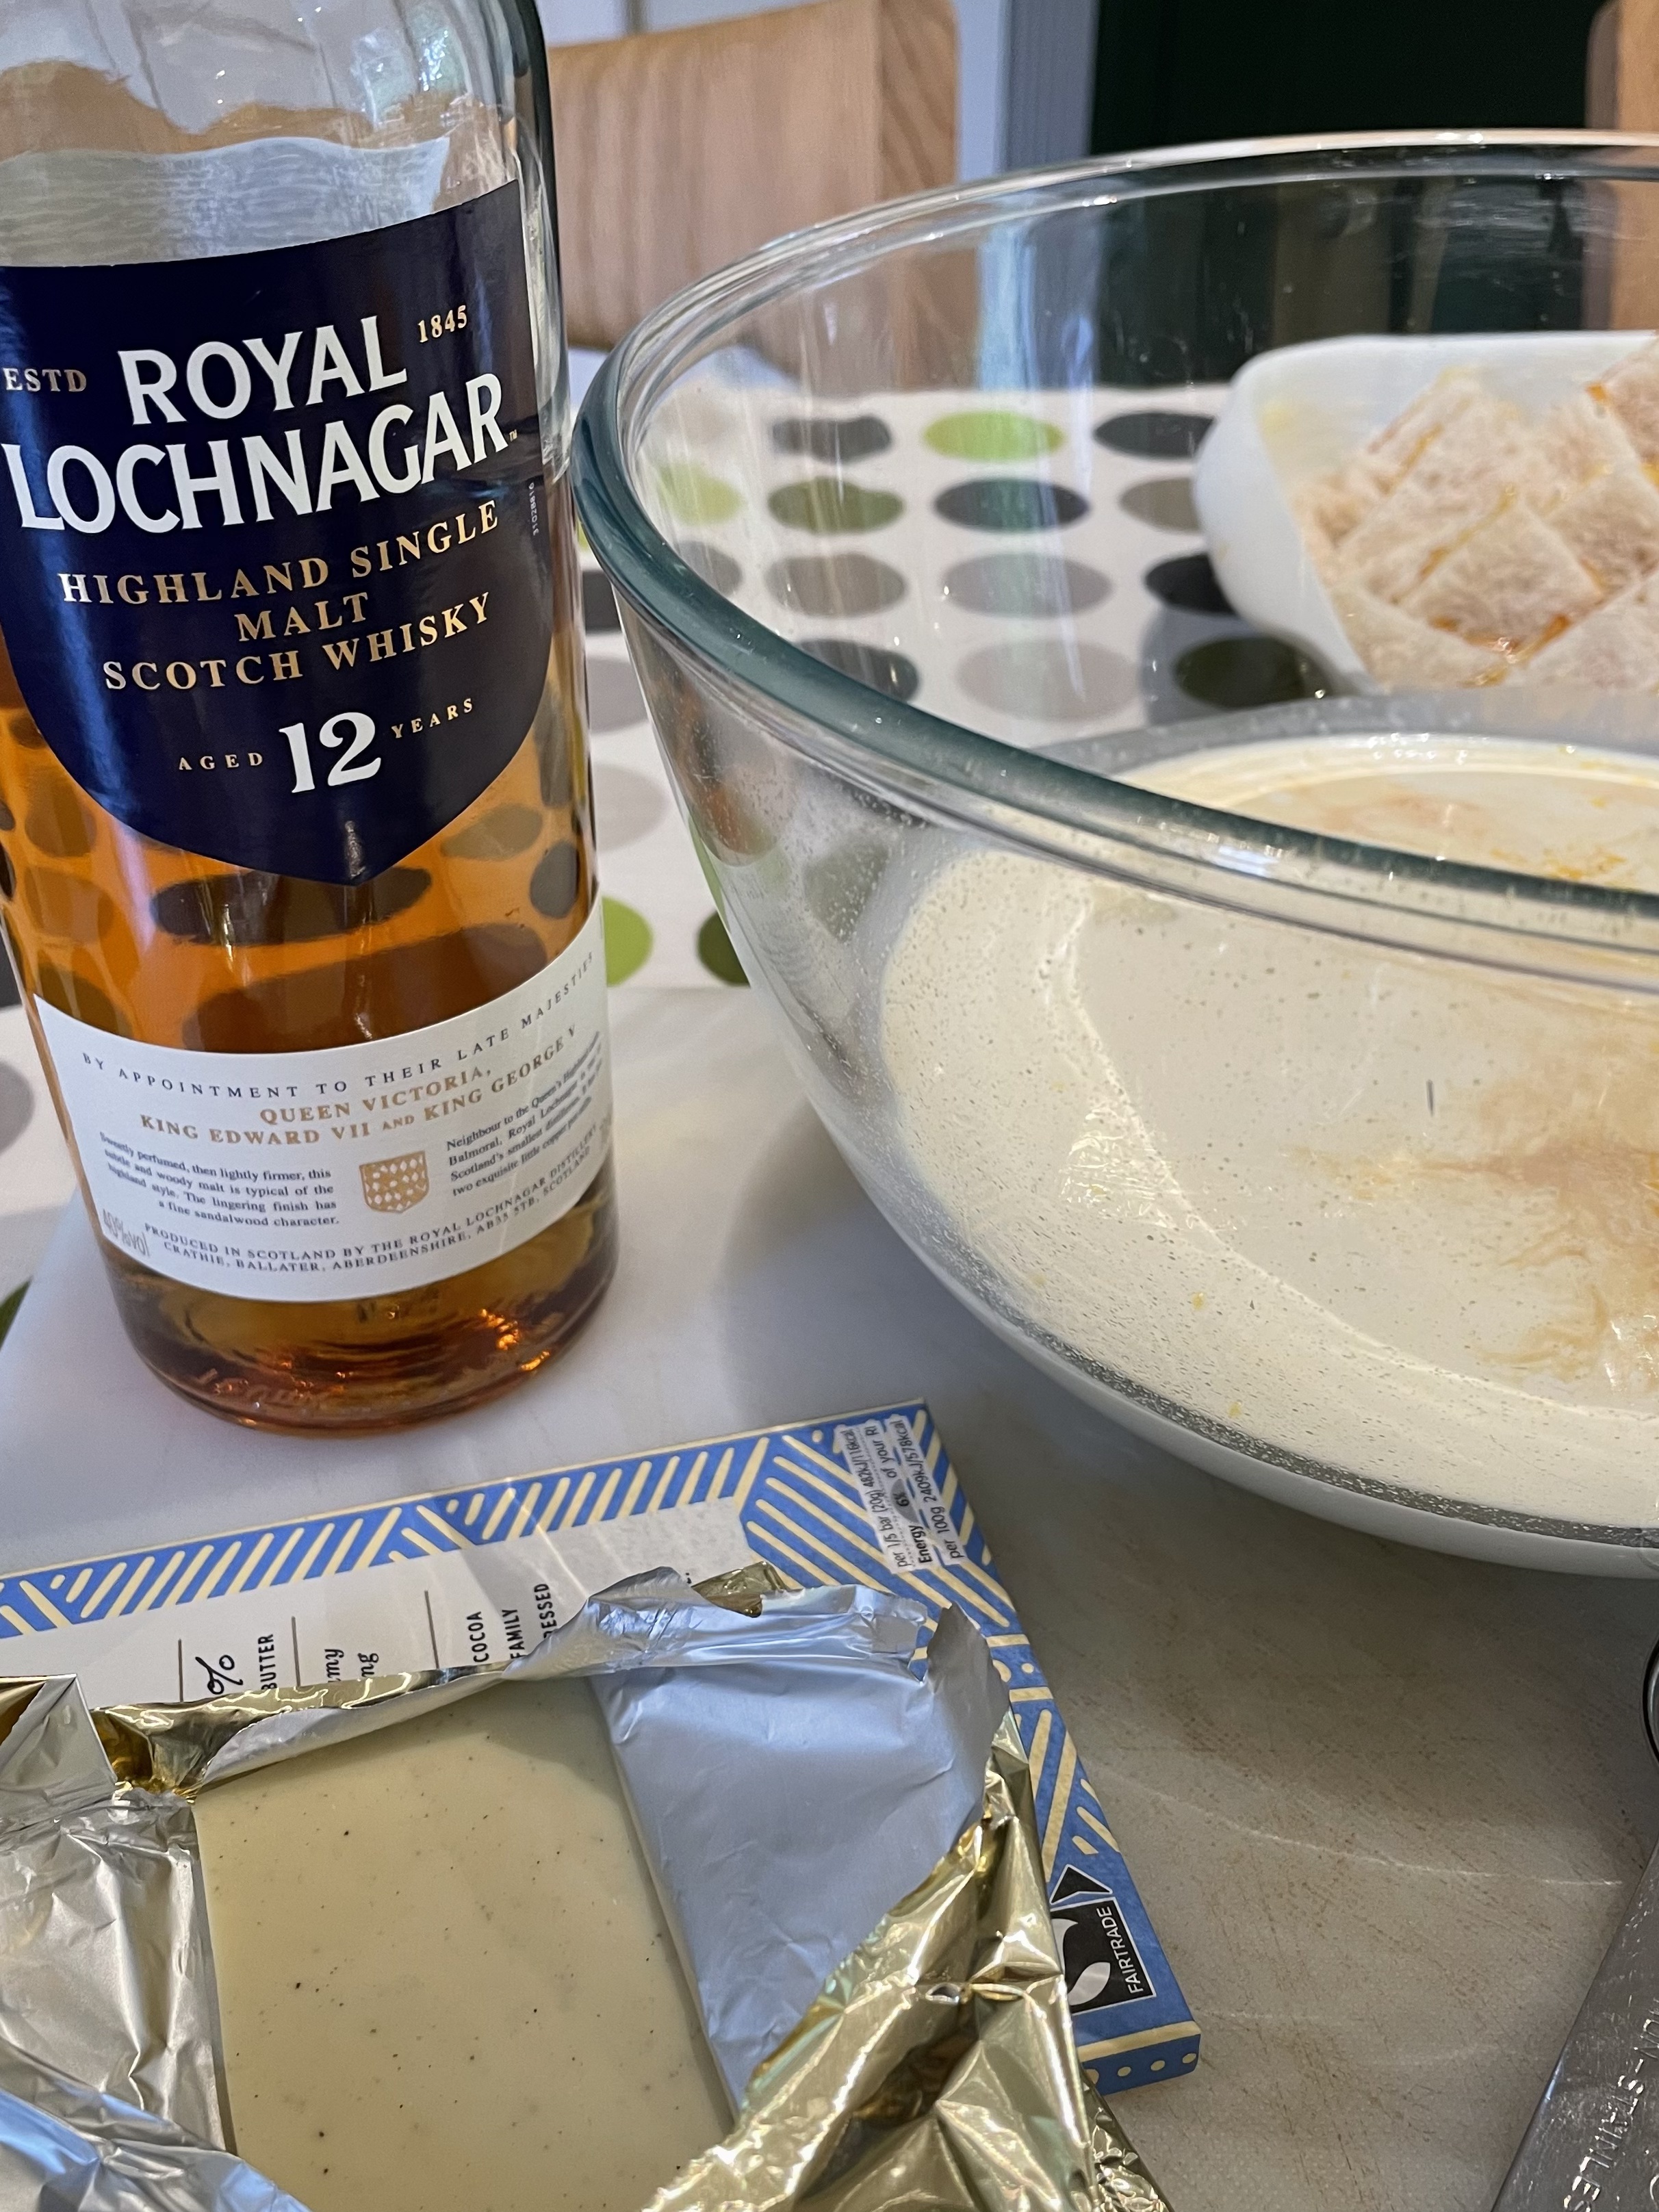
4 tablespoons of your favourite whisky (I used Royal Lochnagar)
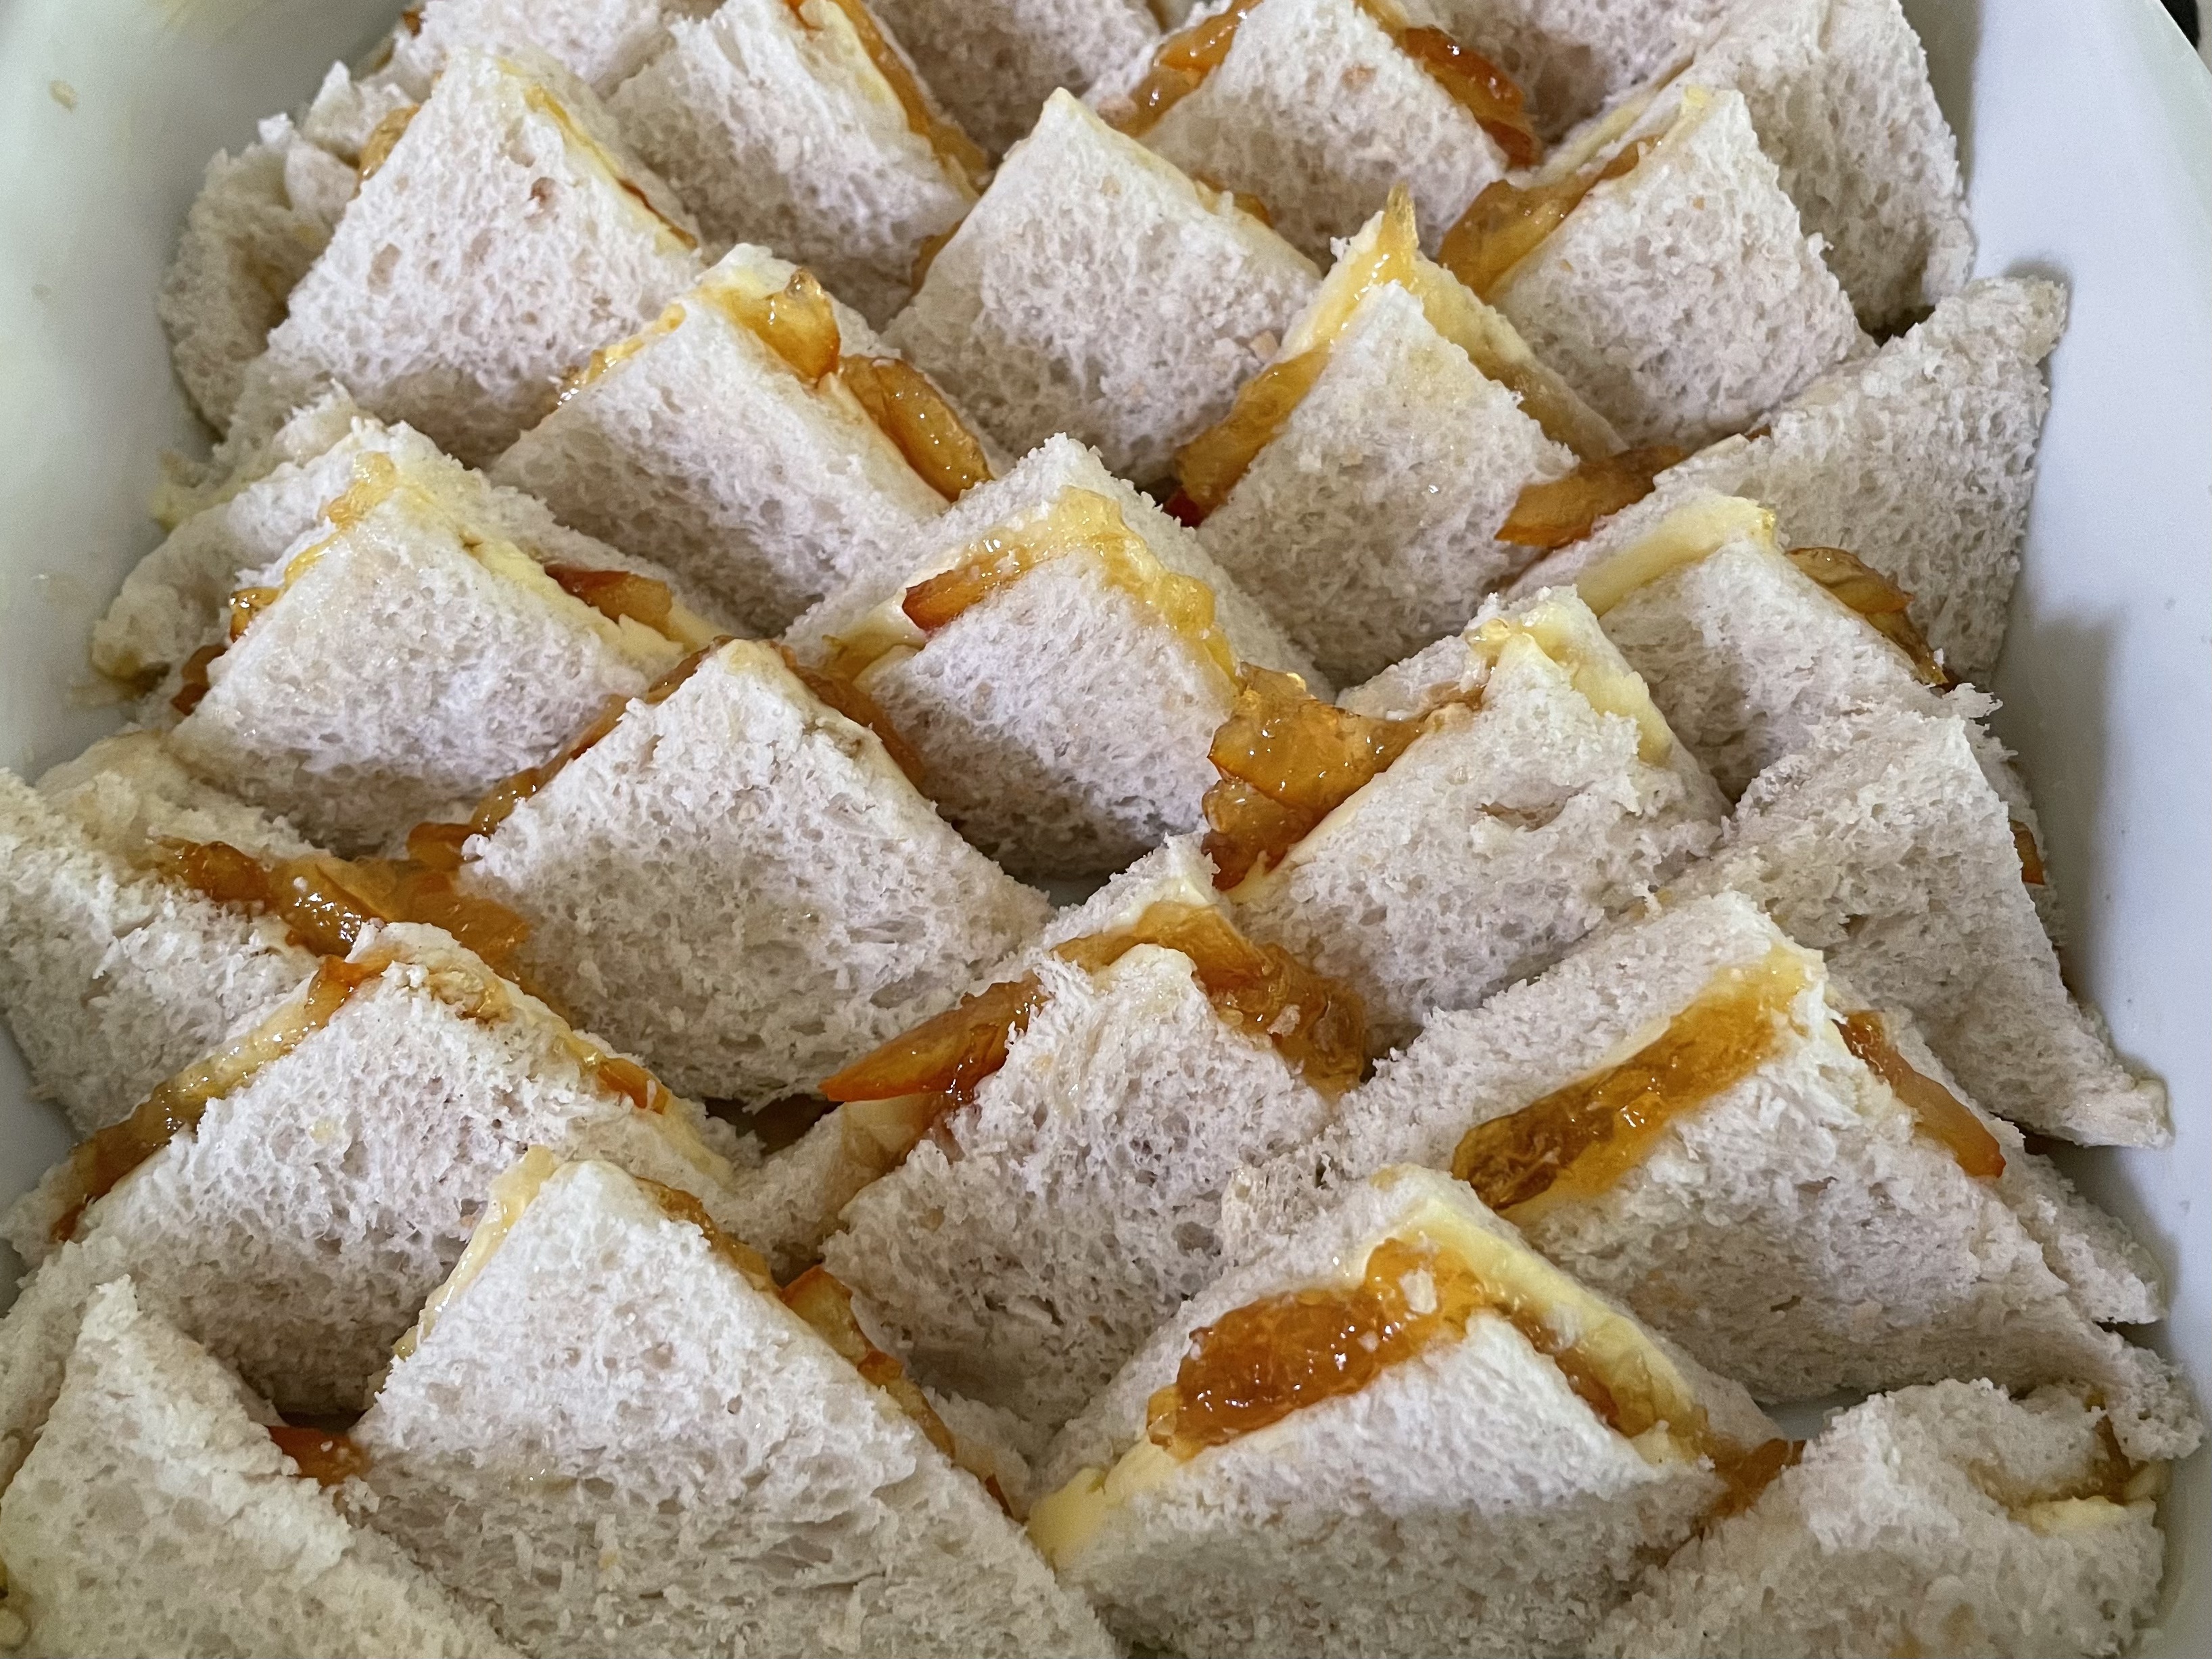
Begin by cutting off the crusts from the slices of bread, spreading them sparingly with butter then making 6 marmalade sandwiches using 1 tablespoon of marmalade for each sandwich. Cut each round into four tiny triangular sandwiches.
Butter your baking dish generously then arrange the tiny marmalade sandwiches in decorative overlapping rows in the dish. You need a shallow, ovenproof dish for this. I used a square white porcelain dish approx. 22cm by 22cm by 5cm which worked well.
Place the chocolate, cream, vanilla extract and orange zest in a heatproof bowl and set the bowl over a pan of not quite simmering water. Wait until the chocolate has melted then remove the bowl from the heat and stir well to combine. Allow to cool for a couple of minutes.
In a separate bowl or jug, whisk together the eggs and the whisky, then add the egg mixture to the slightly cooled cream and chocolate mixture and whisk well to combine.
Gently ladle the chocolate mixture over the marmalade sandwiches. Use a fork to press down the sandwiches gently so that they are covered evenly with the chocolate mixture. Depending on the size of your bread slices and, you may not need to use all of the chocolate mixture.
Cover the baking dish with clingfilm and transfer it to the fridge for a minimum of 24 and ideally 48 hours.
Preheat your oven to 170 degrees C fan. Remove the clingfilm and bake the pudding for 30 minutes until the top is crunchy but the interior is still soft and yielding. Leave to stand for 10 minutes before serving with cold cream and maybe a few berries.
Delicious sustainable fish
July 24, 2022 § Leave a comment
I am lucky enough to live within walking distance of Altrincham market which boasts a busy, friendly fish stall every Tuesday, Friday and Saturday. Whilst in the queue, I like to watch what other people are buying. Dispiritingly, most customers stick to the so called Big 5 best sellers – farmed salmon from Scotland, tuna from Indonesia, cod, haddock and various types of prawn, none of which are particularly sustainable.
Here are a couple of my favourite recipes, both of which use sustainable fish, as per the Marine Stewardship Council website.
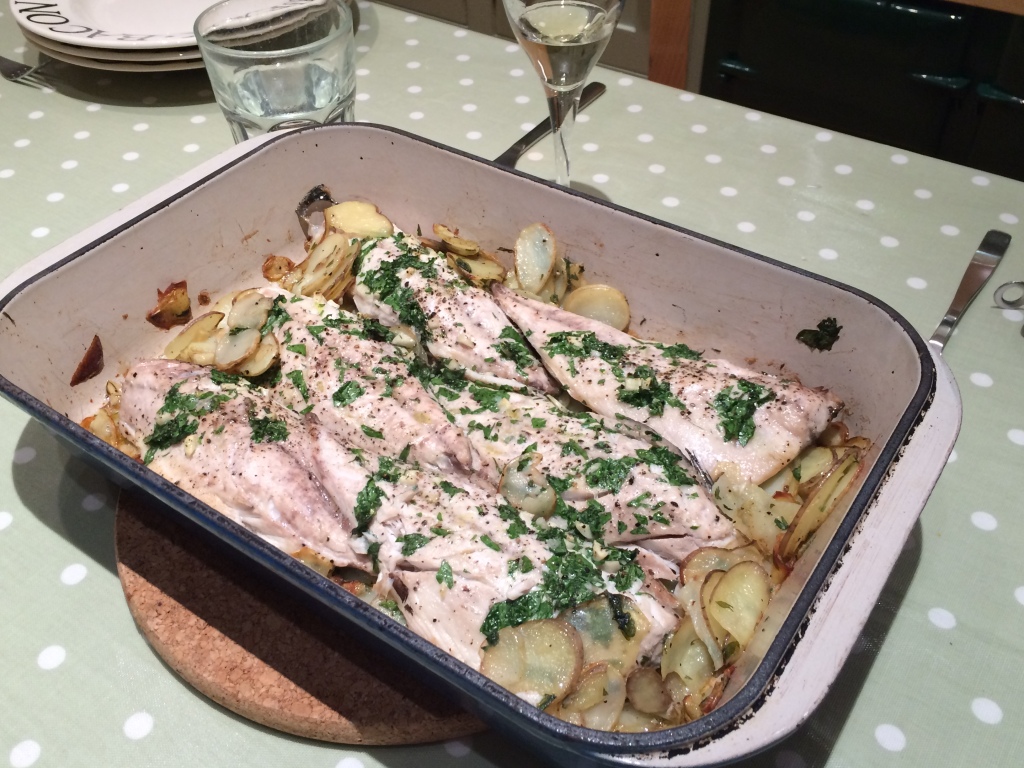
The first uses mackerel fillets (OK if they are line caught from a Cornish coastal fishery) which are rendered sweet and fresh when baked on top of potatoes and basted liberally with a mixture of olive oil, garlic and parsley.
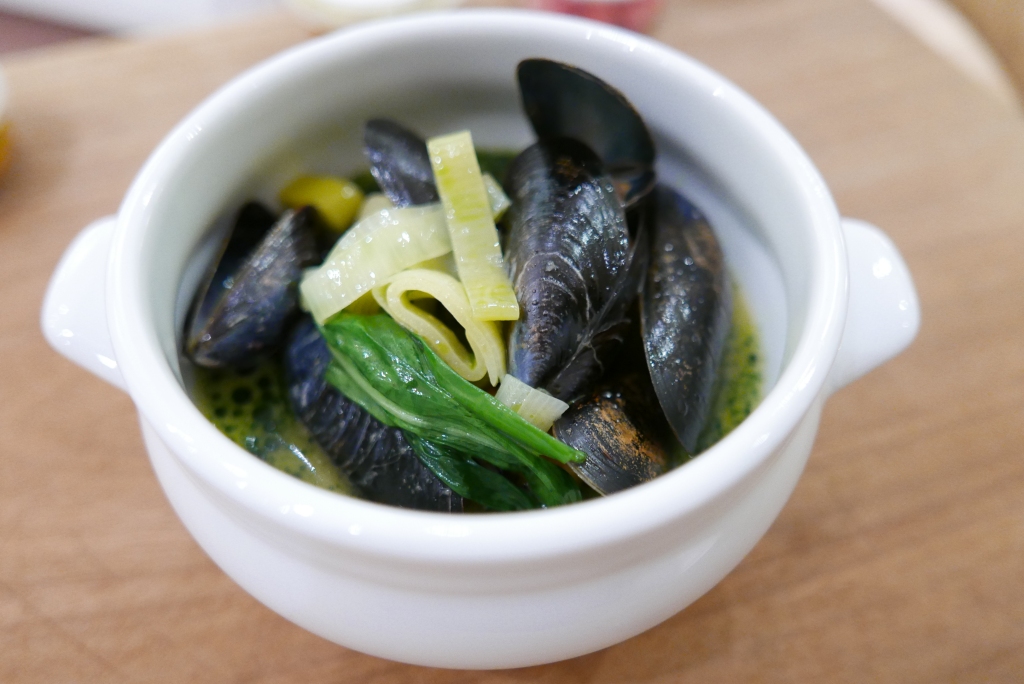
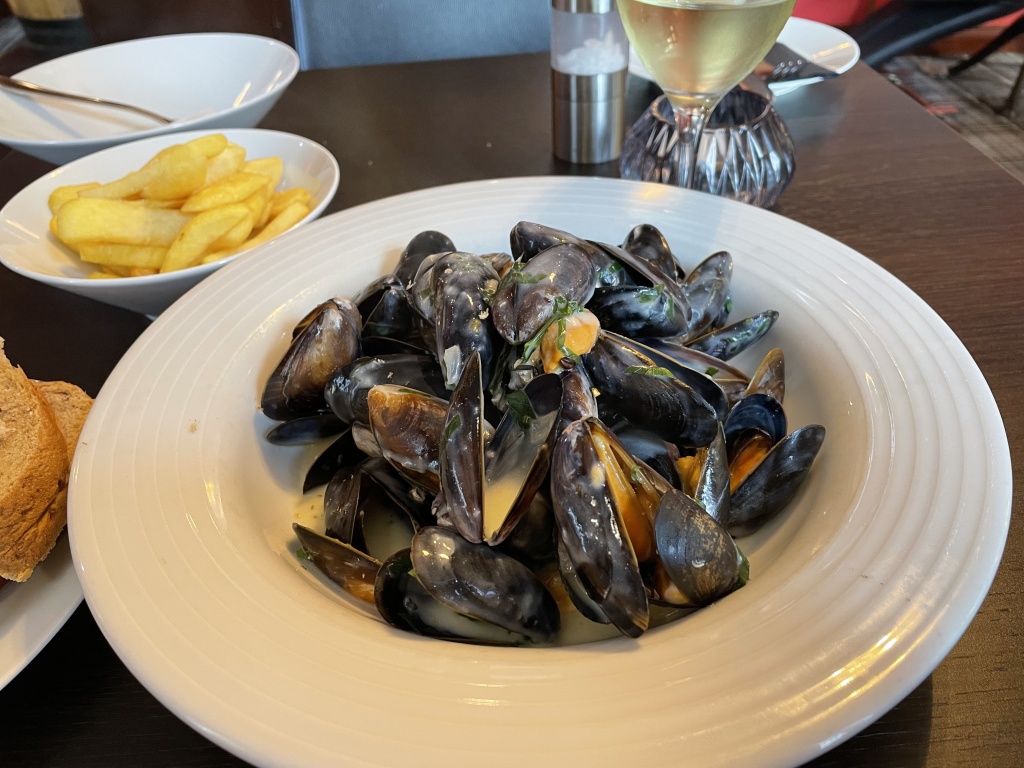
The second uses farmed, rope-grown mussels, a brilliant choice of farmed seafood as the mussels actually clean the seawater they are grown in. This recipe is a twist on the classic Moules Marinière, with fennel and tarragon adding a subtle anise flavour.
Baked mackerel with potatoes, Genoese style
Adapted from a recipe in Marcella Hazan’s Second Classic Italian Cookbook
Serves 4 people with modest appetites
Ingredients
500g waxy potatoes
4 tablespoons extra virgin olive oil
2 cloves garlic, peeled and chopped
25g roughly chopped flatleaf parsley
salt and freshly ground black pepper
4 medium mackerel fillets with the skin left on (ask your fishmonger to fillet the mackerel for you)
Method
Preheat oven to 230 degrees C fan.
Scrub the potatoes (no need to peel them) and cut into very thin slices with a mandolin.
Remove any remaining bones from the mackerel fillets if necessary.
Into a shallow oven proof baking dish large enough to hold the potatoes and fish fillets comfortably without overcrowding (enamelled cast iron is ideal) put all the potatoes, half the olive oil, half the garlic, half the parsley and a liberal amount of salt and freshly ground black pepper. Mix everything thoroughly, then spread the potato slices evenly over the bottom of the dish.
Place the dish in the preheated oven. Bake until the potatoes are half cooked, approximately 12-15 minutes, maybe a little longer.
Remove the dish from the oven and place the mackerel fillets skin side down over the potatoes. Mix the remaining oil, garlic and parsley in a small bowl and pour the mixture over the exposed surface of the fish basting it well. Sprinkle with a generous amount of salt and pepper. Return the dish to the oven.
After ten minutes, remove from the oven. With a spoon, scoop up some of the oil in the dish and baste the fish and potatoes with it. Loosen those potatoes that have become browned and stuck to the sides of the dish, moving them away. Push into their place some of the slices that are not so brown. Return the dish to the oven and bake for five more minutes.
Serve piping hot with all the juices from the dish, scraping loose any crispy potato slices clinging to the sides of the dish. Accompany with a salad or some simply steamed green vegetables.
Mussels with fennel and tarragon
Serves 2 as a main course, 4 as a starter. Adapted from a recipe in Olive magazine.
Ingredients
2 tablespoons extra virgin olive oil
2 shallots, peeled and thinly sliced
Half a bulb of fennel, trimmed and thinly sliced
3 cloves garlic, peeled and thinly sliced
100ml dry white vermouth eg Noilly Prat
1kg mussels, cleaned and debearded
75ml double cream
Small handful of tarragon leaves, roughly chopped
Small handful of flatleaf parsley, large stems removed, roughly chopped
Method
Heat the olive oil in a large casserole (enamelled cast iron with a lid is ideal) over a medium-high heat, add the shallot and fennel with a pinch of salt, and cook for 10 minutes until soft and beginning to caramelise. Add the garlic and cook for another minute before pouring in the vermouth and seasoning well. Bring to the boil, then tip in the mussels and toss really well. Put on the lid and cook for 3-4 minutes, shaking the pan every now and again, until the mussels have just opened. Discard any mussels that remain unopened.
Remove the lid, stir in the cream and scatter in the chopped tarragon and parsley. Spoon into bowls and serve. Accompany with crusty bread or chips and a salad.
Pecan puffs for Christmas
December 18, 2016 § Leave a comment

I first came across this recipe more than 20 years ago in Sophie Grigson’s recipe column for the Evening Standard. I was delighted to rediscover it recently when I was thumbing through an old copy of her book “Sophie’s Table”.
She recounts how an American friend would send the family a gift of these puffs for Christmas each year and how they would barely last beyond Christmas Eve. They are a crumbly and buttery mouthful, essentially a shortbread but with a delicious pecan and vanilla flavour.
They have a Christmassy feel with their snowball-like appearance and are quick and easy to make. The only slightly fiddly part of the recipe is the rolling in icing sugar and returning to the oven to set the sugar.
They’ll keep for a week or more and so would make a lovely last-minute edible gift.
As an alternative to icing sugar, I’ve recently discovered “snow sugar” on the Bakery Bits website. It’s powdered dextrose plus cornflour and doesn’t dissolve away so bakes retain that freshly dusted look for longer. Ordinary icing sugar is fine though.


Pecan puffs
Adapted from a recipe in Sophie Grigson’s book “Sophie’s Table”.
Makes about 35.
Ingredients
125g unsalted butter
3g salt
30g golden caster sugar
½ teaspoon vanilla extract
150g shelled pecan halves
150g plain flour
icing sugar or snow sugar for dusting
Freeze the pecans beforehand to prevent them turning oily too quickly when ground. Put them into a food processor with the golden caster sugar and grind to a coarse powder without overworking.
Cream the butter, beat in the vanilla extract and gradually work in the ground nut and sugar mix and the flour to make a paste.
Chill the mixture briefly in the fridge to allow it to firm up just a little.
Roll rounded teaspoons of the mixture into balls and set onto baking sheets lined with silicone paper. Space the balls well apart to allow them to bake evenly.
Bake at 150 degrees C fan for 30 minutes until golden.
Allow to cool very briefly then carefully roll each puff in icing sugar, place back on the baking sheet and return to the oven for a further 2 minutes to set the icing sugar.
Cool on cake racks and store in an airtight tin, dusting each layer with icing sugar and separating with sheets of baking paper.
Shortbread
September 10, 2016 § Leave a comment
Shortbread is the classic British, or more properly Scottish, biscuit. With just three ingredients, flour, butter and sugar balanced in the baker’s golden ratio of 3:2:1 it’s sublime in its simplicity, the perfect riposte to an oversized cookie or indeed the overworked esoterically flavoured creations on offer on our TV screens at the moment courtesy of the Great British Bake Off.

Shortbread is relatively straightforward to make at home (though as I have discovered there are several ways to go wrong) but you can buy great shortbread too. One of my favourite commercially produced shortbreads is that made by Dean’s of Huntly. On a visit to Aberdeenshire not so long ago (mainly focused on sampling Speyside whiskies) we found ourselves in the small town of Huntly and took the opportunity to visit the factory showroom and café, learning the story of how Helen Dean started baking and selling shortbread from her family kitchen in the early 1970s. Dean’s shortbread truly is melt-in-the mouth and the list of ingredients for the premium all-butter shortbread is admirably simple.


So if Dean’s sets the benchmark, where does my own shortbread recipe come from?
It’s a combination of various different recipes plus a little trial and error.
In contrast to the brevity of the ingredients list, there are a number of aspects to the method for making and baking of shortbread that warrant a little further discussion or explanation.
1) Ratios
I referred above to the baker’s golden ratio of 3:2:1. Where does this come from you may be wondering?
I have 3 unimpeachable sources. The first is my mother-in-law’s handwritten recipe which calls for 6oz flour, 4 oz butter and 2 oz sugar (incidentally this is also what she does to make the best crumble topping); the second is Jane Grigson’s shortbread instructions from her book “English Food” (sorry Scotland!); the third is a classic shortbread recipe attributed to Katharine Robertson from the book “Seasonal Cooking” by Claire MacDonald of MacDonald who runs a famous hotel, Kinloch Lodge on the Isle of Skye.
2) Substituting some of the flour for cornflour, semolina or ground rice
The received wisdom seems to be that you can substitute up to one third of the plain flour with one of the above alternative starches. I have found that shortbread made with just plain flour has an amply crumbly and melt-in-the mouth texture if properly baked so why make things more complicated than they need to be?
3) What sort of butter is best?
I like to use a salted British butter, ideally a farmhouse one as this gives the best flavour to the finished biscuit. I think a little salt in the recipe lifts the flavour and if this is added by way of salted butter there is no danger of over-salting the dough. British butter is generally made from straightforward pasteurised cream and is known as “sweet cream” butter. Butter from the continental mainland e.g. Lurpak or the many French butters available are generally made from cream that has undergone lactic fermentation. This gives butter with a fresh, clean flavour but for shortbread making I prefer the richer taste of a sweet cream butter.
4) What sort of sugar is best?
Some recipes call for icing sugar but as far as I’m concerned, caster sugar is the way to go helping to achieve the desired crumbly texture. I also think that golden caster sugar gives an extra depth of flavour to the finished biscuit.
5) How should the ingredients be combined?
Some recipes suggest rubbing in the butter, flour and sugar whereas others suggest creaming together the butter and sugar and then working in the flour. I’ve tried both methods and find that it makes no difference. I find it easiest to start by creaming the butter and sugar in my Kenwood mixer and I was pleased to see that the legendary Helen Dean started off her family shortbread-making business using a trusty Kenwood mixer (proudly on display at the company’s HQ in Huntly – see photo above) so I feel I’m on solid ground here.
6) To roll or not to roll?
Several recipes suggest rolling out and cutting shortbread dough into shapes. Good luck to you if you can manage it! There is no way I’d attempt to roll out this type of dough as I find it just to hard to work with which is why I press my dough into a tin and cut it into fingers when baked. There are other recipes available for crisp little sablé-type biscuits that contain either egg yolks or whole eggs which are more suitable for rolling-out and cutting into shapes if that’s what you’re looking to make.
7) How long to bake and at what temperature?
Different recipes contain vastly different instructions on this aspect. As far as I’m concerned, relatively low and slow is the way to go which is why I suggest a baking temperature of 150 degrees C fan and 45 minutes’ cooking time. If you like a paler shortbread you might consider dropping the oven temperature by a further 10 degrees – Claire MacDonald’s recipe referred to above calls for a conventional oven temperature of 150 degrees C and a baking time of 1 hour.


Traditional shortbread
Makes enough to fill a standard rectangular Swiss roll tin (mine is 33cm by 23cm by 2cm) which when cut into fingers yields 36 individual biscuits. The ratio of flour to butter to sugar is the simple to remember 3:2:1 so you can readily alter the quantities to suit whatever tin size you have.
Ingredients
250g salted British butter
125g golden caster sugar (plus a little more for sprinkling afterwards)
375g plain white flour
Line the tin using a sheet of baking parchment carefully trimmed to fit. I do this by cutting a sheet of parchment slightly larger than my tin, pressing it into the tin to mark the division between base and sides then carefully snipping the paper at each corner at right angles then folding in the sides origami-style to create a 3D lining. If this sounds too complicated then just line the base of the tin.
Making the shortbread dough is easily done in a stand mixer but works well using a large bowl, wooden spoon and some elbow-grease too.
Cream together the butter and caster sugar thoroughly until the mixture is a little lighter in colour. Add the flour in 3 or 4 stages, mixing until well incorporated. The end result should be a crumbly dough that barely holds together and looks like badly made shortcrust pastry.
Tip the dough into the lined tin and spend a few minutes carefully pressing and distributing the dough evenly in the tin. You can do this using any combination of your knuckles and fingertips, a metal spoon or a small crank-handled palette knife. Prick the dough all over with the tines of a fork. I think this helps the dough to bake through more evenly, it looks attractive and importantly creates tiny pockets in the baked surface allowing the final sprinkling of caster sugar to adhere better to the biscuits.
Place the tin of shortbread dough into the fridge for at least 15 minutes to chill and firm up. It can be left into the fridge for several hours, even overnight if that suits your timetable.
When you are ready to bake, preheat your oven to 150 degrees C fan. Bake the shortbread for about 45 minutes until a light golden colour throughout. Judging the right degree of baking is perhaps the hardest aspect of this recipe and will probably require a degree of trial and error depending on how accurate your oven temperature is. It shouldn’t be too dark a colour – baking long and slow is the way to go. Also, if the shortbread is baked too long it becomes too hard and brittle and will shatter when cut into. If underbaked it will lack flavour and have a claggy rather than melt-in-the-mouth crumbly texture. When it is baked just right it will still be somewhat soft when cut into while still warm but, fear not, it will firm up to the right crumbly texture when cooled.
Once baked, remove from the oven, immediately carefully cut into fingers of the desired size (I cut mine lengthwise into 3 long strips then crosswise into 12 strips to produce 36 fingers) and sprinkle the surface with a little more golden caster sugar. Leave to cool completely in the tin.
Breakfast from Chad
September 5, 2016 § Leave a comment
The latest in our Breakfasts of the World Project series. It’s been a while but I think the muse is back…
The Republic of Chad is a landlocked country in Northern Central Africa named after the great freshwater lake on its Western border. It is a huge country in terms of land area (the fifth largest in Africa) but with a relatively small population of some 14 million.
It was part of French Equatorial Africa until 1960 when the country declared independence from France. The capital city is N’Djamena and French and Arabic are the official languages. Confusingly, Chad’s flag of vertical blue, yellow and red stripes is identical to that of Rumania, a source of low level diplomatic tension unlikely to be resolved any time soon.
Chad has experienced vast numbers of refugees flooding across its border with Sudan since 2003 as a result of the Darfur conflict. More recently there have been further waves of refugees crossing its Western border fleeing civil war in the Central African Republic.
The UNHCR publishes copious detailed reports of its work with refugees in Chad that are probably not as widely read as they should be. Looking at these reports, I was struck by the pictures of refugees eking out a meagre living selling street food. My Chadian breakfast took inspiration from these resilient street food vendors and comprised sweet millet fritters plus the ubiquitous “jus de fruit” which is in fact a simple mango smoothie. The helpful Chad information website where I found both recipes says that many small businesses have started up throughout Chad based on selling this one popular drink.


Millet is a staple grain from this part of Africa and grows successfully in hot arid conditions but is relatively unknown in more temperate climates except as bird seed. The grains are like tiny creamy seed pearls and grind down to a yellowish, mild, slightly nutty tasting flour. It’s naturally gluten free and perhaps as a consequence quite hard to handle and my millet fritters were something of a disaster. This is what the first deep-fried batch looked like after cooking:
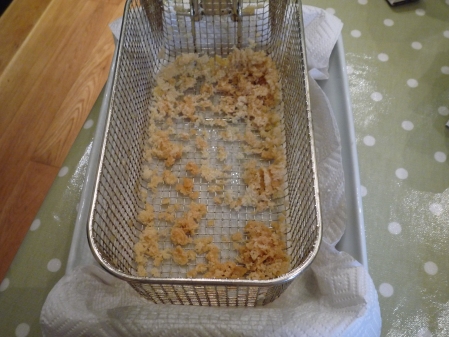
I had to abandon the deep fat fryer and ended up shaping my millet dough into shortbread-style fingers before oven baking. Perhaps these would have turned out better if I’d been able to use freshly ground local millet flour as the recipe specifies rather than a bag of Bob’s Red Mill US grown millet flour.
It’s also possible that my proportions were wrong as I used US cups i.e. 8 fl oz measures whereas the measure used in the original recipe was a “verre” i.e. a glass. Who knows what that might be but I suspect it may be smaller than 8 fl oz.
At least the mango smoothie turned out well – I’d happily drink this for breakfast anytime and the addition of the powdered cardamom adds an extra flavour dimension.
Jus de fruit – Mango smoothie from Chad
Adapted from a recipe from http://www.tchad.org/research/cook.html
Ingredients
1 medium-size ripe mango, peeled, stone removed and cut into chunks
2 cups whole milk (fresh tastes good but powdered milk would probably be used in Chad)
Caster sugar to taste
6 ice cubes
1/4 teaspoon cardamom powder
Crush the ice in the blender . Peel and cut up the mango and put the fruit chunks into a mixer. Blend the mango in the mixer. Add the milk, sugar and cardamom to the mixer and blend well. Serve immediately.
Millet fritters from the Ouaddaï
Adapted from a recipe from http://www.tchad.org/research/cook.html
Ingredients
2 cups millet flour ground the day you prepare the fritters
1 cup wheat flour
1 cup vegetable oil
1/2 cup powdered sugar
1 egg
Peanut oil to fry
Mix the millet and wheat flours together. Heat the cup of vegetable oil to hand-hot and pour it over the flour mixture. Mix roughly. Whisk together lightly with a fork the sugar and egg and pour over the dough. Knead the dough for 5 minutes until it becomes firm and smooth.
Roll the dough to a thickness of 5 millimetres on a lightly floured board and cut into ribbons.
Fry to a golden brown in the peanut oil at about 150 degrees C. Drain the fritters on kitchen paper and serve hot, warm or cold.
Spaghetti or linguine vongole – a shellfish pasta dish for summer
June 15, 2016 § 1 Comment
We were out with friends at a local Italian restaurant on Friday and I ordered their spaghetti vongole to benchmark my own version against it. The restaurant version was competent but no more – the pasta hadn’t taken on the sweet flavour of the clams and there was too much pasta and not much else. I shall spare the restaurant kitchen’s blushes by not naming it here!
I’ve been experimenting at home recently with spaghetti vongole having seen a recipe demonstrated by chef Theo Randall on the BBC cooking show Saturday Kitchen back in April.
The Theo Randall version ups the shellfish flavour by partnering the clams with squid and prawns. White wine, garlic and sweet cherry tomatoes form a base for the sauce, strips of courgette are mingled with the pasta to lighten the dish and the whole whole thing is freshened up with lots of chopped fresh flat-leaf parsley.
The trick to boosting the flavour of the finished dish is to only part-cook the pasta in boiling and salted water and complete the cooking in the clam sauce so that the pasta really takes on the sweet shellfish flavour.
The recipe for spaghettini with squid, clam and prawns that the BBC give on the website (to accompany the Saturday Kitchen show) for is frankly pants. It misses out the wine from both the ingredients list and method, some of the cooking times are wrong – you really don’t want to boil the wafer-thin courgette strips for 7 minutes – and the weight of some of the ingredients is unbalanced. My version of the recipe corrects these errors and omissions.
It’s important to have everything prepped and ready to go before you start cooking, as once you begin cooking it’s all systems go and the dish is finished quickly and cooked pasta can’t be kept waiting. Doing all the prep is a little time consuming but the finished dish is worth the little bit of effort this takes.
The clams need to be fresh but the recipe works just fine with defrosted raw squid and prawns.
The courgette strips would probably most easily be created with a modish spiraliser but if you don’t have one (and I don’t as you can see from the pictures), the courgette can be fashioned into long thin strips using a vegetable peeler or mandolin and kitchen knife.
I experimented making this dish with different types of good quality dried pasta. You don’t need to use spaghetti – my favourite version was with fine flat linguine to which the sauce clung well.


Linguine with clams, squid and prawns
Serves 2
Ingredients
200g good quality dried linguine (or spaghetti or other long thin pasta of your choice)
1 medium courgette cut into thin strips using a vegetable peeler or mandolin (or spiralised)
3 tablespoons extra virgin olive oil
350g clams in their shells, cleaned (1 generous handful each)
1 medium squid, cleaned, cut into small pieces (0.0,75cm dice is about right)
150g raw peeled deveined prawns cut into small pieces (the same size as the squid pieces)
1 garlic clove, thinly sliced
pinch dried chilli flakes
10 baby plum or cherry tomatoes cut into quarters
large glass dry white wine
2 tablespoons chopped fresh flatleaf parsley
1. Prep all the ingredients, bring a large pan of salted water to the boil , lay the table and warm your serving bowls and have your guest at the ready before you start cooking as this dish is ready in the time it takes to cook the pasta and is at its best served and eaten as soon as it’s ready.
2. Cook the pasta in the pan of boiling salted water according to the packet instructions but reduce cooking time by 1 minute. It will finish cooking in the clam juices.
3. Meanwhile, heat the olive oil in a sauté pan or deep frying pan big enough to hold all the sauce and the cooked pasta. Add the prawn, clams and squid and stir fry for one minute.
4. Add the garlic, half the parsley, the dried chilli flakes and the quartered baby plum or cherry tomatoes and stir fry for a further minute. Add the glass of white wine and allow it to bubble away for a further minute or two until reduced by approximately half. Turn off the heat while the pasta cooks.
5. Once the pasta is about one minute away from being ready, drain in a colander but reserve a cupful of the starchy pasta water.
6. Straightaway, add the raw courgette strips and drained pasta to the frying pan containing the sauce, turn the heat back on and cook for a further minute or so, tossing the pasta and courgettes in the pan so that sauce emulsifies and the pasta and courgettes really take on the flavour of the sauce. You may need to add a little of the reserved cooking water if the contents of the pan seem too dry. Go easy on the liquid though as you don’t want to drown the pasta in water.
7. Add the reserved tablespoon of chopped parsley and mix well before dishing up into warmed bowls.
Sometimes a magazine recipe comes up trumps
February 29, 2016 § Leave a comment
I spotted a recipe in last month’s edition of the M&S food magazine for something they called “Salmon and ricotta brunch”. Practically every food publication that comes out at this time of the year features healthy eating and detox options. The brunch recipe was billed as being high protein fuel for those concerned with their health and nutrition. The recipe title wasn’t great, nor was the health-food angle but the picture looked pretty so I gave it a go and was really pleased with the result.
At the time I decided it was far too fussy a dish to make for breakfast. Who wants to tumble out of bed on a Sunday morning and start separating eggs for goodness’ sake!
But on reflection, if you’re in the right frame of mind, with a bit of forward planning it is manageable and making this dish for a second time at the weekend, the process seemed a whole lot easier.
Don’t let the whole seventies-retro vibe feel of a roulade put you off either. The end result is delicious, filling, and yes, being high-protein and low carb probably counts as healthy too.
I bet you’re thinking that the roulade in the picture looks just a tad too golden-brown. You’re right as I mistakenly baked mine at 200 degrees C fan rather than the 190 degrees C fan I suggest in the recipe.


Salmon, spinach and ricotta roulade
Serves 8 for brunch or a light lunch.
Ingredients
For the roulade
50g unsalted butter
50g plain flour
300 ml milk (whole or semi-skimmed)
60g grated parmesan
4 medium eggs at room temperature
freshly ground black pepper
2-3 further tablespoons grated parmesan
For the filling
240g bag ready-to-cook spinach
250g ricotta
salt and freshly ground black pepper
¼ grated nutmeg
175g cooked flaked salmon or hot-smoked salmon or trout
1. Heat the oven to 190 degrees C fan and line a swiss roll tin with baking parchment.
2. Make a very thick white sauce as the base of the roulade. Melt the butter in a medium saucepan, add the flour and cook the resulting roux for a minute or two but do not allow to colour.
3. Take the pan off the heat and add the milk a little at a time whisking thoroughly after each addition. Return the pan to the heat (medium heat) and, whisking constantly, bring the mixture to the boil and cook for 4-5 minutes, again whisking all time to produce a thick smooth mixture.
4. Remove the pan from the heat and add the 60g grated parmesan. Mix well to incorporate then set the pan aside for the mixture to cool for 5-10 minutes. Stir it from time to time while it cools to stop a skin from forming.
5. Separate the eggs. Reserve the yolks and whisk the whites until firm but not too stiff and dry.
6. Beat the reserved egg yolks into the thick cheese sauce mixture.
7. Take a big spoonful of whisked egg white and mix it into the thick cheese sauce mixture to loosen it a little then add this mixture to the whisked egg whites. Fold together using a balloon whisk trying not to knock too much air out of the whisked mixture.
8. Carefully pour the roulade mixture into the prepared tin, spread it to the corners with a palette knife and sprinkle 2-3 tablespoons grated parmesan over the top.
9. Bake for 15 minutes until risen and golden-brown.
10. Meanwhile, lightly steam the spinach, squeeze out all the excess water, chop roughly and place in a bowl. Add the ricotta, salt, pepper and grated nutmeg to the bowl and mix thoroughly to combine.
11. Place a sheet of baking parchment on a work surface and when the roulade is cooked, turn it out onto the parchment. Peel away the parchment used to line the tin.
12. Quickly spread the spinach and ricotta mixture over the roulade and top with the flaked fish. Roll up the roulade using the parchment on the work surface to help create a tight roll.
13. Cut into slices with a serrated knife and serve while warm with roast cherry tomatoes if liked.
14. The rest of the roulade is good served cold for lunch the following day.
An idea for a Valentine’s night supper
February 13, 2016 § Leave a comment
Here’s a quick idea for a special meal at home if you don’t fancy sharing an evening in a restaurant with couples out on an awkward first date, red roses and all that over-hyped jazz.
My suggested menu is built around a main course of Lobster Mac and Cheese. This is a world away from the stodgy macaroni cheese I remember from my childhood. It was a very on-trend dish last year but now that Marks and Spencers do a ready meal version I think we can say it’s truly become mainstream.
I’d wanted to give the dish a try but couldn’t bear the idea of using expensive and hard-to-source lobster in anything except it’s purest form. But then I saw the Iceland Christmas ad campaign and filled my chest freezer with 10 quid packets of pairs of Canadian lobster tails. Perfect for experimenting with different lobster recipes, be they salads, chowders or indeed lobster mac and cheese.


After a couple of trial runs, I’m quite pleased now with the recipe I’ve come up with. I’d accompany it with a crisp green salad dressed with olive oil and lemon juice.
To start, you could stay with the seafood theme and serve a pretty-as-a-picture crab, pink grapefruit and avocado salad.
To finish something fresh and light on carbs would be in order – maybe a lemon granita or fruit salad, and of course Champagne would be the perfect drink.
Lobster mac and cheese
Serves 2
Ingredients
180g dried macaroni or other small pasta shapes (I used conchigliette)
2 small cooked lobster tails, meat removed from the shell and cut into bite-size chunks
30g unsalted butter
1 shallot, finely chopped
25g plain flour
100ml Noilly Prat vermouth
350ml semi-skimmed milk
35ml double cream
2 teaspoons tomato purée
1 teaspoon paprika
generous pinch cayenne pepper
25g gruyère cheese
2 tablespoons chopped flatleaf parsley
Salt and pepper
2 tablespoons freshly grated parmesan cheese
3 tablespoons Panko or similar dry breadcrumbs
Preheat the oven to 210 degrees C fan.
Cook the pasta in plenty of boilings salted water until just al dente then drain.
While the pasta cooks, prepare the sauce.
Melt the butter and sauté the chopped shallots for a minute or two until soft and translucent. Stir in the flour to make a roux and cook for a further minute.
Add the Noilly Prat, milk and cream a little at a time stirring well after each addition. Cook over a medium heat, stirring constantly until the sauce thickens. Add the tomato purée, paprika, cayenne pepper and gruyère cheese and stir to combine well and melt the cheese. Add the chopped parsley and season to taste.
Mix together the sauce, cooked pasta and lobster meat and turn into a shallow heatproof dish.
Sprinkle the grated parmesan and breadcrumbs over the top and bake in the preheated oven 210 degrees fan for about 15 minutes until piping hot and golden brown on top.
Root cake
October 17, 2015 § 1 Comment
As I write, England need just 33 to win in the surprisingly exciting test match against Pakistan..
This reminds me that earlier this year I fulfilled a longstanding ambition to take a along a cake to the BBC cricket commentary team in the Test Match Special studio. The occasion was a glorious Saturday at Cardiff during the opening Ashes test match 2015 (a hotly contested series whereby England take on Australia in case you’re not a cricket aficionado).
England’s batsman of the moment was Yorkshire’s finest, Joe Root, and it was his name that gave me inspiration for what to put in the cake and how to decorate it. Everyone knows that carrots make a great teatime cake so why not run with the idea and throw parsnips and swede into the mix as well? That’s exactly what I did. The only other change I made to my failsafe carrot cake recipe was to substitute coarsely ground hazelnuts for the chopped walnuts as I thought this would make a better flavour match with the nutty notes of parsnip and swede. And so the root cake was born.


The cake recipe, like the England team, was a winner, whether in its original carrot and walnut form or with the root vegetable and hazelnut variatiotion – straightforward to make and bake, travels well, reliably moist and delicious and with a cream cheese frosting that holds its shape and won’t let you down when the heat is on…
I was delighted that my cake made it onto both the Test Match Special Facebook page and Twitter feed, was tweeted by former leading Australian bowler turned commentator Glenn McGrath and was referred to by Jonathan “Aggers” Agnew in an interview for Radio Times. A tiny bit of fame!


Root cake with cream cheese frosting
This quantity makes a triple layer 20cm round cake. Increase the cake batter quantities by 20% and the frosting quantities by 50% to make a triple layer heart-shaped cake in a tin measuring 22cm lengthwise (from low point between lobes to tip) by 23cm across widest part.
The 20cm triple layer round cake cuts into 12 slices.
Ingredients
300g soft light brown sugar
3 eggs
300ml/265g rapeseed oil
½ teaspoon vanilla extract
300g plain flour
1 teaspoon bicarbonate of soda
1 teaspoon baking powder
1 teaspoon ground cinnamon
½ teaspoon ground ginger
½ teaspoon freshly grated nutmeg
½ teaspoon salt
100g each finely grated carrots, parsnips and swede
100g coarsely ground hazelnuts
For the frosting
300g icing sugar, sifted
50g unsalted butter, at room temperature
125g cream cheese, cold
To decorate
A selection of root vegetables modelled from marzipan and painted with food colouring or, more simply, a handful of toasted hazelnut halves and a sprinkling of ground cinnamon
Prepare three 20cm cake tins by greasing and lining the bases with silicone baking paper.
Preheat the oven to 170 degrees C fan.
Put the sugar, eggs, vanilla extract and oil in a stand mixer fitted with K beater attachment and beat until the ingredients are well incorporated. Mix together the flour with the raising agents and spices and slowly add this to the bowl continuing to beat until well mixed.
Stir in the grated root vegetables and ground hazelnuts and mix until evenly dispersed.
Pour the mixture into the three prepared cake tins (weigh to ensure evenly distributed) and level the surface with a palette knife. Bake in the preheated oven for 20 to 25 minutes or until golden brown and cooked through (test by pressing quickly and lightly with a clean forefinger – the sponge should bounce back when cooked). Leave the cakes to cool in the tins for a few minutes before turning out onto a wire rack to cool fully. Peel off the baking paper.
Make the frosting while the cakes cool. Beat together at slow speed the icing sugar and the butter in a stand mixer fitted with a K beater attachment. Add the cream cheese all in one go and beat until fully incorporated. Turn up the speed to medium-high and continue beating for about 5 minutes until the frosting becomes thick and fluffy.
When the layers are fully cold, you can assemble the cake. Put one layer on a stand and spread about one third of the frosting over it. Place the second layer on top and spread over it the next third of the frosting. Top with the last cake and swirl the remaining frosting decoratively and smoothly over the top. Decorate with marzipan models or halved nuts and a sprinkling of cinnamon according to your preference.
