
Cambodian breakfast
February 4, 2013 § 4 Comments
The latest in our Breakfasts of the World Project series.
New Year, new letter of the alphabet – we’re finally onto the letter C! – new country.
In preparation for our Cambodian breakfast I watched Roland Joffé’s “Killing Fields” on DVD documenting the friendship between New York Times reporter Sydney Schanberg and his Cambodian colleague Dith Pran. The Vietnam war spills over the border into neighbouring Cambodia and the Communist Khmer Rouge take control of Cambodia’s capital city Phnom Penh in 1975. Schanberg gets away unscathed but Pran, as an urban intellectual, is taken prisoner by the Khmer Rouge and made to work in harsh labour camps and witnesses Pol Pot’s in the killing fields.
How things have changed in the last 30 odd years. Cambodia is now very much on the modern-day Grand Tour with the holy city of Siem Reap and the temples of Angkor Wat a must-see destination. And a tourist website gives the following cursory directions to another top tourist attraction:
“The Killing Fields of Choeung Ek are 15 km from Central Phnom Penh. To get there, take Monireth Blvd south-westward out of the city from the Dang Kor Market bus depot.”
So what to eat for our Cambodian breakfast? The opening scenes of “The Killing Fields” feature Schanberg and colleague Al Rockoff (memorably played by John Malkovich) ordering café complet and aspirin at Phnom Penh’s Café Central but I was after something altogether more authentic. Fortunately, travel blogs are almost unanimous in identifying Nom Banh Chok – bowls of rice noodles with fish curry ladled over – as the ubiquitous breakfast dish in Cambodia.
You can read about the extremely laborious process of making Nom Banh Chok rice noodles by hand here, a link to the fascinating and beautifully photographed Eating Asia blog.
The list of ingredients required to make Num/Nom Banh Chok (spellings transliterated from the Cambodian language are many and various). I succeeded in tracking down an authentic recipe which comes from another West/Eastern duo – not Schanberg and Pran this time but Austrian and Cambodian chefs Gustav Auer and Sok Chhong who co-authored the cookbook “From spiders to water lilies” containing recipes from their Phnom Penh restaurant Romdeng (Cambodian for the key flavouring ingredient galangal).
Having tracked down an authentic recipe I wanted to do my best to use authentic ingredients. Whereas most large supermarkets now stock lemongrass, Thai basil, Kaffir lime leaves, Thai fish sauce and coconut cream and milk (and you can get hold of Kaffir limes from the Natoora range carried by online supermarket delivery service Ocado), some of the ingredients listed necessitated a special expedition to Manchester’s Chinatown.
I was delighted to be able to track down galangal, fresh turmeric and something close to the recipe’s specified “Cambodian rhizome” at Kim’s Thai Food Store. What I bought was Boesenbergia Pandurata aka Kaempferia pandurata, Chinese Keys, lesser galangal (though this name is probably incorrect), krachai (Thai), kcheay (Khmer) and kunci (Indonesian).


The aromatics were chopped then blitzed in the food processor to produce 15 tablespoons of precious yellow curry paste:

To complete the curry, a whole new batch of ingredients were needed. Coconut cream, fish sauce and coconut milk are now readily available in supermarkets. I had no idea at the time what type of fish to use, or even if it should be sea or freshwater fish so I chose a fresh and healthy looking Anglesey farmed seabass from my local fishmonger who expertly converted it into fillets. It was a shame to carefully poach and skin it and then pulp it into oblivion as the recipe specifies!
I’ve since read about Cambodia’s enormous inland Tonlé Sap lake which apparently supplies 70% of the protein consumed in Cambodia, including not only fish but shrimps, crabs, snails, frogs and snakes.
The only ingredient I couldn’t get hold of was the Cambodian fish paste called prahok. According to the helpful Cambodian food leaflet “Cambodia on A Plate”, prahok is “a grey paste of preserved fish…(that is) probably the most distinctive flavour in all Cambodian cooking”. I had to make do with a Thai shrimp paste instead (on reflection the UK anchovy paste we call “Gentlemen’s Relish” might have made a good substitute too).


Curry complete, all that was left to do was prepare the all-important rice noodles, accompanying salad and Thai basil and red chilli garnish. Yet another long list of ingredients, some, such as the cucumber and beansprouts easy to obtain, others, such as banana flower (?) and water lily root (??) a little trickier. I was delighted to find a fresh banana flower in Chinatown but the water lily root request defeated both the Chinese and Thai shop assistants. In the end I went for the helpful suggestion of a lotus root which is apparently used raw in salads in some Thai recipes.


The resulting plate of salad was a thing of beauty:

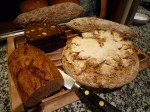
And finally, after about 6 hours spread over 2 days of shopping, chopping, pounding and boiling, we sat down to breakfast:

Contact details
For Oriental vegetables in Manchester:
Hang Won Hong
Connaught Buildings
58-60 George Street
Manchester M1 4HF
Telephone 0161 228 6182
For Thai (and Cambodian) specialities in Manchester:
46 George Street
Manchester M1 4HF
Telephone 0161 228 6263
For the UK’s only Cambodian restaurant
Lemongrass
243 Royal College Street
London NW1 9LT
Telephone 0207 284 1116
http://www.cambodianlemongrass.co.uk/
Recipe for Num Banh Chok – yellow fish and coconut curry with rice noodles and raw Cambodian vegetables
This recipe is adapted from one in the book “From Spiders to Water Lilies” by Gustav Auer and Sok Chhong published as a fundraising project by the Friends International organisation.
Serves 4-6
Ingredients
For the lemongrass paste
200 g young lemongrass stalks (about 15-16 stalks) trimmed and sliced
2cm cube of peeled and roughly chopped galangal
3cm cube peeled and chopped fresh turmeric
4 kaffir lime leaves, thinly sliced
4 garlic cloves, halved
Peel of half a kaffir lime, chopped
2cm cube peeled and chopped Cambodian rhizome
For the curry
300 g fish fillets, poached
3 tablespoons lemongrass paste
2 tablespoons roasted chopped peanuts
500 ml fish stock
250 ml coconut milk
250 ml coconut cream
1 teaspoon prahok (Cambodian fermented fish paste)
2 tablespoons fish sauce
salt to taste
1 tablespoon palm sugar
To accompany the curry
400 g dried weight thin rice noodles, cooked al dente
2 small cucumbers, cut into matchsticks
half a banana flower, soaked in cold water acidulated with kaffir lime juice then thinly sliced just before serving
200 g bean sprouts
2 pieces of water lily root, peeled and thinly sliced
To garnish
red chillies
few Thai basil leaves
First, prepare the lemongrass paste. Using a food processor, blitz the chopped lemongrass into a paste. Add the remaining ingredients and 4-6 tablespoons cold water and blitz again until well combined. According to the original recipe, this paste will keep refrigerated for one day only, so take what you need for the recipe and freeze the rest in individual containers. This quantity of ingredients produced 12 tablespoons of neon-yellow paste which I froze in 3 tablespoon portions.
Next, poach the fish in the stock until just cooked – for thin fish fillets this will take just 2 or 3 minutes. Leave to cool a little then drain off and reserve the stock to add to the curry and skin the fish fillets making sure no small bones remain in the flesh as you do so. Set aside.
Prepare the raw vegetable accompaniments and garnish, leaving the banana flower pieces in iced acidulated water until the last minute as they discolour very quickly.
Weigh, measure and set out all the curry ingredients and necessary kitchen equipment so you can complete the curry quickly without overcooking the rice noodles and fish.
About 20 minutes before you plan to serve the curry, take the banana flower from the iced acidulated water, dry it and shred finely. Add to your serving platter of accompanying raw vegetables.
Next, soak the dried rice noodles in hot water for about 15 minutes until they soften to just al dente. Keep an eye on them as overcooked rice noodles have an unpleasant mushy texture.
You are now ready to complete the curry. Place the cooled cooked and de-skinned fish fillets with the 3 tablespoons lemongrass paste and peanuts into the bowl of a food processor. Blitz to a coarse paste. Set aside. Put 500ml fish stock, the coconut milk, coconut cream and prahok into a medium saucepan and bring to the boil, stirring frequently to mix. Add the reserved fish paste, fish sauce, salt and palm sugar, and simmer for 5 more minutes, mixing to incorporate.
To serve, put a large handful of vegetables into each person’s bowl. Add a portion of cooked rice noodles then ladle the fish curry over the top. Garnish with finely sliced deseeded red chillies and a scattering of Thai basil leaves.
German new year
January 6, 2013 § Leave a comment
Twelfth night is behind us, the decorations are down and I’m almost into the second week of the now traditional alcohol-free January. Time to take stock of the new year festivities which this year took the form of a German-themed 3 day event hosted by our friends Mike and Janet. We ate our fill of homemade bratwurst (and that was just for childrens’ tea!), Mike’s excellent seeded and rye breads and lots of good wine.


Here’s the menu for the main event on New Year’s Eve:
Silvestermenu und weinkarte 2012
Wurst and leberkäse canapés
2006 Joh. Jos. Prüm Zeltinger Sonnenuhr Riesling Auslese
NV René Muré Crémant d’Alsace Brut Prestige
~
Bräustüberl Weihenstephaner Obatzda mit Bretzeln
Soft pretzels with the original cheesy dip (Bräustüberl Weihenstephan)
1999 Joh. Jos. Prüm Wehlener Sonnenuhr Riesling Kabinett
~
Gugelhofer Riesling pochierte Forelle mit Thymian
Riesling-poached trout with thyme (Gugelhof, Berlin)
1999 Albert Boxler Riesling Brand
~
Rheinischer Sauerbraten mit Spätzle von Wolfgang Puck und Kümmel Krautsalat
Traditional beef sour-roast with spätzle and caraway cabbage salad
2009 August Kesseler Spätburgunder Cuvée Max
~
Birnenküchen
Roasted pears in a yeasted cinnamon-hazelnut cake
1996 Reichsgraf von Kesselstatt Scharzhofberger Riesling Beerenauslese
1976 Hugel et Fils Riesling Sélection de Grains Nobles
~
Käse von Deutschland,England und die Republik Irland
Tilsiter, Colston Bassett, Coolea, Westcombe, Kirkham’s, Cornish Yarg, Tunworth
1983 Grahams Porto Vintage
1977 Warre Porto Vintage
~~~
Janet blithely announced on the morning of the 31st that our work preparing this feast would be “relatively light”. As if! It took us most of the day to get everything ready, and once we were done, Janet and Shelley set up the mincer, stretched the skins and produced several pounds of home made bratwurst. I watched in amazement as Shelley and Janet coaxed the pork and veal filling into seemingly endless pink links. My contribution to the project was a bit of washing up.
Back to the main event. My task was preparing the obatzda cheese spread and home made pretzels to serve alongside. I’d made pretzels before using an authentic Greg Patent “Baker’s Odyssey” recipe which I did again, this time dipping the pretzels in a bicarb solution rather than full-on caustic soda. I didn’t want to take the risk of chemical burns to self and children and damage to someone else’s home that working with caustic soda solution entails. After the effort of making the pretzels, whizzing up the obatzda was relatively simple. It was served deumurely from a small earthenware pot rather than in great scoopfuls on a big rustic wooden board as is traditional in Munich.


Next course was the trout, poached in a delicate riesling wine along with leeks and carrots for flavour and colour.

The main course was a long-marinated and 5 hour simmered majestic beef Sauerbraten served with authentic spätzle noodles and a crunchy cabbage and caraway salad alongside, a good contrast to the meltingly soft been and noodles. Janet took charge of the spätzle, laboriously pushing the batter through a colander into boiling salted water in true Hausfrau style. The technique of cooling the cooked spätzle in iced water then briefly sautéing in hot oil and butter when ready to serve makes them practical for a dinner party.


Pudding was a magnificent yeasted pear and hazelnut cake which Shelley made. We managed to dovetail our use of the Kenwood mixer and oven very amicably. This was a truly magnificent cake, perfect served warm in delicate slices with billowy whipped cream. If there’d been any left, I’d imagine it would have been rather good served with coffee next morning!

The meal concluded with cheese and port, then a rousing team demonstration of “Gangnam Style” to bring in the New Year and embarrass the children. Start as you mean to go on.
Recipe for Obatzda – Bavarian cheese spread
Traditionally served with soft pretzels as snack. Adapted from a recipe from the Bräustüberl Weihenstephan in Munich. Serves 6 as a starter or snack.
Ingredients
300g piece of Brie cheese, skin and all
23 g softened unsalted butter
50 g cream cheese
1/2 teaspoon ground paprika
pinch of ground caraway seeds
2 tablespoons German beer (Weihenstephaner Vitus Weizenbock or Weihenstephaner Weißbier for authenticity)
salt and freshly ground black pepper to taste
40 g finely chopped red onion (or less depending on your preference).
Process the Brie to a mass in a food processor. Add the butter, cream cheese, seasonings and beer and process again to combine. Remember that the cheeses are already quite salty so go easy on adding salt at this stage.
Finally add the chopped red onion and process very gently once more just to combine.
Refrigerate for a couple of hours to allow the flavours to combine and mellow. You can serve the spread packed into a pretty earthenware pot as we did, or more traditionally, serve in scoops or quenelles on a rustic wooden board alongside the soft pretzels and garnish with red onion rings, chives, and lettuce – a Bavarian ploughman’s lunch I suppose.
Recipe for Spätzle – Germanic rustic noodles
Austrian born celebrity chef Wolfgang Puck’s recipe from Epicurious.com. Serves 8 as a side dish.
Ingredients
4 large egg yolks
1 large egg
1 3/4 cups whole milk
1 pound (about 3 cups) all-purpose flour
1/4 teaspoon freshly grated nutmeg
1 teaspoon salt
1/4 teaspoon freshly ground black pepper
1/2 cup peanut oil
1/2 cup (1/4 stick) unsalted butter, melted
1 tablespoon fresh parsley, minced
In a small bowl, beat together egg yolks, egg, and milk.In medium bowl, whisk together flour, nutmeg, salt, and pepper. Add egg mixture to flour mixture and mix with wooden spoon just until well blended. Do not overmix. Refrigerate, covered for at least 1 hour.
Bring a large pan of salted water to boil. Fill a large bowl with iced water. Place a large-holed metal colander on top of the pan. push one-third of the batter through the holes into the water using a flexible spatula. We think that a food mill set on the large hole screen might do this job pretty well but haven’t tried it out yet. Cook for a minute or two then transfer quickly with a slotted spoon to the bowl of iced water. Make 2 more batches in the same way.
When the spätzle are cool to touch, drain well and toss with 1/4 cup oil. (They can be prepared up to this point and refrigerated, covered, up to 2 days.)
When you are ready to serve, place a large sauté pan over high heat and in it heat the remaining 1/4 cup oil. Add the spätzle and cook, without moving the pan, until undersides are brown, about 2 minutes. Add butter and sauté until golden brown, about 2 minutes more. Season to taste with salt and pepper. Sprinkle with parsley and serve.
Recipe for Birnenküchen – German pear cake
Serves 8 generous portions for teatime or 12 dainty portions for dessert with whipped cream. Adapted from a recipe on Epicurious.com.
Ingredients
For the enriched yeast dough
3/4 teaspoon fast acting instant dried yeast (2-3g – the type that can be added directly to flour)
1 1/2 cups strong plain flour, plus additional for dusting
1/2 teaspoon salt
1/3 cup milk
1/3 cup golden caster sugar
1 whole large egg
1 large egg yolk
1/2 teaspoon vanilla extract
7 tablespoons unsalted butter, cut into pieces and softened
For the pear topping
3 ripe but still firm Conference pears (about 1 1/2 lb total)
2 tablespoons unsalted butter, melted
1/4 cup packed dark brown sugar
2 tablespoons plain fine dry bread crumbs
3 tablespoons hazelnuts, toasted and chopped
1/2 teaspoon cinnamon
Begin by making the enriched yeast dough. Ideally you need a stand mixer (Kenwood or Kitchenaid ) to attempt this recipe.
In the bowl of a stand mixer fitted with a dough hook, stir together the flours, fast action dried yeast and salt. Pour in the milk, turn the mixer on to a low speed and mix for one to two minutes until the flour is moistened and you have a fairly dry shaggy mixture.
Scrape down the sides of the bowl using a plastic dough scraper or rubber spatula. Turn the mixer back on to a low speed and add the egg mixture little by little, then the sugar. Increase the speed to medium and beat for about 3 minutes by which time the dough should have formed into a ball.
Reduce the mixer speed to low and add the butter in 2 tablespoon sized chunks, beating until almost incorporated before adding the next. You will end up with a very soft cake-batter-like dough. Increase the mixer speed to medium and beat until the mixture comes away from the sides of the bowl, about 10 minutes.
Cover the bowl with cling film or a plate and let the dough prove until doubled in size, at least 1 and 1/2 hours, maybe longer.
While the dough proves, prepare the roast pear topping. Preheat oven to 180°C fan.
Peel pears, cut lengthwise into eighths, and cut out the cores. Toss pears with melted butter and 2 tablespoons brown sugar in a 13- by 9-inch glass or ceramic baking dish and arrange in 1 layer.
Roast pears, gently turning and stirring occasionally, until just tender and lightly caramelized, about 45 minutes. Transfer pears to a plate with a slotted spatula. Stir bread crumbs into baking dish, scraping up all brown bits and butter, then transfer to a bowl. Stir the hazelnuts, cinnamon, and remaining 2 tablespoons brown sugar into bread crumbs.
Line a deep 24cm round cake tin, ideally spring form, with a baking paper.
Now you are ready to assemble and bake the küchen. Reduce the oven temperature to 160°C fan.
Knock back the proved dough and transfer it to the lined cake tin and and spread it evenly across the base of the tin with a rubber spatula.
Sprinkle half of the crumb mixture over the dough, leaving a 1-inch border. Gently toss the roasted pears with the remaining crumb mixture and scatter the pears over the dough. Let the küchen rise, covered with plastic wrap for about 30 minutes.
Bake the küchen for about 40 minutes until firm to the touch and deep golden brown. Cool the küchen in its tin on a rack for about 20 minutes, then carefully remove from the tin. Serve warm or at room temperature with softly whipped cream.
Burundi breakfast
December 30, 2012 § Leave a comment
The latest in our Breakfasts of the World Project series.
It’s not long since we breakfasted Burkina Faso style. That was an impoverished landlocked West African country whereas Burundi is an impoverished landlocked East African one. Over to the BBC weather website for some basic facts about the country:
“This small country in central Africa is about the size of Wales or Israel and is densely populated. It lies between 2° and 4°S and is bordered by Rwanda to the north, Tanzania to the east, Lake Tanganyika to the southwest, and the Democratic Republic of Congo to the west. It is a hilly and mountainous country, with its highest point rising to over 4,600 m/15,000 ft.”
I was taken aback by the existence of a 4,600m peak in central Africa that I’d never heard of before – sadly this seems to be a factual error – shame on you BBC!- as other more reliable sources show that the highest peak in Burundi is the whimsically named Mount Heha clocking in at just 2,670m.
Over to another BBC site – a world news one this time – for more facts. This was a depressing roll call of colonial oppression (first the Germans then the Belgians who are presumably responsible for Burundi’s official language being French), Hutu and Tutse civil war, genocide, mass refugee emigration and a shattered economy. Amidst the depressing fatcs I did find this striking image (courtesy of Getty Images) there of a Burundi man on a bicycyle transporting a LOT of green bananas:

Information on Burundian food is hard to come by but the meagre information sources available seem to agree that green bananas or plantains and beans are part of the staple diet. So over to the Celtnet website for a basic red kidney bean and plantain stew which is there described as a main course accompaniment.

I’ve adapted the Celtnet recipe to make it simpler to concoct in my Western kitchen and I give my recipe below. Served with toast and a poached egg plus a cafetière of aromatic East African coffee (coffee is one of Burundi’s principal exports) this made a pretty decent breakfast, the kind of breakfast to set you up for facing the legendary man-eating crocodile Gustave said to inhabit the waters of Lake Tanganyika just off Burundi’s capital city, Bujumbura.

And we’ve reached the end of countries beginning with the letter B just in time to end the year!
Recipe for Burundian bean and plantain stew
Adapted from a Celtnet.org recipe.
Serves 4
Ingredients
14oz can red kidney beans
2 plantains
1 small onion
1 tablespoon vegetable oil
pinch dried chilli flakes
salt and pepper to taste
300ml water
First prepare the vegetables. Drain and rinse the kidney beans in a colander. Peel and slice the plantain into chunks about 1cm thick. Peel and thinly slice the onion.
In a medium lidded saucepan heat the vegetable oil over a medium heat and add the sliced onions. Fry for 5 or so minutes until soft and translucent. Add the plantain slices and fry for 10 minutes more, turning the chunks occasionally so that they don’t burn. Once the plantain has coloured a little, add the drained kidney beans, seasonings and 300ml water. Bring to the the boil, turn the heat down to a simmer, partially cover with the pan lid and cook for about 20 minutes. The stew is ready when the plantain is soft and the liquid has reduced by a half.
Twelve days of Swiss Christmas
December 29, 2012 § Leave a comment
On The Twelfth Day of Christmas my true love sent to me:
12 Chocolate Snowmen
11 Christmas Guetzli
10 Grilled Kalbsbratwurst
9 Glasses of Glühwein
8 Rhåtischebahn Engines
7 Rustic Chalets
6 Christmas Trees
5 Singers singing
4 Advent Candles
3 Christmas Stockings
2 Davos Sledges
and an enormous Cinnamon Star!


That’s more or less a summary of our Swiss Christmas,though we didn’t spend any where near 12 days there, and I haven’t even mentioned the skiing.
We have our mince pies and Christmas cake but the Swiss go nuts for their Guetzli – Christmas biscuits which are on offer in every bakery, household and public place throughout Christmas. The good Hausfrau will of course make her own to offer to guests and family. Leafing through my Betty Bossi Christmas baking book I see cosy colour pictures of Orangenschnittli (filled almond orange shortbread), fantastically embossed Tirggel, Orangenschümli (orange mini meringues), Pfeffernüsse (little spiced gingernuts) to name but a few.
Best of all in my opinion are the Zimsternen – cinnamon star biscuits. At their best they’re nutty and spicy, a little bit crunchy, a little bit chewy with a crisp meringue icing. These biscuits aren’t exclusively Swiss but can be found throughout the German-speaking countries.
The biscuit base, a mixture of ground nuts, sugar and egg whites flavoured strongly with cinnamon and lemon zest is half way beween marzipan and a macaroon. I’ve come up with my own version of the classic recipe compiled from 3 sources: (i)the recipe on the back of the special split “profi” star cutter; (ii) Marianne Kaltenbach’s “Aus Schweizer Küchen”; (iii) Thorsten’s recipe on website Food.com. Dry matter per egg white varies from 225g to 275g and the percentage of ground nuts varies from 59% to 77% in the different recipes. This version uses 300g nutsand 200g sugar making 250g dry matter per egg white with 60% of the dry matter made up of nuts.
To make the biscuits using the method shown in my pictures you’ll need to get hold of a special split star cutter which releases the moist iced biscuits without sticking. I found mine in specialist kitchen shop Sibler in Zürich. If you have a standard star cutter then I’d recommend cutting the shapes out, placing them on the baking sheet then brushing with the icing.


Recipe for Cinnamon Stars
Makes about 34 biscuits in two rollings plus 15 small additional shapes with the soft trimmings.
Ingredients
For the biscuit dough
75g whole unblanched almonds
75g halved walnuts
100g golden caster sugar
60g egg white (about 2 medium egg whites)
pinch of salt
approximately 150g ground almonds (more may be needed to make a pliable, workable dough)
further 50g golden caster sugar
50g icing sugar
2 teaspoons ground cinnamon
1 teaspoon finely grated lemon zest
For the icing
30g egg white (1 medium egg white)
small pinch of salt
175g icing sugar, sifted
1 teaspoon lemon juice
Lightly toast the whole nuts. Allow to cool then blitz in a liquidiser with the 100g golden caster sugar until very finely chopped.
Whisk the egg whites with a pinch of salt until they reach the soft peak stage. Mix in the ground nut and sugar mixture, the ground almonds, caster sugar, icing sugar, cinnamon and lemon zest. Add additional ground almonds if necessary to make a workable dough. Wrap the dough in cling film and rest in the fridge for about an hour.
When the resting time is nearly up, make the icing. Whisk the egg white with a pinch of salt until stiff. Whisk in the sifted icing sugar a tablespoon at a time together with the teaspoon of lemon juice. You may not need to add all the icing sugar; stop when you reach a thick spreading consistency.
Preheat the oven to 160 degrees C (fan) and line two or three baking trays with parchment.
Dust a pastry board and rolling pin with plenty of sifted icing sugar then roll out the rested dough to about ½ cm thick. You can roll out the dough between 2 sheets of parchment if you prefer.
If you have a special split star cutter which can be squeezed to release the iced biscuit you can use this method to complete the stars: using a pastry brush, paint the surface of the dough thickly with the meringue icing and cut out the iced stars and carefully place them on a baking sheet a few centimetres apart. This gives a neat and professional finish but the drawback is that the icing is mixed into the dough when the trimmings are combined for rerolling making the dough wetter each time. To counteract this you may need to add more ground almonds each time you reroll. For my third rolling, I simply rolled the soft mixture into a log and cut thick disks. I didn’t ice this third batch but instead topped each with a whole blanched almond for a more macaroon-like biscuit.
If you have an ordinary star cutter, don’t try and pre-ice the biscuits as they will stick and not release from the cutter: simply cut out the star shapes, place them on the baking sheet then brush the biscuits with the meringue icing.
Bake the biscuits for about 15 minutes until baked through but still somewhat moist with crisp and uncoloured white icing. The biscuits will swell a little as they bake to end up 1cm thick. Leave on the baking sheet for a few minutes after removing from the oven before transferring to a rack to cool thoroughly.
You might like to bake any un-iced biscuits at a slightly higher temperature to give a more toasty flavour as there’s no icing to brown.
An alternative Christmas dinner
December 20, 2012 § 1 Comment
I’ve been teaching some local young people simple cooking skills at our local Parish Centre/Church Hall over the past few months. To celebrate the “end of term” we congregated together for a special pre Christmas meal.
My initial idea for this meal was to showcase the 3 original Christmas gifts of gold, frankincense and myrrh. Having researched their culinary possibilities I decided that whilst it would be straightforward to decorate a dessert with real edible gold leaf, incorporating frankincense and myrrh into savoury dishes might be more challenging and maybe even downright toxic. I sourced high quality frankincense and myrrh resins the origins of which were Oman and the Yemen and decided to incorporate them into the meal by burning them over charcoal.The fragrant smoke is very atmospheric and transports you instantly to the Middle East.
Hence the inspiration for the meal – food inspired by the the Holy Land as reinterpreted by Yotam Ottolenghi and Sami Tamimi in their rather gorgeous new book “Jerusalem” featuring recipes from their respective Jewish and Arabic heritages. The book, hardback and handsomely cloth bound, was an early Christmas present to myself and I couldn’t wait to put it through its paces.
This was the menu for yesterday’s alternative Christmas dinner for 18, largely taken from the pages of “Jerusalem”:
Roasted chicken with Jerusalem artichoke and lemon
Open kibbeh
Root vegetable slaw
Mejadra
Roasted butternut squash and red onion with tahini and za’atar
Roasted sweet potatoes and fresh figs
Basic hummus and hummus with lemon sauce and pinenuts
Pitta
Labneh
Golden clementine cake
Yoghurt, honey and pomegranates
Pomegranate and rose cordial
And here we are enjoying the rather magnificent feast:

I did quite a bit of prep beforehand at home helped by Laura who made the rather beautiful roasted sweet potato and fresh figs:

and stunning root vegetable slaw, vibrant in colour and taste, combining crisp raw roots sliced on the mandolin and cut into matchsticks combined with a sharp lemony dressing and Ottolenghi’s trademark abundance of fresh herbs:

At the Parish Centre kitchen, Laura and Emma prepared the chicken with Jerusalem artichoke and lemon which baked to a toasty gold and was aromatic and delicious with lots of slow-cooked shallot, sweet garlic cloves and of course the nuggets of Jerusalem artichoke. This would be a fantastic dish for an informal dinner party or a very welcome addition to a buffet for family and friends over the holiday period.

Perhaps the best fun was preparing our own hummus, just as good as the stuff you can buy at Sainsbury’s! I’ve never had much success with homemade hummus before but I’d always started with canned chickpeas. WRONG! You need to start with dried kind, and some bicarb to help remove the skins. In fact the method is not so different from our own homegrown mushy peas. Oh, and a whole jar of tahini paste per batch, and the magic ingredient – ice cold water which turns the mix, after a whole 5 minutes of processor blasting, magically into an elegantly pale and silky smooth emulsion. Jess and Oli did a fantastic job of mixing up the two different batches of hummus, one plain and one garnished.
My simplified version of Mejadra, a spicy, oniony rice and lentil mix, was a more dramatic and interesting alternative to plain boiled rice:

The finishing touch to our feast was the chocolate ganache iced and gold leaf decorated Golden Clementine cake, sweet and citrussy. This cake, minus the decadent chocolate icing, clearly derives from the many recipes for Sephardic Jewish cakes featuring citrus and ground almonds that the Jews brought with them from Spain hundreds of years ago. Many cookbook authors give recipes for similar cakes – Claudia Roden, Nigella Lawson and of course Delia to name but three. This version is simple to make, deliciously moist with the addition of syrup and very Christmassy with its sharp citrus notes shining through. It reminds you of clementines stuffed in your Christmas stocking and pays a nod to that old British confectionery favourite, the Terry’s chocolate orange. Clemmie and James were the pastry chefs who ably prepared the chocolate icing and painstakingly applied the gold leaf with tweezers.

I give below the recipes we prepared together in the kitchen last night – maybe some of the young people will cook the dishes at home for their families over the holidays?
For the rest, you’ll need to buy the book – it would make a great late Christmas present for any keen cook.
Recipe for roasted chicken with Jerusalem artichoke and lemon
Adapted from a recipe in “Jerusalem” by Yotam Ottolenghi and Sami Tamimi.
Serves 8 as a main course or up to 16 if served as part of a buffet.
Ingredients
900g Jerusalem artichokes, peeled and cut into 6 lengthways wedges, about 1.5cm thick
3 tablespoons lemon juice
16 chicken thighs, bone in, skin on
24 shallots, peeled and halved lengthways
24 large garlic cloves, sliced
2 medium lemons, cut in half lengthways and then into very thin slices
2 teaspoons saffron threads
100ml olive oil
300ml cold water
3 tablespoons pink peppercorns, slightly crushed
8g dried thyme or herbes de Provence mix
40g chopped tarragon leaves
4 tsp salt
1 tsp black pepper
3 further tablespoons lemon juice
further 40g chopped tarragon
Put the Jerusalem artichokes in a large saucepan, cover with plenty of water and add the 3 tablespoons lemon juice. Bring to the boil, reduce the heat and simmer for 10-20 minutes until tender but not soft. Drain and leave to cool.s
Place the Jerusalem artichokes and all the remaining ingredients except the final 3 tablespoons lemon juice and 40g chopped tarragon into a large mixing bowl and use your hand to mix everything together well. Cover, refrigerate and leave to marinate for at least 2 hours.
Preheat the oven to 240 degrees C/220 degrees C fan/Gas mark 9. Arrange the chicken pieces skin side up in the centre of a roasting tin and spread the remaining ingredients around the chicken. Roast for 30 minutes. Cover the tin with foil and cook for a further 15 minutes by which point the chicken should be completely cooked.
Remove from the oven and add the reserved tarragon and lemon juice. Stir well, taste and add more salt if needed. Serve at once.
Recipe for Mejadra
Adapted from a recipe in “Jerusalem” by Yotam Ottolenghi and Sami Tamimi.
250g green or brown lentils (we used Puy lentils which were fine)
6-8 medium onions (1.4kg before prep)
6 tablespoons light olive oil
3 tsp cumin seeds
2 tablespoons coriander seeds
400g white basmati rice
4 tablespoons light olive oil
1 teaspoon ground turmeric
2 teaspoons ground allspice
3 teaspoons ground cinnamon
2 teaspoons sugar
700ml water
salt and black pepper
Chopped fresh parsley or coriander and pomegranate seeds to garnish (optional)
Place the lentils in a small saucepan, cover with plenty of water, bring to the boil and cook until the lentils have softened but still have a little bite, then drain.
Peel and slice the onions thinly. Fry in 2 large frying pans each with about 3 tablespoons light olive oil over a medium heat for about 20 minutes until the onions are soft and brown but not burnt. The original recipe requires the onions to be dipped in flour and deep-fried but I have simplified this step and the resulting slow-cooked soft brown onions still taste good mixed with the rice, spices and lentils.
Take a large heavy based lidded saucepan and place over a medium high heat. Once hot, add the cumin and coriander seeds and dry-fry to toast the seeds for a minute or two, stirring constantly with a wooden spoon. Add the rice, olive oil, turmeric, allspice, cinnamon, sugar, 1 teaspoon salt and plenty of black pepper. Stir to coat the rice with oil and then add the cooked lentils and the water. Bring to the boil, cover with a lid and simmer on a very low heat for 15 minutes.
Remove from the heat, lift off the lid and quickly cover the pan with a clean tea towel. Seal tightly with the lid and set aside for 10 minutes.
Finally, add half the fried onion to the rice and lentils and stir gently with a fork. Pile up in a shallow serving bowl and top with the rest of the onion. If like, garnish with chopped fresh parsley and or coriander leaves and a few pomegranate seeds.
Recipe for basic and garnished hummus
Recipes adapted from those in “Jerusalem” by Yotam Ottolenghi and Sami Tamimi.
Serves 12 or more if served as part of a buffer
Ingredients
For the basic hummus
500g dried chickpeas
2 teaspoons bicarbonate of soda
540g light tahini paste
8 tablespoons lemon juice
8 garlic cloves, crushed
200ml ice cold water
salt
To garnish half of the batch
4 tablespoons whole cooked chickpeas reserved from the second batch
2 tablespoons pine nuts lightly toasted in the oven or dry frying pan
2 tablespoons chopped flatleaf parsley
For the lemon sauce
10g flatleaf parsley finely chopped
1 green chilli finely chopped
4 tablespoons lemon juice
2 tablespoons white wine vinegar
2 garlic cloves, crushed
¼ teaspoon salt
Start a day before by washing the chickpeas well and placing them in a large bowl. Cover them with cold water, at least twice their volume, and leave to soak overnight.
The next day, drain the chickpeas. Place a large saucepan on a high heat and add the drained chickpeas and bicarbonate of soda. Coll for about 3 minutes, stirring constantly. Add 3 litres fresh water and bring to the boil. Cook, skimming off any foam and any skins that float to the surface. The chickpeas will take between 20 and 40 minutes to cook, maybe even longer. Once done, they should be very tender, breaking up easily when pressed between your finger and thumb, almost, but not quite, mushy.
Drain the chickpeas. You should have roughly 1.2kg now. Place half of the the chickpeas in a food processor bowl. Process until you get a stiff paste then, with the machine still running, add the half of the tahini paste, lemon juice, garlic and 1 ½ teaspoons salt. Finally, slowly drizzle in half of the iced water and allow it to mix until you get a very smooth creamy paste, about 5 minutes. Transfer to a bowl, cover with cling film and refrigerate for at least half an hour.
Repeat with the second batch of ingredients (you used only half), but remember to reserve 4 tablespoons cooked chickpeas to garnish.
Shortly before you serve the hummus, combine all the lemon sauce ingredients in a small bowl.
Top the second bowl of hummus with the cooked chickpeas, drizzle generously with the lemon sauce, and garnish with chopped parsley and toasted pine nuts.
Recipe for golden clementine cake
Adapted from a recipe in Jerusalem by Yotam Ottolenghi and Sami Tamimi.
Serves 8 generously or up to 16 if cut into delicate slices.
Ingredients
For the cake
200g unsalted butter
300g golden caster sugar
grated zest of 4 clementines and and 1 lemon
280g ground almonds
5 medium eggs
100g plain four sifted with a pinch of salt
For the syrup
80g golden caster sugar
120ml lemon and clementine juice
For the chocolate icing (optional)
90g unsalted butter, diced
150g good quality dark chocolate broken into pieces (or Valrhona or similar buttons)
¾ tablespoons honey
½ tablespoons cognac
To decorate
Long strips of zest taken from an orange using a zester
or flakes of real gold leaf (available from specialist cake decorating suppliers)
Preheat the oven to 180 degrees C/160 degrees C fan/Gas mark 4. Lightly grease a 24cm round cake tin, ideally loose bottomed and line the base and sides with a double layer of parchment.
The cake is best made in a stand mixer such as a Kenwood. Cream together the butter and caster sugar thoroughly. Add approximately half the ground almonds. Beat in the eggs gradually, scraping the bottom and sides of the bowl with a spatula from time to time.
Add the remaining ground almonds, flour and salt and work them into the mix until completely smooth.
Spread the cake batter into the prepared cake tin and level with a palette knife (a small crank-handled one does the job well).
Bake the cake for 50 to 60 minutes, checking to make sure it’s not browning too much. Test in the usual way by seeing if the sides have shrunk just a little and by inserting a skewer which should come out clean.
Towards the end of the cooking time, prepare the syrup by combining the sugar and citrus juices in a small saucepan. Bring to the boil then remove the syrup from the heat.
As soon as the cake comes out of the oven, brush it with the boiling syrup until it has all soaked in. Leave the cake in its tin to cool completely before removing it from its tin.
Either garnish with the orange strips and serve as is or coat with chocolate icing.
To make the chocolate icing, put the butter, chocolate and honey in a heatproof bowl and set OVER (not in) a pan of simmering water making sure the bowl does not touch the water.
Stir until everything is melted, remove from the heat straightaway and fold in the cognac.
Pour the icing over the cool cake allowing it to dribble naturally over the sides without covering the cake completely.
Let the icing set then decorate either with strips of orange zest of flakes of gold leaf in the centre of the cake.
Comforting casseroles part 3: veal
December 15, 2012 § Leave a comment
The weather pre-Christmas is cold and wintry and thoughts turn to warming casseroles once again. I’ve previously shared my favourite pork (part 1) and beef (part 2) casserole recipes and now it’s veal’s turn. Don’t worry this isn’t pale Dutch veal reared in less than humane conditions, but the more robust English pink veal reared to high welfare standards, a tasty by-product of the UK dairy industry that frankly would be a waste NOT to eat.
Today’s dish is classic Milanese dish of braised veal shin on the bone, Osso Buco, served up with its traditional partner, saffron scented risotto milanese, one of the few instances in Italian cooking when risotto is served as an accompaniment rather than as a separate primo piatto course.

I’ve read about this dish many times over the years but have never been able to try it as a) I had no inkling where I’d get hold of decent veal which hasn’t until recently been widely available in the UK and b) even if I could track down veal I didn’t think I’d find a butcher able to prepare the necessary shin slices complete with intact marrow bone, one of the highlights of the finished dish.
I was delighted to find that Ocado recently began offering slices of veal shin for osso buco alongside its other veal offerings (which include fantastic veal chops, veal rib joints and proper escalopes). They come two or occasionally three to a pack and a pack weighs a tad over 500g so you need two packs for the recipe below which serves four.
You begin by tying your veal into dinky packages with string. This serves to keep the star marrowbone intact during the long braising. You may need to tie around the piece of veal shin as well to keep it in a nice round piece. My pieces of veal looked perfectly well formed and butchered so I omitted this step and just did the package tied up with string thing:

Once the trussed veal pieces have been coated in seasoned flour, the only other bit of prep required is to finely dice a small onion and stick of celery. Don’t worry if you’re iffy about celery – after 2 hours cooking the vegetables break down to produce a textured sauce and there’s no pronounced celery flavour, just a deep savouriness.

The next step is to brown the floured veal slices in hot oil. The veal is then removed and set aside whilst the vegetables are sweated in some butter which you add to the pan. Then the vermouth or white wine is added and reduced a little before adding the stock and returning the meat to the pan for a long slow 2 hour braise.
A word about choice of stock. In a quest for meaty perfection I bought some rather expensive chilled beef stock from the supermarket and used this topped up with some stock from a “quality” reduced salt beef stock cube. I did the same thing with my accompanying risotto milanese. The end result, odd as it may sound was just too beefy and intense. The veal marrowbones and collagen-rich shin meat make a most wonderful sauce as the meat braises so I think there is really no need to start with a rich meaty stock. Next time I make this dish I’ll use a light stock made from a good quality reduced salt cube, making it up at a weaker strength than recommended on the packet. The meat and bones will do the rest for me.
This is how the veal looks before the long slow braise:

And here it is once the cooking is complete, freshened up with its sprinkling of gremolada, a lively mix of chopped flatleaf parsley, grated lemon zest and a smidge of finely chopped garlic:

Serve the meat with risotto alla milanese and a green vegetable. We chose roast courgette, as Anna del Conte does in the glorious photo accompanying the recipe in her book “Gastronomy of Italy”. I’ve largely drawn on this recipe in my version which I give below. The recipe is an authentic Milanese one and thus, unlike many published versions of the recipe, contains no tomato.
The risotto alla milanese recipe I give below is also adapted from Anna del Conte’s and is made in the usual way. If you’re familiar with making risotto you’ll have no trouble following it. If you haven’t made risotto before I’d suggest buying a good Italian cookbook and reading up in detail on risotto-making technique before attempting to follow my slightly sketchy instructions!

One last word – be sure to scoop out the unctuous marrow from the centre of the ossi buci and mash it into your risotto – delicious.
Recipe for ossibuci alla milanese
Adapted from Anna del Conte’s recipe in “Gastronomy of Italy”.
Serves 4
Ingredients
4 decent sized ossibuci (slices of veal shin on the bone) each weighing about 250g)
seasoned flour
3 tablespoons light olive oil
25g butter
1 small onion, finely diced
1 small stick of celery, finely diced
175 ml white vermouth (I like Noilly Prat) or white wine
300 ml light stock (beef, chicken, vegetable – a qood quality stock cube is OK) or even water
For the gremolada
1 teaspoon grated lemon zest
1 very finely chopped small garlic clove
2 tablespoons chopped flatleaf parsley
Tie each osso buco with string as if you were wrapping a package. This is to retain the marrowbone in place during the long cooking and turning process. If, after looking at your pieces of veal, you think it advisable to tie a piece of string around the circumference of each slice to keep it all together then do this as well.
Coat the veal slices lightly in seasoned flour. I put about 6 tablespoons of flour into a deep bowl, then mix in a teaspoon of fine salt before dipping the veal pieces in the flour. Discard the excess flour afterwards.
Heat the 2 tablespoons of light olive oil over a medium heat in a heavy lidded shallow casserole that is big enough to hold the veal snugly in a single layer. Once the oil is hot, put the veal pieces into the pan and leave untouched for 4 or 5 minutes to brown. Turn the veal over using a pair of tongs and brown the other side. Once the browning is complete, turn the heat to low, remove the veal and set aside in a shallow dish.
Once the pan has cooled a litle, add the butter and once melted, add the diced onions and celery and fry gently without browning until soft and translucent, about 8 to 10 minutes’s cooking. Now add the vermouth or wine to the pan and let bubble for a minute or two to reduce a little. Now add the stock and return the veal slices plus any juices which have accumulated in the dish back to the pan. Turn up the heat to bring the contents to the boil then reduce the heat to a bare simmer, cover with the lid and leave to simmer for one and half to two hours until the meat is tender.
Turn the meat over delicately with tongs about every twenty minutes during the 2 hour cooking period to ensure an even braise and tender meat.
While the meat is cooking, prepare the gremolada by combining the chopped parsley, finely chopped garlic and grated lemon zest in a small bowl. Mix well, cover and set aside.
Once you judge that the meat is cooked, check the consistency of the sauce. If it is a little too thin, remove the lid and raise the heat a little and gently boil away some of the liquid until you have a chunky coating sauce consistency. Check the seasoning too. Because the stock you have used is likely to contain salt (especially if you’re using a stock cube) I’ve not specified any additional salt in the recipe other than a little salt in the seasoned flour.
Snip of the string from the meat, scatter over the gremolada and serve with risotto milanese and a green vegetable – roast courgette (still available as I write in December) or steamed broccoli would both work well.
Recipe for Risotto alla Milanese
Adapted from Anna del Conte’s recipe in “Gastronomy of Italy”.
Serves 4
Ingredients
900ml light chicken or beef stock (homemade or good quality stock cube)
1 small onion or medium shallot finely diced
40g unsalted butter
350g risotto rice (Carnaroli or Arborio)
90ml white vermouth (I like Noilly Prat)
big pinch saffron strands
sea salt and freshly ground black pepper
additional 20g unsalted butter
25g freshly grated parmesan
You need two medium heavy-based saucepans for this recipe. Bring the stock to simmering point in the first saucepan and melt 40g butter in the second. Add the chopped onion or shallot to the pan containing the butter and sauté gently until soft and translucent.
Add the rice to the butter and onions and stir over a low heat until the rice is thoroughly coated with the butter. Turn up the heat to medium and add the vermouth and boil for a minute or so, stirring all the time. Now add the hot stock a ladleful at a time, stirring until the rice has absorbed the stock before adding the next ladleful. Once two or three ladles of stock have been added, crumble the saffron strands into the risotto. It should be kept simmering, not too slowly and not too fast either and should be cooked in 15-20 minutes. Test the rice after it has cooked for 15 minutes by biting on a grain. When ready it should be cooked through to the al dente stage and and should no longer have a hard chalky centre but should not be soft and mushy. If it’s not ready, add a little more stock (or boiling water if you’ve used it all) and cook for a minute or so longer before testing again. Conversely, you may not need to add all the stock from the pan.
When the risotto is ready, remove from the heat, stir in seasoning and add the additional 20g butter and 25g grated parmesan, cover the pan and leave for a minute or two for all the elements to merge in a savoury manner.
Burkina Faso breakfast
November 26, 2012 § 1 Comment
The latest in our Breakfasts of the World Project series.
Before our Burkina Faso breakfast I knew just two rather trivial things about the country:
1) It has one of the most memorably named capital cities in Africa – Ouagadougou
2) Favourite French beauty company L’Occitane sources much of the shea butter (beurre de karité in French) it uses in its moisturising products from womens’ cooperatives in Burkina Faso.
I now know that it’s a landlocked country in West Africa, bordered by 6 different countries including sub-Saharan Mali to the North and West, Côte d’Ivoire and Ghana to the South and Niger to the East.
Burkina Faso, formerly known as Haute or Upper Volta was a French colony until 1960. The country gained its current name in 1984, thanks to campaigning by the then president, the so-called African Che Guevara, Thomas Sankara.
Sankara was assassinated in 1987 in a military coup organised by former colleage Blaise Compaoré who remains president of what the UN lists as the world’s third poorest country to the present day.
Finding out what comprises a typical Burkinabé (the colloquial name for the people of Burkina Faso) breakfast was tricky. I found this solitary sentence on the Burkina Faso section of website everyculture.com
“In the morning wooden kiosks offer customers a breakfast of coffee, fried egg, and fresh French-style baguette.”
This simple breakfast encapsulates the country’s recent history, the baguette being a legacy of French colonialism and the meagre eggs and coffee a reminder of the country’s relative poverty.
Here are the raw materials for our Burkina Faso breakfast, purchased inauthentically from our local supermarket:

Tim did the honours, frying eggs to order:

The end result though simple was really rather good, and I’m now reminded to buy more of those L’Occitane shea butter products in the future.

The perfect melting middle chocolate pudding
November 15, 2012 § Leave a comment
The melting middle chocolate pudding or moelleux au chocolat as it’s known in France is one of those dishes that pops up all over the place, from Masterchef to TV cookery programmes to the Marks and Spencer chilled section.
It’s now a recipe in my newly expanded repertoire of chocolate desserts following a trip earlier in the year to the Lenôtre Cooking School, the best place in Paris to learn about making fine pâtisserie at home. I’ve written before about attending classes at Lenôtre -see my post Le Vrai Macaron Parisien. For anyone interested in baking it has to be the place to come and learn tricks of the trade (though all the teaching is conducted in French so at least schoolgirl French is a must). Our group comprised 3 chic Parisiennes, a jolly baker from Lille up for the weekend to hone his skills, and of course me. We were instructed by the charming and surprisingly thin Gilles Maisonneuve:

Gilles is a hands-on kind of instructor, particularly if you are young and glamorous. Here he is instructing one of my fellow students.

Unlike baking at home that has to be done in a kitchen where family meals are cooked, homework done, laundry dried or whatever, the Lenôtre kitchen is gleamingly clean and empty and set up for baking action.
I love the way the finest ingredients are used here in industrial quantities – neatly labelled bins of best quality couverture chocolate, Madagascan vanilla powder, paste and whole pods in similar neat hoppers, different kinds of sugars, nuts, fruits, spices, flours. Then there’s the equipment – rack upon rack of prepared uniform size baking trays, tartlet tins, piping nozzles of all kinds. It just makes you want to get started on an ambitious baking project, and there’s even your own personal kitchen porter to whisk away your dirty pots. What bliss!
The name of this half day course was “Desserts Tout Chocolat” and we made chocolate tartlets, chocolate sorbet and the universally loved chocolate brownie (pronounced “Brooney” or “Bruni” in French – depending on whether your reference points are Manchester United players or politicians’ wives) as well as the moelleux au chocolat, but it is this last dessert that I’ll be concentrating on today.
I am so thrilled with this recipe – it works perfectly every time and is very straightforward – even my 14 year old son can knock out a batch of perfect puddings. It sits in the fridge quite happily for a few days ready to be baked and served withing 9 minutes – perfect for dinner parties. The puddings freeze well too though I think it’s worth defrosting them for, say, 2 hours at room temperature rather than baking straight from frozen. The recipe, though simple, does call for precision (and I mean to the nearest gram) in the weighing of ingredients, the portioning out of the mixture between the moulds and cooking temperature and time.
I’ve cooked these numerous times at home now and have tried rival recipes, specifically those in TV chef Rachel Khoo and Lorraine Pascale’s books. Sorry ladies, your versions just don’t cut it – too big, too sweet, wrong texture.
At Lenôtre we cooked our moelleux in individual disposal foil pudding basins which we buttered and floured then scattered a few flaked almonds into the base:

This is what the end result looked like:

Not bad huh? That said I’m not sure the flaked almonds add a great deal. The disposable foil basins are dead handy and you can pick them up in Lakeland and no doubt other places as well. Better still than the disposable foil basins are these perfectly sized non-stick metal dariole moulds, also available from Lakeland:

No need to grease and flour, the puddings turn out like a dream straight from the oven:

This brings me to the other piece of kit that you’ll need to make this recipe with ease, a disposable piping bag. You can buy these cheaply and easily in bulk from Amazon. They look like a roll of tear-off plastic bags which is exactly what they are but are triangular in shape to create a piping bag. I’ve found the best way to fill them cleanly is to stand them into a tall cylindrical container which supports the weight of the mixture as you spoon it in:

The most important ingredient in the recipe is of course the chocolate. We used dark couverture chocolate drops at Lenôtre. I think they favour the Barry Caillebaut brand and the recipe specifies a 70% cocoa content chocolate. The word “couverture” means a specialised chocolate with a high cocoa butter content for ease of melting. I’ve had unsatisfactory cooking results with some dark chocolates whic simply list a high cocoa solid count on their labels. My suspicion is that they’re stuffed full of cocoa powder rather than the more expensive cocoa butter which makes the chocolate dry and powdery.
I’ve used Valrhona chocolate drops in my recipe, purchased in industrial quantities from the excellent Chocolate Trading Company (see contact details below). I see from their website that they’re based nearby in Macclesfield of all places so I can even comfort myself with the thought that I’m buying local when I take my latest delivery!

Recipe for melting middle chocolate pudding
Once you have the right kit and ingredients assembled it’s a straightforward task to melt the chocolate (over simmering water please), combine it with the softened butter (you need a bit of patience here to let it soften then mash it with a wooden spoon), lightly beaten eggs, sugar, flour and baking powder.

Once baked, all you need to do is serve with a little thick cream (or raspberry coulis if you prefer) and sit back and enjoy the compliments!
Recipe for melting middle chocolate pudding
Translated and adapted from the Lenôtre pâtisserie school recipe though I have not dared tinker with the ingredients, quantities or method!
Serves 8
Ingredients
170g dark couverture chocolate drops (I use Valrhona Manjari, a 64% cocoa content couverture chocolate)
130g unsalted softened butter
95g golden caster sugar
130g whole egg – shelled weight (approximately 2 large eggs)
100g plain flour
4g baking powder
Melt the chocolate using your preferred method (Lenôtre recommend a bain-marie). Add the softened butter and mix well. Add the sugar and lightly beaten egg (whisk by hand with a fork or small whisk until there is a little froth on the surface of the egg) and mix to incorporate.
Combine the flour and baking powder in a bowl and stir well to combine. Gradually add the flour and baking powder to the chocolate mixture. Mix to combine but do not overwork the mixture.
Put the mixture into a disposable piping bag and use this to fill 8 small dariole moulds. Use scales to weigh each mould to ensure you fill them evenly. You should find that if you use a rubber spatula to empty the bowls thoroughly that you can fill the moulds with at least 72g of mixture, maybe even 75g of mixture if you’re careful.
Chill the moulds in the refrigerator for at least 30 minutes.
Bake at 200 degrees C fan for 9 minutes.
Contact details
Pâtisserie courses
Containers and moulds
Fine couverture chocolate
Bulgarian breakfast
November 11, 2012 § 1 Comment
The latest in our Breakfasts of the World Project series.
Much like Lesley Chamberlain (author of “The Food and Cooking of Eastern Europe), my first experience of Bulgarian cuisine was sausage and bread purchased from a station buffet at Plovdiv (the next major city after the capital Sofia) part-way through my five day train journey from Blackpool North to Istanbul Central aged 19. My memories of then-Communist Bulgaria witnessed solely from the train was of bad food, grey cities – the capital Sofia as well as Plovdiv – and corrupt border guards who extorted payment for what turned out to be a non-existent entry visa.
Beyond the railway line there were obviously better things to be seen. Lesley Chamberlain goes on to write “Not much is known about Bulgarian food beyond the reputation of its yoghurt, but actually, when one is not dependent on the station buffet, it is one of the world’s simplest, healthiest and most naturally elegant styles of cooking, akin to the cuisines of Turkey and Lebanon. The seasoning is light and the accent on preserving national flavours. It is the very opposite of the ‘concentrated’ food of Poland. The mountainous country of 8 million, bordered by Greece, Romania, Yugoslavia (ed now Serbia and Macedonia), Turkey and the Black Sea, is hot, with fertile valleys, and broad plains. The land, which the ancients called Thrace, yields abundant green vegetables and fruit…Many of the dishes have a middle Eastern flavour, including white beans and preserved vegetables in olive oil, peppers, olives, tomatoes, spicy sausage (pasterma)…The sausage, salami, cheese, yoghurt, vegetables and fruit that characterize this very natural table first appear at breakfast.”
My mood lightened after reading this – I’d feared a Slavic spread of sausage and cabbage with dry black bread or some such but Ms Chamberlain’s description of Bulgarian breakfast sounded fresh and inviting. I decided to serve up some spicy sausage, a sharp salty ewe’s milk cheese, home-made sourdough bread, the much-loved Bulgarian cold vegetable dish lutenitsa and of course I had to track some genuine Bulgarian yoghurt.

What makes Bulgarian yoghurt special is its combination of two bacteria, Lactobacillus Bulgaricus together with Streptococcus Thermophilus. In fact, a little delving suggests that all live yoghurts contain these two bacteria so maybe we’re all eating Bulgarian yoghurt without our realising it…
Ready-made genuine Bulgarian yoghurt was nowhere to be found, but the Bulgarian yoghurt website http://www.bacillusbulgaricus.com/ saved the day and within a few days a little sachet of yoghurt culture sent to me in a handwritten envelope amusingly with a Plovdiv postmark (that brought back memories) dropped onto my doormat:

There were no instructions on the packet which initially caused some consternation until I remembered that they could be found on the website (and I’ve summarised them below). Rather gingerly I mixed up my culture powder of indeterminate provenance with a 2 litres of milk (semi skimmed as I didn’t have whole milk in the fridge):

The milk sat quietly overnight on the top of the warm Aga. Miraculously, it fermented and thickened and turned into something that really did look like yoghurt – it was a little thinner than I might have liked but I put that down to using semi-skimmed rather than proper whole milk.

On to the lutenitsa. I came across it when I scanned through various Bulgarian food websites. This sweetened vegetable preserve, part jam, part relish, part middle-Eastern cooked vegetable salad is available in jars sold under a number of brands but I decided to make my own, devising a recipe combining the best bits of a number of different versions found on the web (“The Food and Cooking of Eastern Europe” being silent on the subject).
I began by roasting some sweet red peppers until the skins were lightly charred:

Then the raw vegetables were sautéd in olive oil:

The tomatoes and soft pepper pieces were added to the mix and the whole lot simmered for 10 minutes. Some recipes suggest puréeing the lutenitsa but I wanted something chunkier so went in with an old-fashioned British potato masher for a minute or so which gave me the texture I was looking for – thick and chunky with a bit of bite.
Recipe for lutenitsa – Bulgarian vegetable relish
Makes about 2lb. Having tried out a couple of different recipes found on websites dedicated to Bulgarian food, this is my small-scale chunky version of the classic lutenitsa recipe.
Ingredients
2 medium carrots, peeled and diced
1 onion, diced
1 medium aubergine, diced
2 tablespoons olive oil
3 large roasted red peppers, skin and seeds removed and then diced
1 400g can chopped tomatoes
1 tablespoon sweet paprika
1 teaspoon dried thyme (or summer savory if you have it)
2 tablespoons sugar
salt and pepper to taste
Take a medium sized saucepan and fry the onions, carrots and aubergines in the olive oil until soft. Add the red peppers and fry for a further 2-3 minutes. Add the tomatoes and seasoning, bring to the boil and simmer for 10 minutes. Add a little water if the mixture seems too dry. Mash some of the mixture using a potato masher. You are aiming for a thick ratatouille type texture. Spoon into a clean preserving jar, cool, seal and refrigerate.
Recipe for Bulgarian yoghurt
Adapted from the instructions given on the Bulgarian yoghurt website http://www.bacillusbulgaricus.com/
Ingredients
2 litres whole milk
1g (1/4 teaspoon) of freeze dried Bulgarian yoghurt starter
Bring the milk to just below boiling point in order to kill any existing bacteria which could react with the Lactobacillus Bulgaricus. Be careful not to burn it.
Cool the milk down to 110°F (43°C). Without a food thermometer, the easiest way to test for the right temperature is to dip a finger in the milk – if you can comfortably count to 5 then the milk is just right.
Pour the milk to a separate processing container eg a large bowl. Add 1/4 teaspoon of the starter. Mix well – stir well for about 5 minutes. Cover the container loosely with a lid.
Let the milk and culture mix ferment in a warm draft free place overnight.
The fermentation process will continue until the milk reaches pH of 4,7. The fresh yogurt will be set in about 5-6 hours (or overnight). If the place is too cold (50F or less), the process may take longer (10-12 hours). In general, leaving the yogurt sit for longer after it is set, will result in a denser and more acidic yogurt. When your yogurt is ready, move it to the fridge (or a cool place) for storage.
Keep the remaining yogurt starter in a Ziplock bag in the freezer.
Hedgerow chutney for autumn
October 20, 2012 § Leave a comment
A beautiful sunny autumn day today reminds me that on the last such day back in September I gathered a basketful of hedgerow fruits and made the rather good recipe below. Thanks go to Tastethewildblog.co.uk for this.

The recipe is straightforward and the suggestion of using a mixture of cooking and eating apples is inspired – the cookers thicken the chutney whereas the eaters retain their shape and provide a contrasting texture.
The finished jars of chutney look very handsome on my preserves shelf down in the cellar and one or two lucky people might find a jar in their Christmas stocking.
Recipe for Hedgerow Chutney
Adapted from a recipe found on http://tastethewildblog.co.uk/
Makes 4-5 lbs
2lb mixed hedgerow fruits – e.g Hawthorn haws, rose hips, elderberries, blackberries, rowan berries, sloes
1 pint malt vinegar
2 lbs onions chopped
2 lbs apples peeled and chopped (ideally half eating apples and half Bramleys)
4 oz sultanas
4 oz raisins
1lb Muscovado sugar
1 tsp ground cloves
1 generous pinch chilli flakes
1 tsp freshly grated nutmeg
Place the chopped apples and onions in a bowl, cover and leave overnight.
Next, make the fruit vinegar. Remove any large stalks and leaves from the berries, rinse and dry them and put them into a large pan. Cover with the malt vinegar, heat and simmer for 30 minutes until the berries are losing their colour. Strain off the liquid and discard the fruit. You should have about a pint of deep purple fruity vinegar.
The following day put the apple and onion mixture, the fruit vinegar and all the remaining chutney ingredients into a preserving pan and boil together for about 2 hours, stirring frequently. The chutney is ready when it has reduced considerably and when you draw a wooden spoon across the surface of the chutney, a channel remains for a second or two before filling up with liquid.
Put in sterilised jars and cover or seal. The chutney is best left for a month or so to mellow before eating.
